Blogs
Our community blogs
-

- 15
entries - 69
comments - 5028
views
Recent Entries
 Latest Entry
Paint
Dropped the car off at the bodyshop to get the paint finished. They'll be blending the paint on the doors and roof. Can't wait to have it fixed.
- Read more...
-
- 0 comments
- 15
-
- 29
entries - 52
comments - 5795
views
Recent Entries
 Latest Entry
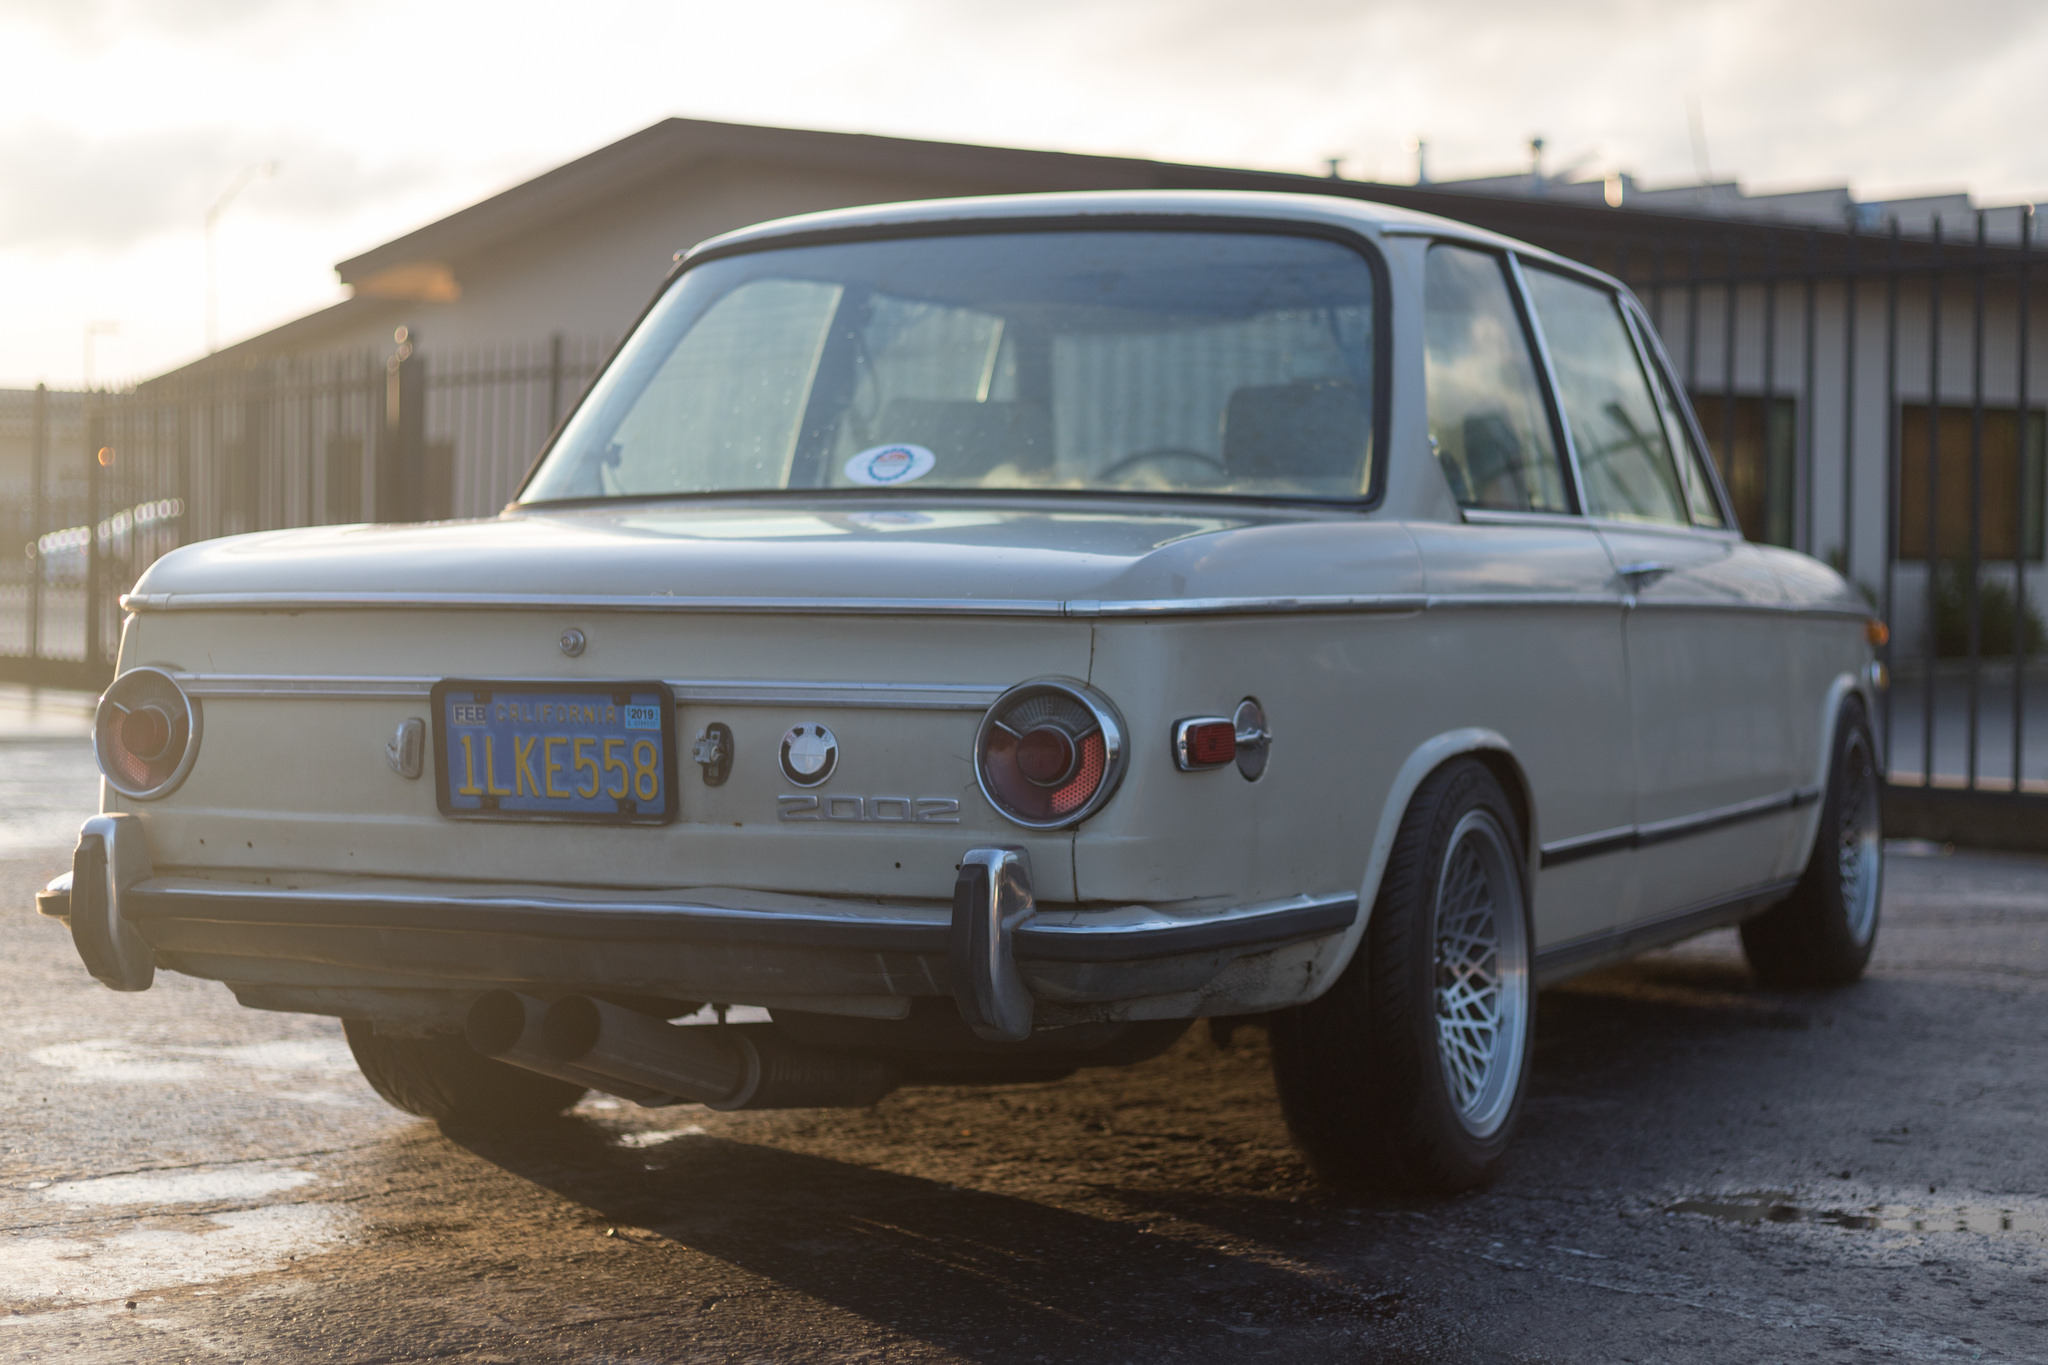
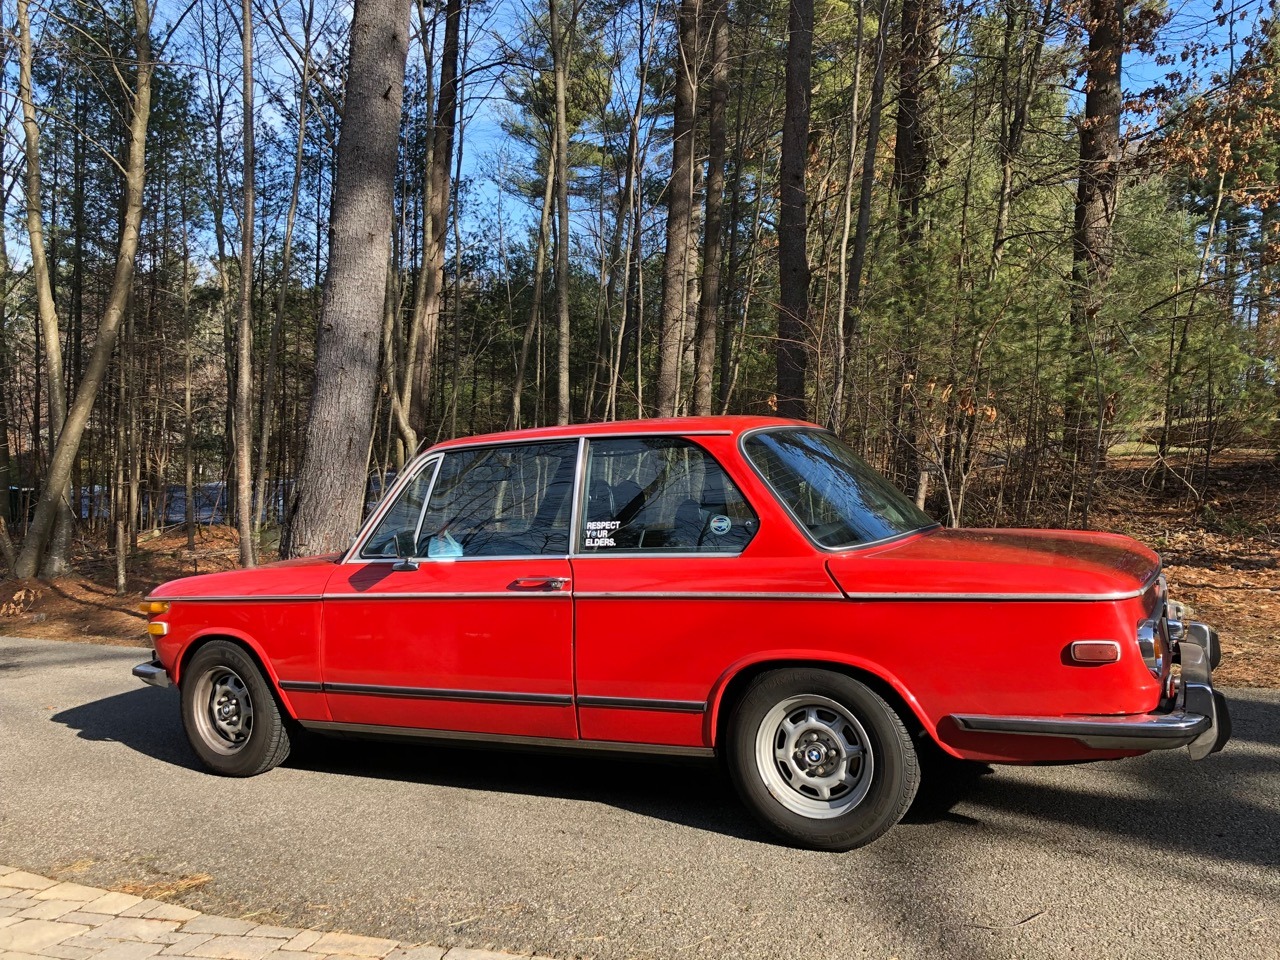
Adios Little Roundie
Sometimes you have to let a project go. Since I bought this car, I've sworn up and down I would never sell it. From the best test drive I've ever had in the car, to the highs and (frequent) lows of the build, I insisted that this car would stay in the stable for as long as it possibly could. As it turns out, that wasn't as long as I had hoped. Back tracking a little, for those of you who have read the previous posts, my 2002 got stuck in fabrication for much longer than intended. When it came back, a lot of the work I had hoped to get knocked out was not done and I wasn't really sure how to proceed next. I made some half hearted attempts to make progress, but truth be told after not seeing the car for 8 months I really felt demotivated.
More importantly, I found that I had no time for this car. It sat for months on end primarily because I had no time to get anything meaningful done on it. Around Thanksgiving it was becoming pretty obvious, I simply was in way over my head. From there it was just a matter of convincing myself that parting ways was the right call for me. A couple weeks ago, I listed the car for sale. If I'm honest, I was half hoping no one would reach out about the car and eventually another alternative would present itself. But after fielding plenty of phone calls, some tire kickers and low ballers, the right buyers showed up.
It's a little bittersweet letting a car go in this condition. It's a blank canvas, and while I had a clear vision for it, I know that it's up to the new team to execute the car how they want. However they have promised me that the car is in excellent hands, and to keep me updated of the progress. Already I've been sent photos of the engine bay completely stripped out, and it sitting in it's new home. I've offered them to keep this build thread updated to preserve the history of this specific chassis. Though it's not mine anymore, I'm always happy to contribute to keep information on this car in tact.
For now, I have no 2002s. Though I'm sure I will in the future, for now I need a long break from big projects. To everyone on this forum that sold me parts, gave me help and suggestions, a massive thank you. I often told my friends that the best part of owning a 2002 isn't the car, but the community. That's what I'll miss the most.
The Roundie in its new home.
- 29
-
- 19
entries - 189
comments - 26556
views
Recent Entries
 Latest Entry
God closes a door and opens a trap door.
So as I am sitting here with the flu and cold in full effect sipping on my nice warm apple flavoured neo-citran, I find myself in a meditative state of mind. Looking out towards the many tasks that I have ahead of me and struggling to understand how I ever got to this point.
What started as a conversation with my better half regarding an old BMW that isn't too fancy and that I could park on the street, soon became a garage only drive, with electronic fuel injection accompanied by a laundry list of parts that I have amassed for the next stage of development. I find myself wondering why... why do I feel compelled to jump into this?, is it ego? is it curiosity? is it bravado? what am I trying to prove? and to whom am I trying to prove it to?
The reality is that I feel enabled by the folks on this forum. And truly enjoy sharing what little time I have trying to help others. I think what I am trying to say is thanks to everyone for your support on this part of my journey. It means more to me than you may think.
Now that I have all that touchy-feely stuff out of the way. I think I will close out this blog, as the initial scope of putting a Sniper EFI on a 02 has, at least for me, primarily been fulfilled. The knowledge that I have gained has been invaluable both as a car enthusiast and a data jockey.
I have been fine-tuning the system, and for the most part, it is working well. I hold myself to a high standard, and by that measure, it wasn't a complete success. It starts drives and stops well. The shortcomings of a TBI based injection system perhaps are exaggerated by the small displacement of the engine. I do not doubt that it would be an excellent fit for an M20. I have primarily tamed the idle issue by essentially digging a hole for it to sit in. On each side of the hole, I put a very steep fuel and timing curve that "forces" the idle to stay between 850 and 975 RPM when the pedal is less than 2%. Kind of a hack solution, but a solution nonetheless.
Before I decommission the setup, I will post my log file and tune file for anyone wishing to pursue a TBI setup further. Perhaps Holley will come out with a TBI that is more suited to smaller displacement engines. I will be starting a new blog on the conversion from my existing build a new one based on the familiar 3 series manifold. I think it was a good rule that I will post stuff there if anything interesting or new as many others have done an excellent job focusing on the fundamentals of the megasquirt conversion.
Being a data cowboy and learning from this journey my intent is not to make enormous power (just significant power), but to essentially create a data-gathering platform that I can learn from and perhaps contribute in some way to the 02 community. The ultimate goal is to inspire others to tinker with stuff (not just cars). I will fail, I will pick the wrong wire, but ultimately I will get through whatever hardships I may have.
I want to do some crazy shit as well, even more hair brained than this one, just to see if it would work.. why? ...because life is truly too short.
Warmest regards
- 19
-
- 8
entries - 22
comments - 2930
views
Recent Entries
 Latest Entry
Suspension
With the rolling stock and brakes squared away, it was time to address the suspension. To my untrained eyes and ears, I could tell that the bushings and mounts were all shot, the car bottomed out on hard bumps and the front tires had a comical amount of caster. I’d been stockpiling parts in plans to tackle the entire thing at once. Thanks to this site (again) as well as @BLUNT I had accumulated what I needed:
- Steering links
- Tie rods
- Lower control arms
- All front bushings
- Ball joints
- Upper strut mounts
- Fixed camber plates
- All rear bushings
- Subframe mounts and urethane inserts
- One-dot rear pads
- New upper and lower spring pads throughout
- Bilstein HD struts
- H&R springs
- Ireland 22mm sway bars and end links
I continue to have great luck with this car, as the exhaust shop that rolled my fenders turned out to be run by a 2002 guy, and his head mechanic is an old school 2002 guy with a hot tii track car. Since we just had our second child, I opted to have this shop do the install with the exception of the sway bars. I had just completed a full gut bathroom remodel by myself and was tapped out. I wish I could have performed this work myself, but it was completed in a couple of days and everything was safety wired correctly.
This totally transformed the car. Everything David E. Davis Jr. wrote about in Car and Driver was being transmitted through the car and into me. The car begged to be flogged, seemed happiest being wrung out and was always ready for more. I’d previously owned a car where I chased big power before addressing the chassis and brakes, but this tiny little go kart has changed the game for me. I don’t think I can emphasize how electrifying this car became, and practically overnight.
I still had a touch of understeer, so I installed the IE sways during our kids’ nap time one day and it was solved. The car was neutral and rotated, and I had a touch of bling underneath the car.
At at this point I began driving the car everywhere. To the store, to drop kids at school, basically any excuse to take it out was good enough for me. As summer rolled on I took it out for early morning thrashes before the family woke up, took it up to Tahoe and back, and generally put as many miles on it as possible.
I changed out smaller parts as they wore- new starter, chased bad grounds, removed the prehistoric smog equipment and gave it a full tune up. It’s happy, I’m happy. The more I drive it the less I care about cosmetics. It’ll eventually be repainted but it’s a driver that I’m not afraid to depend on.
- Read more...
-
- 0 comments
- 8
-
- 30
entries - 37
comments - 10098
views
Recent Entries
 Latest Entry
Can't bring myself to put it in hibernation
It's taken 4+ years to get this rolling tetanus shot on the road. At this point it's really not a BMW any more. That needs to be made clear, this car was missing much, damaged and significantly rusted. Add to that a cross country relocation compounded by this being my first ground up. I say all that to say I would have done things very differently. Due to the moving and original plans of a track car, much of the interior little bits are gone. I have had to build my own over the last few weeks. without them the noise was just unbearable. The door cards are just basic with pull straps.
My cranks and handles were in rough shape, so I picked up the billet ones. All I can say is just don't. It's a bad design compounded by poor manufacture. I have fought with them more than I care to think about. Seriously remove and reinstall of them is an hour each, they are that fiddly. On happier news Michigan seems to be having a mild winter so I will continue to drive when I can. Friday I commuted in the 2402, using freeways and all! There are some odd rattles to track down, further interior clean up and my running list, but it's overall a car. I am continually amazed at how fast this thing is. I'm sure the numbers aren't great but it just feels so visceral.
The garage is all set for more work. below is my list of items to knock out before the summer driving season returns
1. new windshield (reused the old as it was my first to install)
2. buy and install windshield wiper linkage (what came with the car was incomplete and what was left was rust beyond repair)
3. sway bars (the car came with NONE)
4. New tires, the current ones hold air but originally were old stock discounted tires used in a lemons race car 5 years ago!
5. replace the broken left rear quarter glass opener.
6. new steering wheel, just tired of looking at the junkyard special
Not a huge list but after the very expensive 2019, trying to keep the spend low this year and the miles high.
- Read more...
-
- 0 comments
- 30
-

 Latest Entry
Major update
It has been over a year since my last update, and a lot has happened since then.
After my last update, the first change I made was in getting a new handbrake and shift knob from kooglewerks, and after installing it I almost immediately decided that I needed the nardi wheel to match... because of course I did. A bit after installing the wheel, I drove out to Bimmerfest West and along the way I found a group of other o2s all driving together. I figured that since I thought I was already late, I would rather be late in a group or end up where ever they were going than pull in to the meet late on my own. They turned out to be a great group of guys who go to meets and C&C events regularly somewhat local to me, and I have been going to events with them ever since.
After the Bimmerfest West and a few more meets with that same group, I found that I was having a bit of a cold start issue and decided that I would rather leave anything having to do with the Tii injection tuning to someone who knows what they are doing a bit more than I do, so I brought the car up to Le Tran from 2002GarageWerks to take a look at it. Unfortunately there ended up being more than just a cold start issue. When I brought the car around, we saw from the plugs that it was running lean which was the first sign that there was more to the issue. After I left, Le sent me the compression numbers both before and after valve adjustment. Additionally, the valves were adjusted far too tight and there was excessive wear on the cam. While it was over there, Le put in a new coil and 123 Bluetooth distributor.
After I got the car back, it was running worse than It was even before I dropped it off. I began the process of taking off the head to replace the worn down parts and hope to fix the compression in the process. During disassembly I found that the plug wire to cylinder 3 was broken, which obviously didn't make anything better.
While taking everything apart, I made sure to label all of the vacuum lines, fuel lines, and wires to help make sure I put it all back together correctly.
After I took it all apart, a good friend who I met back at Bimmerfest West got me all of the head parts I needed and in return I gave him the enki 15 inch wheels I was using at the time and about $200, saving me a bit of cash for everything else that needed to be done. I then drove the head out to Bob's Automotive Machine Shop to have it rebuilt with all of the new parts. Here the disassembly process is shown:
here are the new parts compared to the old:
After everything was taken apart, they began the cleaning and rebuilding process:
The rebuild included a pressure test, resurfacing, valve guide install (late type), and valve job.
Once I got it back, I re tapped all of the threads on the block for mounting the head, and re tapped the head as well prior to installing the studs.
I was finally able to reinstall the head and put everything back together as well as do timing.
Once it was all back together, I refilled the coolant and oil, and primed the head my cranking the motor with no spark to get it all oiled up as you can see in the first video. Then the videos after that are the first start and first time at idle.
After the motor seemed to be happy and was able to sit at idle for a while without any issues, I decided to take it down the street for a test drive, which didn't end up working out too well. When driving downhill it seemed to be doing fine aside from some popping on deceleration so I went to turn around and bring it back up to my garage, and as soon as I started back up the hill my temperature suddenly shot up and I had a major loss of power, so I was barely to get it back inside as it started billowing steam out from under the hood.
Additionally the exhaust manifold was glowing by the time I got it inside.
Based on all of this, I suspected that this was an AFR issue as I said in the video. That turned out to be exactly what the issue was, and what I suspect caused the sudden jump in temperature was the cold start fuel enrichment turning off after it got to operating temp, which was the only thing keeping the car at a somewhat normal AFR. After it turned off, the car leaned out due to several vacuum leaks which I later tracked down, resulting in it running so hot and being so low on power.
To fix the issue, I smoke tested everything and found and patched several leaks. After they were all patched, I re adjusted the AFR and reset the ignition timing, which totally fixed the issue and the car has ran happy since then..... until the differential blew less than a month later. FUN!
What had happened was I heard a loud bang from somewhere in the drive line while taking a fun corner on the way home but was not sure where it was exactly in the drive train. As I limped it the rest of the way home, I noticed a consistent noise that sounded like a mechanical thud based on wheel speed. At first I was not sure what the issue was, and I had assumed that it couldn't be the differential since it didn't lock up and I was able to limp the car back home. After having it towed back to my parents shop, I swapped the guibo and whole driveshaft because I had assumed that a U joint or the center bearing could have been the culprit. Thankfully, I had a spare driveshaft so this attempt at solving the issue didn't cost me more than a new guibo and hardware.
Obviously this didnt solve anything, so I put the car on a lift, jacked up the rear wheels, and had someone get inside and drive it in the air to try to find the issue. Immediately we could tell something was wrong in the diff when only one side spun, which I would not find too odd from an open differential like this, but its not like more load was being placed on that side than the other so there was no reason both sides shouldn't have spun.
after using a mechanics stethoscope on the diff, it was obvious that something internally was being ground up. here is what some of the drained oil looked like (keep in mind I changed it about 2 months prior)
Thankfully I also had a spare differential from the same car as the spare driveshaft (new on the left, old on the right) I also noticed a few differences between the two, the main one being that the old one had some extra holes drilled in the output, didn't have the same structural ribs on the top, and had different markings on the bottom.
I cleaned up some of the hardware in a sonic bath, and put everything back together
One of the lessons this car has taught me is that right when you think you are done, you will get a new to do list one way or another. Another lesson it has just taught me this past week is that if you see a great opportunity, don't hesitate to take it. Both of which came in the form of this Facebook ad another friend from that same group had sent me.
A freshly rebuild 245 with less than 500 miles is worth a whole lot more than that. After talking to the seller, I learned that he had just put it in his 2002 but after felt like he wanted more power for the straights of the canyon he lives in, and is planning on doing an S2000 swap. He wanted to sell it locally and see it go to someones project nearby. Some prospective buyers from the east coast had told him how much it was worth after he refused to ship it, but he had told me that that was not nearly how much he had bought it for and that he isn't doing this for profit, and would feel wrong selling it for so much more than he had paid. Even more fortunately for me, he was able to get me the rest of the 5 speed swap components, saving me enough cash to keep the car going. As of now, I have the transmission, a brand new clutch, flywheel, clutch slave cylinder, shortened shift linkage/ mounting plate, and hardware. Next week I will be picking up the shortened drive shaft, speedometer cable, clutch line, and rear cross member. I hope to install everything at the start of winter break when I will have all the time and parts needed to put everything together.
- Read more...
-
- 0 comments
-
- 8
entries - 7
comments - 3051
views
Recent Entries
 Latest Entry
Spare Tire Well
We replaced the spare tire well, as it was rusting.
We bought the replacement from Wolf. They sprayed the color and shutz in the way the factory did. Thanks for the tip from Andrew Wilson on that.
- 8
-
 Latest Entry
Hi!! I’m TocaChakra and happy to be here....
Hi, My name is Toca. Before I begin this blog, I was testing the ease of use on this site. First thing I notice is the program/site changes the position of the photo selected.... I haven’t entered the photo yet in “Submit Entry” but when I tried downloading the profile photo it juxtapposed my photo.... A little frustrating but I’ll figure it out. If anyone can -PM- me some helpful tips; that would be appreciated... This way, I can meet some of the more active members in this community. Here’s to success!
-
- 3
entries - 1
comment - 615
views
Recent Entries
 Latest Entry
Rear Subframe Refurb, Rear Brakes, and Suspension
While the car was cut to pieces, I spent time rebuilding the rear subframe and related parts. It was a nice break from all the grinding, cutting, and scraping on the body. The rear subframe was sand blasted by precariously hanging one end out of a HF sand blaster with a few trash bags strapped to the side to contain the dust. It was then primed with corroseal and coated with a few coats of brushed on gloss enamel. The same treatment was given to the differential case, diff bracket, and rear control arms. Luckily a set of refreshed control arms were included with the car. I was able to use these instead of performing surgery on the spring perches of the originals.
For suspension I used the ST lowering springs found in the trunk. The PO had installed the fronts already, but not the back for some reason, probably because it would have crumbled... I matched these with KYB gas adjust struts, new rubber bushings in the control arms and subframe, poly subframe mount inserts from IE, IE poly diff bushings, and an IE rear sway bar.
Brakes were left stock but new besides some stainless lines from BavAuto (RIP). I also bent and flared cunifer hard lines. I'm on the fence if the time effort is worth buying a new set. I have two original lines left in the car as of writing this. I'm pretty sick of flaring lines...
I also took the opportunity to replace the diff fluid with red line and rebuild both axles with fresh boots and grease.
- Read more...
-
- 0 comments
- 3
-
- 47
entries - 78
comments - 10472
views
Recent Entries
 Latest Entry
I got a lift!
After searching for months and resigning I’d have to buy new and pay for installation, I managed to find a local guy selling a four post lift for a great price. Rather than disassemble it, I had a hauling company pick it up at his house and drop it off in my driveway.
- 47
-
- 13
entries - 16
comments - 3867
views
Recent Entries
 Latest Entry
Ready for his closeup
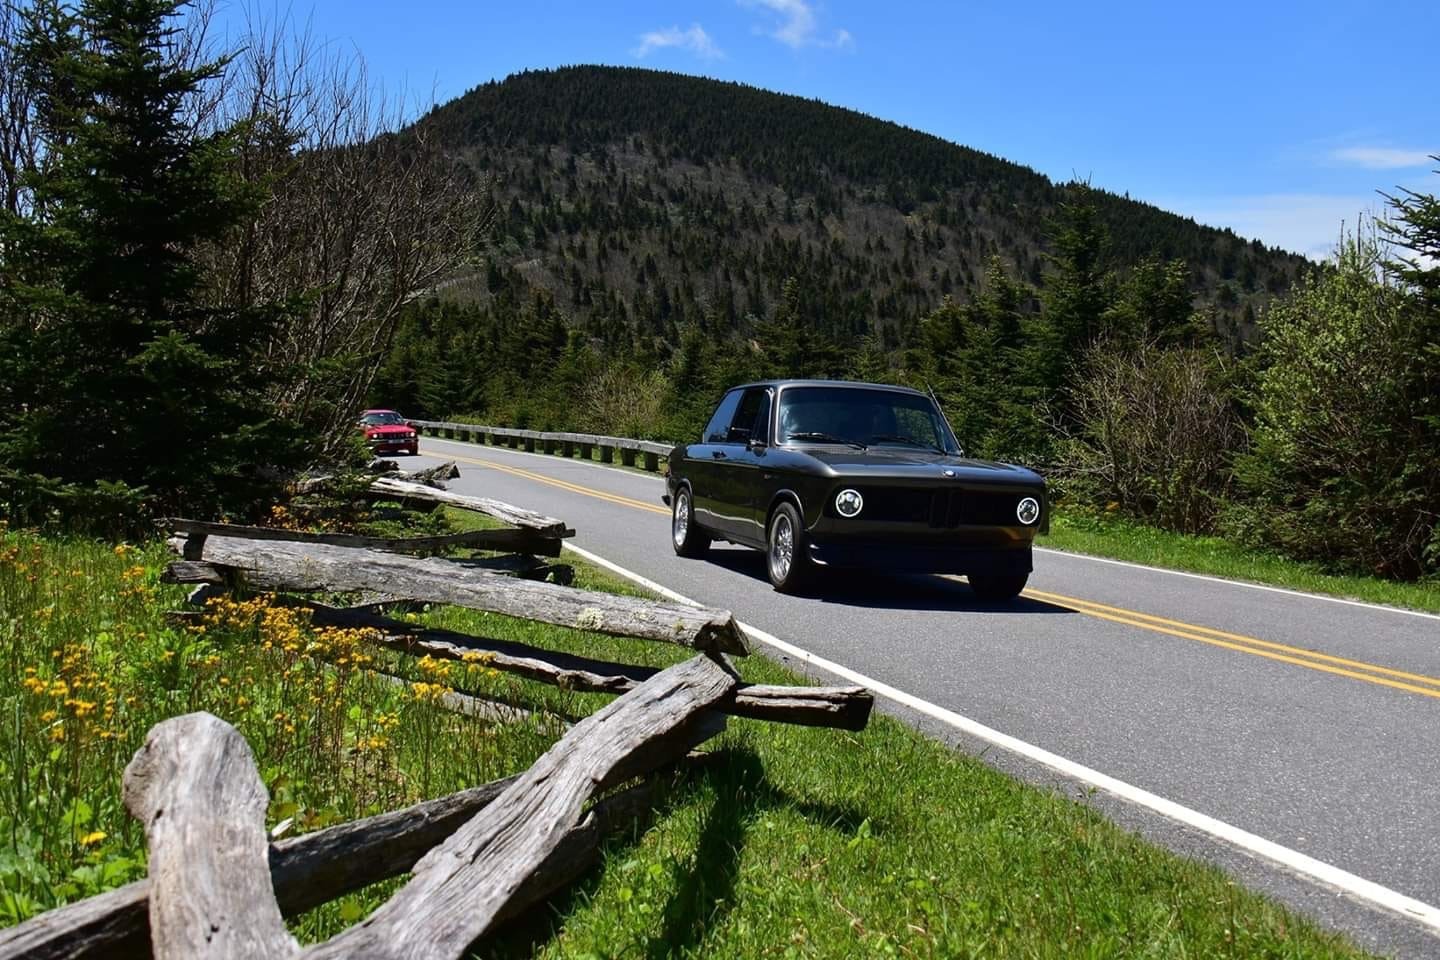
So it's been quite a journey with good old Fred. Blood, sweat and cursing. He was named Fred by my wife because when he showed up in the driveway, he was painted black and she thought he looked like a top hat, like Fred Astaire's. So Fred he was.
I learned a lot and spent a lot. Hundreds of hours in the garage while Pandora kept me entertained. Dozens of questions and help from all you FAQ'ers, Steve at Blunt and various friends and mechanics. Quite the journey.
He's finally done....well, as done as they ever are. Of course there are still dribs and drabs here and there but for the most part, he's in good shape. He drives like a dream, handles like a champ and even sounds good both from the engine sound to the custom stereo. There are many of you to thank but knowing you guys, the pix will do the talking. Thx for the journey!
Nick
Here you go!
- 13
-
- 22
entries - 94
comments - 3177
views
Recent Entries
 Latest Entry
Not for sale
With apologies to Mr. Polak.
Started out modeling this just because.
Printed the tags individually, epoxied them to a metal license plate frame then painted.
Stupid project - sure. But, so satisfying. ?
- 22
-
- 15
entries - 14
comments - 19419
views
Recent Entries
 Latest Entry
New seats and trunk in epoxy.
This past weekend I got epoxy down on the trunk. I think I can cross this off the list until its time for final paint.
Thee are a few small areas that yet need to be addressed that will be addressed when the car is in PA and I can take the rear glass out, but structurally the trunk is now sound. This makes me very happy.
And today, something showed up in the mail for me!
Really excited about these. There is also a rear seat cover that I have not unpacked yet. I ordered them from a small shop in Thailand that restores them, and was nervous about it being a scam. But after 8 weeks in a container they showed up at my door today! The tracking site the guy sent me had not even updated yet (as of Sunday) so I did not even know they had landed and gone through customs and been delivered to the US Post for delivery.
Zach
- 15
-
 Latest Entry
Finally in the new shop
After a couple of months in storage I finally got Old Blue home to the new shop. It seems like she's spent the majority of her life with me either on jack stands or on a flatbed being towed.
- Read more...
-
- 0 comments
-
- 9
entries - 27
comments - 3998
views
Recent Entries
 Latest Entry
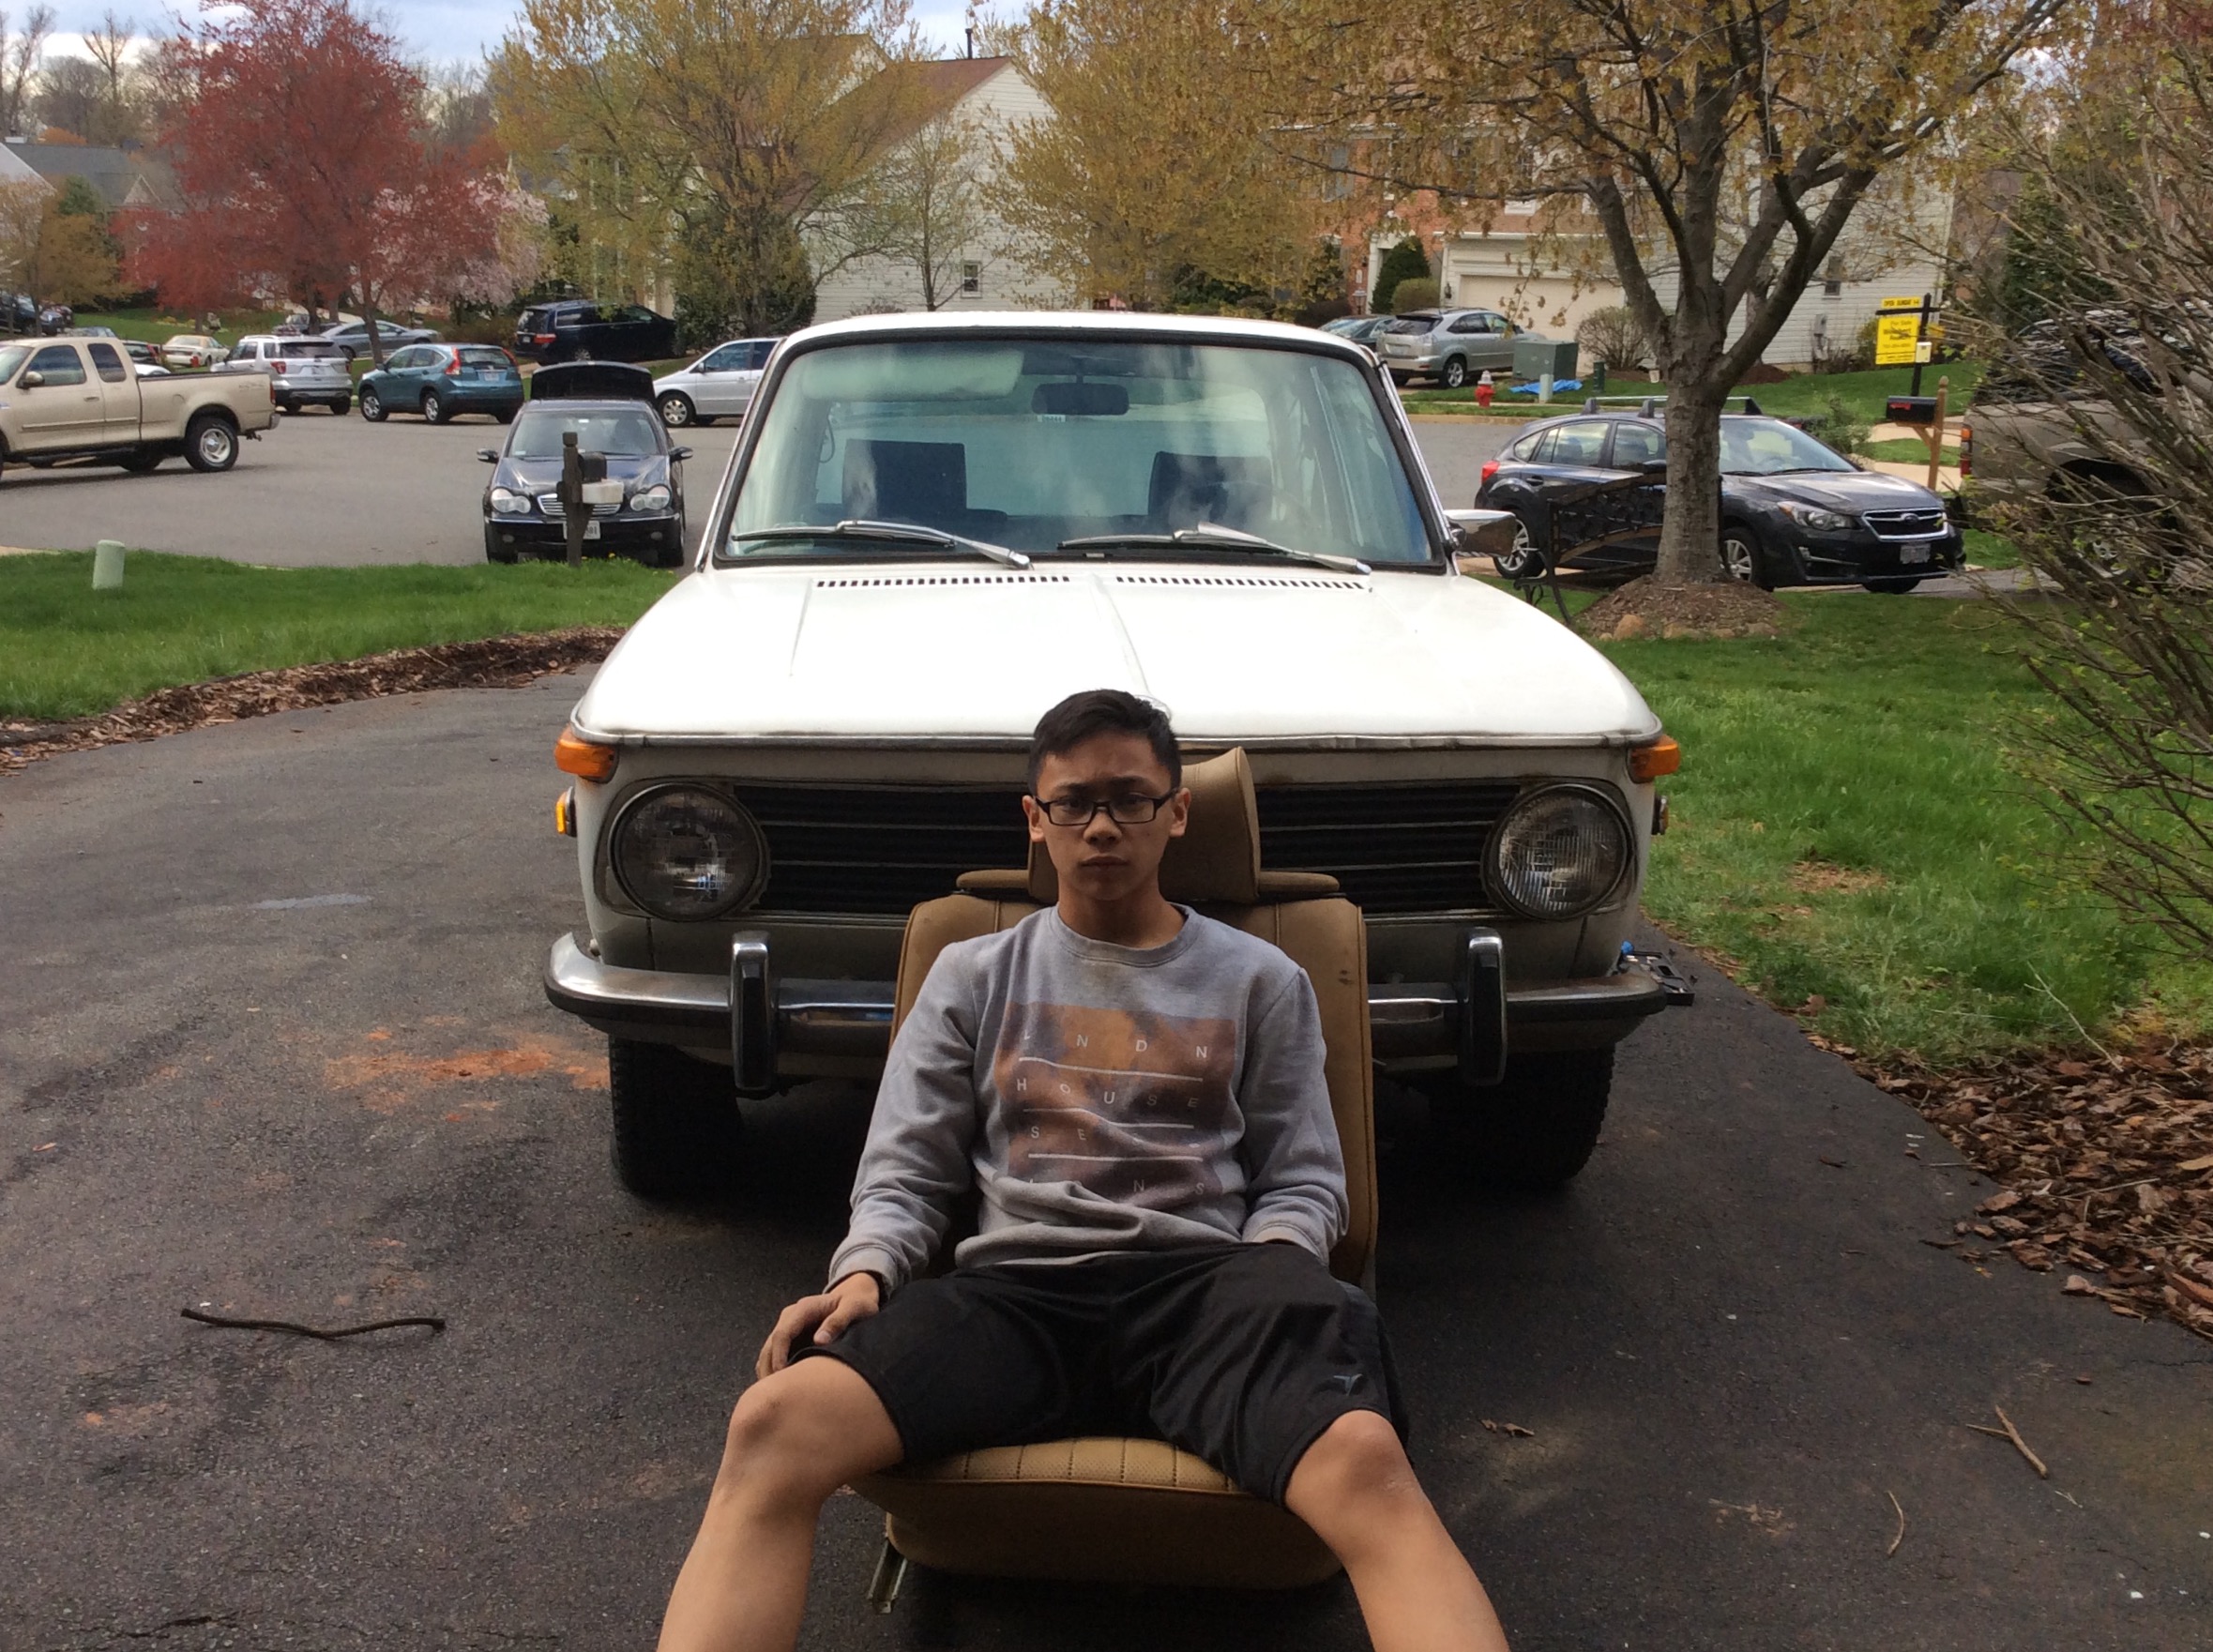
The Car is DONE!!!!
The car finally arrived back from shop. It's not 100% yest, but its close to where we want it to be.
This is my uncle who gave me the car (for free) so my dad and I can work on it. He is the original owner if the car. Thanks to him, I now have my "Dream car"!
I made him drive it.
He drove it with his wife , and it brought back a lot of memories.
- 9
-
 Latest Entry
M42 is the new black
Early last year 2018, a friend, Rob swapped a m20 into his 318 Convertible and he asked me if I'd want his m42. I'd been interested in this swap for a while so I said absolutely. I was pretty intimidated no matter how many writeups saying it's easy I read. And thanks to all those who have done writeups before me. They were all super helpful.
Big shoutout to Jakeb for infinite and timely help along the way to my millions of questions he answered amazingly quickly considering how busy I can imagine he is. Special thanks to my buddies Rob and Austen
For full disclosure on my car experience. I have always been a figure-it-outer but as far as cars go I have changed oil myself on nearly all my cars, I've replaced a catalytic converter, changed rotors and pads (with help) but any major engine work I've always gone to a shop. A lot of this felt way over my head but breaking it up into digestible pieces made it doable.
Pics below show where I started and the progress. Rob and Austen dropped off the m42 one cold February 2018 afternoon and we set it up on a stand. It was pretty filthy and crusty. I felt if I was doing this I didn't want to just drop in a dirty engine. I also wanted to have a better understanding of all the components and use this all as a learning experience, so hopefully when something fails I'll be able to fix it myself. I wanted to pull apart and see firsthand how everything works and goes together, replace anything that didn't look good and replace as many seals as I could. I left the rear timing case housing in place and didn't remove the head. I ended up having to replace all the timing rails, but Blunt thought the sprockets and chain were fine.
I sent the valve cover and intake pices to a local powder coater to get refinished.
This work took me most of the summer cleaning, painting when I had time. Having never done any of this before I was pretty slow and methodical, doing lots of reading before doing anything. I was also tracking down all the other parts needed for the swap since Rob just had the engine, driveshaft, flywheel, clutch and computer. So I had to find all the other bits elsewhere - Radiator, transmission, fuel pump, battery cable etc. It was a lot of stuff. I'm hesitant to go through my reciepts and add it all up.
The big day finally came in the fall. Rob came over and we pulled out the m10. This part wasn't that bad having someone experienced like him to help. While the engine was out I figured there was never a better time to clean up the engine bay. I've never really particularly like red cars. The first 02 I recall seeing in person was a Colorado in Vancouver BC and always loved it. I also really liked Inka. I put the 2 to a vote with my wife and 3 year old and Inka won. (I was the lone Colorado vote) My Father in law is a huge Buick guy. I think he was 7 50's Buicks right now, all restored by him. He had offered to paint the car and so he came up and we cleaned up and sprayed the bay Inka. I checked into getting the legit OEM paint and the price was way too high (I think when I priced it out over $1000 for the paint) He had used Nason for all his Buicks and I think in the end paint was about $300. Single stage urethane. The plan then was that he would do body work over the winter while the car is stored at his house and paint it in the Spring. More about that later.
It seems like i didn't get and shots of the engine going in but here it is in. It came from above with the transmission attached.
There was still tons to do and I enlisted Austen (@millcitymoto612 on Instagram), who's a super talented full-time mechanic. He currently runs a supercharged m3 in his e30. He and I or just me plugged away at it for about a month.
I wanted to do the "Mess under the intake" mod and Austen was super helpful here getting everything plumbed up. The wiring was a bit of a mess for a while. I didn't really want to clean it up until all the wiring for everything was done, and there was still things like installing the tach adapter and where exactly I wanted to locate the new fuses and relays so we just cleaned up the best we could and left wires long for the time being. You can see in this pic the new fuse box and relays are near the 02's fuse box. I ended up putting the fuse box wat up front to the left of the 02 relays. I put one of the new relays in the open spot next to the 02 relays and the other new relay was placed near the firewall where the m42s relays are.
First start
At the same time I swapped in a e21 LSD I had picked up earlier in the year. It was pretty crusty but cleaned up nicely. Had Ireland send a set of redrilled flanges and got new seals for the flanges as well. When I pulled the 02s diff I found that the mount bushings were shot so had a local shop, Huber Imports near me in Golden Valley press in new ones. Werner Huber and his sons run the shop, they are the nicest people you'll meet and reasonable prices, highly recommended if you're in the Minneapolis area.
Found a torn CV boot so learned how to fix that too, which was much easier than I thought it would be. Messy, but pretty easy and satisfying.
Austen had a really cool way, I thought, for shortening the shifter linkage. Maybe this is a common knowledge way to do it but I never read about it anywhere online - I got my measurement the best I could and then cut a section out of the linkage that was very close if not a bit short. Then, since the linkage is basically just a tube I tapped the inside of each side of the now cut tube and used a big corresponding bolt and threaded it all together. Then if theres any adjustment you need to make you just unscrew it a couple turns. Once I was happy with the shifter position I just popped over to the CarX near me and they welded it up. For the carrier I ran into a bit of a snag. I was assuming my 02 carrier would work, just that it would be too long and need to be trimmed down. I was wrong, it was too short, it's the e21 carrier that can be shortened. I didn't really want to wait around for one to come so I instead bolted some flat iron to my 02 carrier to make it work. Looks ugly but it works. I do have an e21 carrier from Jakeb sitting in my garage, just need to put it on.
One of the parts I realized too late that I was missing was the throttle linkage. This is where all my watching MacGyver in the 80's paid off. The car was basically done and I wanted to get it to the exhaust shop to get welded up so I rigged up this ugly thing. It's a lumber tie leftover from when I built my deck and a bracket from an Ikea shelf. Vroom
Luckily it was only about a mile or so to the exahust shop. The car wasn't running great, I assume because of the lack of the oxygen sensor. Also, I had no idea what the engine temp was doing because my gauge wasn't working yet. The exhaust shop did confirm the engine was staying at operating temperature. Later, After lots of headaches and red herrings I figured out that the sensor I had pulled off the m10 for the temp gauge was not working. Swapped in a new one and the gauge came back to life.
A few other notes. I used the m20 flywheel and clutch with the getrag 240. I don't have a frame of reference for the difference vs the dual mass but the car definitely feels peppy. I didn't really go through the transmission when I got it (came from a junkyyard in Iowa) I probably should have. I was having an impossible time bleeding the clutch and came to find that the slave cylinder was shot. I watched a video about changing the slave when the transmission is in a 318. Looks easy. In the 02 the tranny sits so close to the tunnel and had to use enough socket extensions to reach about 3 ft and I still got bloody knuckles. I also found that the clutch sounds a little buzzy un release. I used a new throwout bearing and new clutch fork and spring clip. 2nd gear is a little tough to go into.
After it was all running I had about a week to drive the car before it was time to send it to storage at my Father in Laws. I usually drive it there but I was a little nervous to to the 2 hour drive knowing all the kinks weren't worked out yet so I used my AAA to have it towed.
My father in law spent the winter picking away at the bodywork. When we went there he already had the hood, doors and fenders bondo-ed up. The big bumpers were going to be replaced for early bumpers so he did the appropriate bodywork to prep for that. We also filled in the lower plastic trim holes.
The cold and snow (and salt) lasts forever here in Minnesota so we didn't go down to pick up the car until early May. We went down to Austin, Mn on a saturday and the plan was to do that last bits of work and then I'd drive it back to Minneapolis the next day. We needed to get both windshields back in, install the new door panels, and attach the new early bumpers. On Sunday I thought Mark and I should take a shakedown drive to see how the car was running. About a mile in I noticed the temp gauge get to 3/4. Pulled over and could see coolant under the car. We were still pretty close to home so we limped back. This is where my time pulling that engine apart came in handy. It was hard to see where the leak was coming from but finally found that the hose on the plastic water diverter off the block coming from the heater core had completely popped off. It wasn't the most difficult fix, but the upper intake had to come off. No clamp was in site, so either there I missed putting one on there in the first place or it fell on when the hose came loose. Got it back on with a clamp Mark had laying around and refilled and bled the coolant for probably the 3rd time since putting the m42 in.
The drive home was great. No issues.
Here's a few other pics and notes. I still have a list of things to do. I have HR springs and front sport struts that need to go on. I want new wheels but am undecided what to get. My wipers aren't working (new relay, pulled wiper motor, looks fine) They were starting to work only at random times even before the engine swap. For the tach I first tried the MSD adapter and it just never did anything, Jake said I should try Andrews Autosports and that one worked right away though it seems to read about 500 RPMs low. I'm still trying to find out how to calibrate it. I installed some Squatch pads in the engine bay. They are awesome, highly recommended. For anyone doing the job, I really didn't want to pull the hood so I had started masking non spray areas quickly realizing how much tape and unsure how to get the pad under the torsion bar after spraying without it getting messed up. I pulled all my masking tape, put the pads in place unsprayed under the torsion bar and put a little masking tape to hold the top from folding down. Then I sprayed a bunch of Super 80 into an old frisbee and applied to the hood and pad with a foam brush starting at the bottom and working my way up. Work toward the bottom from the torsion bar and then work up from the torsion bar. Took me all of 20 minutes. Worked great, no adhesive where I didn't want it and didn't have to remove the hood.
You can see in the first pic here the radiator is zip tied to the nose. I spent a lot of time trying to figure out a nice solution to tieing the radiator in. Metal would be preffered but not having any fab machinery I looked for a durable plastic that could be used. I found a piece of J channel thats intended for installing vinyl soffits at Home Depot. They only had white but black is an orderable option which I think would look better. You can see my white one in the pic with thw squatch pads. I used some expandable rubber grommet fasteners to tie them together.
Thanks for reading. Again big thanks to everyone who helped me along the way. Really wouldn't have attempted any of this withoug you. My father in law Mark, Austen, Rob, Jakeb and Blunt.
Shameless plug - I'm a freelance graphic designer in Minneapolis so if any of you need any design help from a fellow 02er let me know. My work - https://lfdept.com email - jamie@Lfdept.com
-
- 31
entries - 66
comments - 23062
views
Recent Entries
- 31
-
- 19
entries - 93
comments - 7718
views
Recent Entries
 Latest Entry
A time to build and a time to sell
its been a conflicted and multifaceted decision process, but I have decided to list the car.
I've enjoyed this project immensely and am still enjoying my '74. I'm sure I will have another tii at some point
- 19
-
- 28
entries - 55
comments - 26600
views
Recent Entries
 Latest Entry
Ignition Investment - UPDATED
After reading good things on the FAQ and reviews around the web, I decided to invest in a Summit Racing 'MSD' CDI ignition. I have to say, this is an impressive package. EVERYTHING about this product (build quality, instructions, part numbers, specification, installation kit etc) screams that this is an MSD product. If MSD are not making this, or getting a cut out of Summit, I would be very surprised and I would suggest that MSD need to get a better lawyer.
http://www.summitracing.com/int/parts/sum-850610/overview/
Opening the box we have the sturdy unit (Aluminium heat sink case), wiring harnesses with good quality sealed plug couplers at the one end and well installed crimp terminals at the other. There is a comprehensive fitting kit with all manner of small parts that someone may have thought would be even vaguely useful (it even comes with a small screwdriver for adjusting the rev limiter pots). They really have tried to think of everything here. The installation instructions I have given below are really the same for a real MSD branded product as there is no difference that I can see between this and a MSD 6AL digital or similar at least as far as configuration, if not performance.
I have been slowly modifying my ignition system in advance of future engine modifications and in an attempt to rid myself of a persistent low RPM misfire that gives me an unsteady idle. Ultimately I intend to get a 123Tune distributor but in order to try and delay that, I have gone down this road (with a view that this can be perfectly switched by the 123 at a later date). At the back of my mind, I am concerned by reliability and while the postage from Summit to South Australia was pretty quick, I don't want to be completely stranded if the box should go on the fritz so I needed an installation that would allow me to revert to conventional points / inductive ignition at short notice.
I had originally intended to use my original, well worn, vac advance distributor with a Hot Spark Pertronix knock-off to switch the unit but gave up with the Hot Spark when I went to all of the trouble to fit it, just to find that it was not working. I gave up and pulled the whole distributor, replacing it with a distributor that I had on the shelf that someone had modified its curve and removed the vac advance. This is in better overall condition (less jumping of the timing marks) but I had put it to one side as I really wanted the advantage of vacuum advance for my (currently) mildly tuned street motor. I will take the vac advance distributor to a local specialist to see how much they charge for a rebuild (or put the money towards that 123Tune).
The CDI box works without a condenser, with the points acting as a simple low voltage switch which then trigger the firing of a capacitor which charges quickly, quicker than the difference between each cylinder firing in turn. This removes all of the concerns about the reduction in time for the coil primary field to charge as the revs rise. It also allows, in the case of a 'multiple spark discharge' ignition like this one, multiple sparks for each cylinders compression stroke under 3,000 rpm. This improves the ignition at low revs through extending the 'burn time'. With a CDI ignition, the coil works more like a conventional transformer, transforming the now raised primary voltage of approximately 480v to up to 40,000v (depending upon the coil primary to secondary ratio).
The first job was to mount the unit in the engine bay and plan the routing of all of the wiring. I chose an area on the front of the right hand inner wing. After drilling the mounting holes, I used the included resilient rubber mounts in the rear. The jury is still out as to whether these are entirely necessary - the concept seems to be for 'high vibration' applications, which mine probably isn't and some people say that they allow circulation of air in rear which may be more important for longevity. The unit has two plug couplers and flying leads for battery + and ground. The battery + wire was run around the front of the engine compartment to connect to the battery positive terminal. There is no fuse in this wire so to minimise risks of short circuiting causing it to overheat it was given secondary insulation with some loose plastic wiring sheath and tied to existing looms running behind the radiator. The ground was extended by soldering in a new length of 4mm2 wire and run with the battery + around to the battery negative terminal direct. No problems with poor power connections here.
The wiring loom with the small plug coupler is run to the ignition coil. Here the orange and black wires connect to the coil + and - terminals respectively and the red wire is connected to the green switched ignition12v wire (which is now disconnected from the coil) using a male 1/4" terminal. The orange and black wires will be live at up to 480V so it is best that you stay away from them when the ignition is on - I added rubber boots from an electric fuel pump over the wires to avoid accidental contact. It is also worth remembering that you will not be able to measure 12V at the coil terminal any more as this will only be live in pulses when the capacitor is delivering the 480v into the coil primary since it does not need to charge an electric field within the coil.
The second loom, from the large plug coupler, runs toward the distributor. One section of loom is the 'magnetic pick-up' wiring (green and violet) this is terminated on a two pin plug coupler and in my application is unused. There was a lot of this to 'lose' tidily within the wiring so I cut the wires off short and insulated with heat shrink.
The white and the grey wires from this loom were initially run around to the distributor before I established the need for the tacho adapter. The white wire was directly connected to the points at the distributor which are switching the CDI box's connection with ground and the grey tacho wire was run around to connect with the black wire that was previously connected to the terminal on the distributor. The section of black wire between the distributor and the coil was left disconnected previously at the coil and secured out of the way / insulated.
I wanted to retain the distributor through body connector with the two male 1/4" terminals associated with the condenser so I took an old spare condenser, cut the wire off flush with the plastic terminal plug and hacksawed the capacitor cylinder off from the fixing bracket. This was then reinstalled with the fixing screw to secure the through body connector plug to the body of the distributor.
If I have any problems with the box that needs a quick reversion, I will: add a new condenser to the distributor and reconnect connect the black wires back onto the condenser terminal. Disconnect the orange and black leads from the coil and reconnect the green switched 12v currently connected to the CDI red wire to the coil + terminal. I will then disconnect the black wire at the coil from the CDI box white wire and reconnect to the coil - terminal and I will be back to points. I reckon this would take me about 10 minutes and can be accomplished at the side of a dark road.
From reading posts about this and legitimate MSD ignitions, it appears to be a pot-luck as to whether the grey tacho wire will work directly with our tachos. The tachometer works by sensing the coil flyback voltage pulses when the points are opened. The Ignition provides an 'artificial' square wave output at 12v to simulate the flyback voltage pulses which has an equivalent dwell angle of 86 degrees (or 24% duty cycle as described in the instructions). Variations in the components within individual tachos may be less able to discriminate this input, instead the tacho is looking for the 'ringing' of the coil and so the tacho adaptor is required. My tacho did not work, with it staying resolutely at zero.
After looking for some time on Summit's site I could not find the tacho adapter listed in the instructions. A Google search on the part number took me to a page which said it was unavailable and suggested a Mallory part which looked exactly the same but... also unavailable. The Mallory page then suggested the equivalent MSD part so I emailed Summit technical support who advised me to use the MSD part. These tacho adapters are basically a coil wired with just an equivalent to the primary winding which charges and collapses its field as the points close and open. This will then provide a sufficient back EMF pulse to trigger the tachometer. This basically fits between the switched 12v and ground via the points. They also include a diode which is installed between the white wire and the points to presumably protect the ignition box from this pulse. I drilled two holes and screwed mine to the bulkhead behind the coil where the wiring was easily within reach of the usual cluster of terminals at the coil.
I needed to rearrange the wiring from the original configuration to accommodate. The red wire was connected to the green switched 12v wire and the jumper used to connect the red wire on the ignition box. The white wire from the adapter was cut short after teasing out of its protective sheath, re-terminated and connected to the black wire that was previously connected to the coil - terminal (which was hanging disconnected with the earlier set up). The grey tacho wire from the box was disconnected and insulated with heat shrink and left running parallel with the loom across the top of the bulkhead. The grey wire isn't used with the adapter but I left it in place as it can be used to drive other, rpm dependent equipment.
The unit includes a rev limiter which is set by adjusting two potentiometers concealed behind rubber plugs next to a diagnostic LED that lights when the points are opened. The rev limiter pots are set, one for the thousands of revs and one for the hundreds by turning with a small screwdriver. I set mine at 6,200 rpm which gives me some safety margin against the factory red line. This can be adjusted up to 9,900 rpm so this gives me a bit of leeway for future modification. The unit needs to be configured for operation with a 4 cylinder, it comes out of the box set for an 8 cylinder engine. There are red and blue loops of wire projecting out of one of the wiring grommets -These are both cut. I insulated mine with heat shrink so they could be spliced and soldered in the future - jusssst in case I ever decide to swap the engine for a 6 or 8 cylinder - it pays to be prepared.
I took the opportunity, when ordering the MSD tacho adapter, to order a Pertronix Flamethrower coil. This maintains a 3 ohm primary resistance which matches the stock Bosch coil and is probably a mild upgrade. I did consider something like an MSD Blaster II coil but this has a low impedance primary that would definitely need a ballast resistor to run with points. This is an added complication for my reversion strategy so I will stick with the blue coil that doesn't need an external resistance as the total voltage, even with a stock coil is likely to be overkill on this engine.
What is the impact? I had not expected it to be too dramatic in terms of performance enhancement but it has certainly crispened up the throttle response and I would swear that it has gained some power at the low to mid range. The unsteady idle has improved a lot. So much so, I am willing to think that the ignition is now 'sorted' and look to fueling for any other improvements. I checked the timing and found that it was slightly advanced from its setting of 36 degrees at 3,000 rpm. I tweaked it back again and had to play with the idle speed a little (though I seem to be having coincidental water choke issues with my Weber 32/36).
Overall I am pretty pleased with the kit. It is very well made, with good instructions and easy to fit. The benefit is noticible, I will be interested to see if I can detect any improvement in MPG. It was a bit disappointing that I needed the tacho adapter as it is a little bit clunky and it required some rework to fit. This seems par for the course though with many people reporting different results, even with the same cars. I can see that this has kicked the purchase of a 123 Tune off over the horizon a bit - at least until I rebuild my engine to seek a little more power. At that point I will be interested in the tune ability of the ignition but having the CDI means I will not have to worry about 'the amount' of spark available.
- 28
-
 Latest Entry
A 16 year olds first car.
Just brought home a 1973 2002Tii for my son who just turned 16. It currently runs and is completely rust free so we are just going to start by bolting on new suspension parts, rebuild brakes and chase down any electrical issues before body and paint.
-
 Latest Entry
Updates on 2002tii
See forum post for most recent updates. Blog entries are kind of redundant.
- Read more...
-
- 0 comments
-
- 5
entries - 8
comments - 1365
views
Recent Entries
 Latest Entry
Power Moves
This happened over the course of a bunch of months. It's all the metalwork to the floor pans and trunk area.
First, we removed all the sound deadening from the floors and then the cutting began. The car got three floor pans replaced with new metal, one patch we had to fabricate for the rear seat shelf, then patches on the front inner wings, and finally a few outer rocker panel patches — the inners were solid, rust treated, painted and then sealed up.
The undercoating was stripped from the underside then sandblasted - and treated with POR15 (cleaner, zinc phosphate metal-prep, then POR15), the same for the inner panels of the floor. Then hit it all with seam sealer.
Then we moved on to the trunk - the spare tire well was shot. We cut it out and decided to mount the spare UNDER the car like a truck (hell yes). fabricated it up, welded it in, then moved on to the gas tank surround.
It had been poorly patched in the past, and we discovered all kinds of rot underneath it. So like everything, cut it out, sandblast it, make a new piece, weld it in, POR15, seam sealer.
- Read more...
-
- 0 comments
- 5
-
- 4
entries - 51
comments - 3143
views
Recent Entries
 Latest Entry
Car is finished!
So its been a while since I've added anything to the blog. The car was finished in October. Just in time for winter in Ireland. With crappy weather and salted roads here, I've only managed 200 miles in 5 months. Though the weather is finally starting to get better and the car is finally being driven!
The car was lucky enough to be featured on the cover of Retro Classics magazine. (Irish car mag)
I plan to take it to plenty of shows this summer. First show is this weekend, me and my dad are taking the car over the Irish Sea to the Practical Classics Magazine show at the NEC centre in Birmingham, England. The car will be featured at the BMW Car Club GB stand. https://www.necrestorationshow.com
The car is driving great though there's a few niggles to sort out before the long drive, including its running in service.
- 4
-
 Latest Entry
Semper ubi sub ubi
Subframe nearly complete. After replacing the brakes, she should be set to get bolted back on. Can't wait to get her back on the road!
R&R'ed mostly everything:
- Diff rebuilt with new bearings
- CV joints re-packed
- New half shafts & hubs
- Wheel bearings
- All bushings & hardware
- Sandblasted & POR-15 frame
Before and after:
Rebuilding the diff was probably the most difficult / nerve-wracking. Removing/reinstalling all the bearings was definitely a learning experience. The upside is that I have a shiny new shop press.
The wheel nuts were giving me nightmares based on all the posts here, but a long stretch of angle iron and this bad boy made it a pretty easy job to get to 280 lb/ft of torque.
-
- 10
entries - 19
comments - 5354
views
Recent Entries
 Latest Entry
Rims found
I had a rim wish list and patience has paid off. Some nice SSR reverse mesh 3 pce. These guys are in 15x7.5 -5 offset, so some nice dish ??
- 10