
Blogs
Our community blogs
-

- 2
entries - 0
comments - 871
views
Recent Entries
 Latest Entry
Aw Rats!
Both sides have nice rust holes in about the same location. Drivers was right under the fuse box. Luckily they didn’t much through any wires.
- Read more...
-
- 0 comments
- 2
-
- 4
entries - 9
comments - 1833
views
Recent Entries
 Latest Entry
Interior Nearly Done!!!!!
Finally getting around to posting the updates to my '02 that I completed during our brief but awesome warm season here in Michigan.
The first images are most current. Then the in-progress. The last images are the 'before'. I guess everything is in reverse chronological order. Really happy with the results so far, though I really really really don't recommend installing a carpet yourself like I did. There's also a photo of me installing the carpet, just so you can see what a stupid idea it was.
Process:
Vinyl-dyed the tan interior (seats, door panels and parts, backseat trim
Installed form-fitted single-piece carpet (because I'm dumb)Cut new door cards (the boards behind the aesthetic pieces were all weather-rotted, staple-gunned the newly dyes trim onto them
Drilled new rails so the Ricaro Seats would fit....
Restored the wood on the center console
Installed the seats, trim etc.I'd love to hear what you think!
- 4
-
- 9
entries - 26
comments - 3375
views
Recent Entries
 Latest Entry
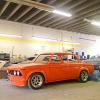
Bacc At It Again
Car is done!!!...At least the Hot Wheels version is ? (1/24 scale model coming as well)
I have been getting some things checked off the list. Some of the more time consuming and pricey things.
Things checked off the list:
Exhaust ✔️
Roll Cage✔️
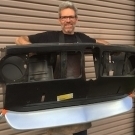
Hood Louvers✔️
All that's left is to go hard on the last of the paint preparation, get it scheduled and in the booth. Then of course re-assembly, tuning, tweaking, changing my mind several more times, and finally, hopefully it will be done.
The hood louvers. Guy cut me a deal on these because of how long he had my hood at his shop. I want to say it was almost 2 years waiting for this guy. Might seem a bit much for most of you but to make things they way I want it I can wait pretty long. I've gotten used to this project taking forever. I think since my last update there has been another addition to my family, so things are at a snails pace. I still have to weld the little supports back to the underside of the hood, couldn't be left on for the punching. Without further ado ?
The exhaust. A little bit pricier than I first imagined (a lot because of the material I wanted to use), but it came out just as I wanted and didn't take but a week to finish. The headers are slightly different than the ones I originally posted as they were not compatible with the swap. Hangs high and tight, and has a low profile because of the oval tube. The "resonator" tucks up in the hump for the front seats. All 304 SS.
The roll cage. Came up at about twice the expected price, but I am very satisfied on how it looks. Pretty stealthy, it was hard to get pictures because the bars are so close to the "B" and "C" pillars. Because I took out the original trunk floor I had the fabricator extend the cage to the two bumper mount areas for added strength to support the bumper and the fuel cell. Also hopefully it will add a little rigidity if I were to ever be rear ended as we all know happens all too often in these cars (myself twice in this car already).
That's all for now! There is A LOT going on in my life, all good things, but all very time consuming things. A new chapter of my life is about to start if you will, so it might be a while before the next update again. Stay tuned!
- 9
-
- 7
entries - 8
comments - 1047
views
Recent Entries
 Latest Entry
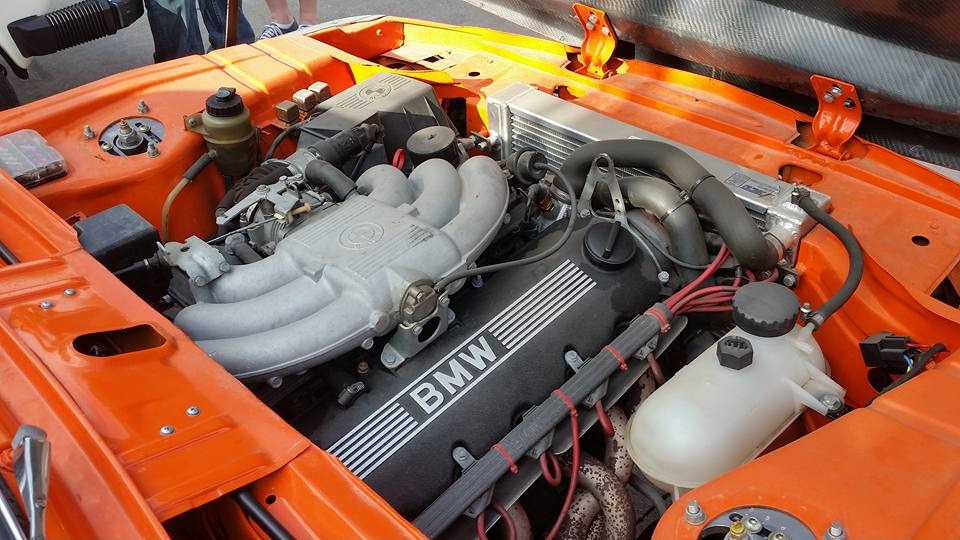
Rebuilt and Back in Business
What seemed like a straight forward job turned into an agonizing long process due to COVID. First I waited too long before ordering parts. Then the piston manufacturer Ross took significantly longer than expected. Finally my local machine shop was backlogged by the time I had everything. So 6 months later it finally has come together. I didn't take as many pics as I should have due to wanting to quickly get driving
- 7
-
- 4
entries - 2
comments - 2802
views
Recent Entries
 Latest Entry
Backlog Entry December of '19
Christmas Shopping for period correct goodies...
And a massive BMW parts list for seals, engine, transmission etc etc etc...
'
- Read more...
-
- 0 comments
- 4
-
 Latest Entry
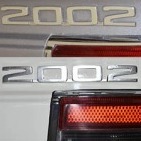
Factory color emblem shirts, Round 2
We’re doing another round of vintage BMW emblem shirts in custom colors; $30 each with free shipping to US. (Contact us for non-US.) Many new designs (turbo, touring, 1600, etc.), but which will get the needed minimum orders of 12 to do a press run?! We’ll find out, I guess. Pre-orders only, through August 22.
https://fountainsquareroundie.com/shop/
-

 Latest Entry
Replacing the foam in my sun visors
A common thing for 2002 owners: How many of you have sun visors that look like balloons? Over time, the foam just turns to dust, and the result is a floppy, poofy, sun visor. I decided to document my first DIY experiment to see if I could keep the original vinyl on a sun visor, but refill it on my own. At the end of the day, it's certainly far from perfect, but I figured maybe someone with steadier hands can iterate and improve on it.
For this project, I needed:
- A poofy sun visor
- A pair of scissors
- An X-Acto knife
- A tube of E-6000 adhesive
- A sheet of 1/8" thick Volara foam (a 1 foot x 60" wide sheet will be enough for two sun visors)
- 1 large cardboard box
- A vinyl repair kit for black vinyl (with fabric included)
- A bottle of rubbing alcohol
- Cotton Q-tips
- A pen
Step 1: Open up the visor
I started off by using my X-acto knife to cut around the top and sides of the black side of the vinyl, leaving a bit of black on either side so I could seal it up later and hopefully mask the vinyl repair kit work later. Very quickly, I found out that to really be able to open it up, I'd also need to make very careful cuts around where the sun visor usually attaches to a clip on the car. This was probably the most stressful part of the project, because once you cut, you can't undo it!
The goal was to avoid cutting the bottom of the sun visor as much as possible, since that's what the driver usually sees. Once open, I removed the metal frame and foam. That's all the sun visor is! I forgot to take pictures of this step, but here's one from later on after I was in the process of sealing it back up, so you can see just where the cuts were:
Step 2: Cut foam and cardboard
To make sure the sun visor would always have at least a little bit of structure in the future, I decided to add some cardboard to the interior, in addition to new foam. With some trial and error, I found that 1/8" foam would allow the visor to seal with this arrangement. Using the metal frame and the sun visor shell, I used a pen to trace the forms on cardboard and the foam sheet, then cut them out with my scissors. You could also use an X-Acto knife for this step. Here's what I came up with-- two of the foam inserts, and one cardboard insert per visor:
Step 3: Glue fabric
Next, I glued strips of fabric to the bottom of the inside of the visor so I could seal it up later. I experimented with both hot glue and E-6000, and found that E-6000 was a good choice of adhesive because it was flexible and didn't dry instantly. It's safer to use a larger strip of fabric because you can always trim it. Here's that picture from earlier again:
Step 4: Slide in the foam and cardboard
This step took the longest, because I wanted to make sure everything fit properly. I slid in the bottom foam insert first, followed by the cardboard, and then the frame. Finally, the second piece of foam! I made sure that the visor would seal properly, trimming the foam and cardboard as needed.
.
Step 3.5 (optional): Trace final foam and cardboard inserts
Now that I knew just what shape the inserts needed to be, I took them all out and traced them on some more cardboard and foam. This is helpful if you're thinking of repeating this on another sun visor since you'll have a master template to work off of.
Step 4: Seal up the visor with a vinyl repair kit
Once I knew everything would fit inside, I started getting ready to seal! I glued the cardboard to the bottom foam sheet to make sure it would stay in one place. Then, the most important part:
IMPORTANT: Before you start sealing things up, insert the screw back into the visor frame, and wrap tape around the portion that goes into the clip to make sure the sun visor frame is aligned properly (see the first picture below)!!!
With the frame was in place, I put some more E-6000 on the top of the fabric strips and sealed it, using painter's tape and pressure to get the best seal I could. Once dry, I used the rubbing alcohol and cotton Q-tips to get any extra adhesive off. I left sealing the clip area for last. Since it didn't need any fabric, I just used some more E-6000 on the inside of the vinyl.
When the whole thing was sealed, I used the vinyl repair kit to make the white fabric blend in better. The instructions on the particular kit I used said to use a Q-tip and rubbing alcohol to get a matte finish and blend a little better. I didn't use the vinyl repair kit on the clip area since it needed to have a specific fit inside the clip. My painting job wasn't perfect, but here's an example of what one side looked like:
Here's the finished product! Structurally, I think it's a big improvement.
-
 Latest Entry
Well, this is a new one...
So this weekend, all the water went out the tailpipe.
It took the driver 3 laps to notice this
(he's been sacked)
but the only thing I found wrong was that the exhaust valves were making
their own reliefs in the pistons (!!!)
The engine builder's been sacked, too.
I didn't have a very good straight edge tonight
(I sacked myself)
but the head is surprisingly un- warped. Based on a bit of aluminum angle I had lying around.
More as it gets taken apart.
t
-
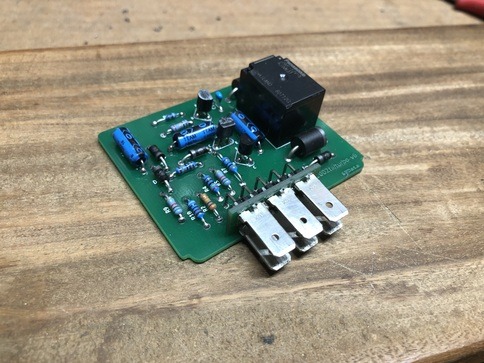
A lot has happened in the last few months. I've built a handful of cold start relays (v4). Great fun and have gotten to know several folks quite well as we worked through their cold start wiring systems.
During one of the troubleshooting efforts (one Tii had a starter that wouldn't stop, but only when the cold start relay was installed!) I moved on from v4 of the board to v6! This follows the design changes from Bosch. I'm not sure we will ever know the motivation behind the slight changes to the boards but I figured why not give it a try, perhaps it helps in this situation! Well, the starter run on turned out to be something else, not the cold start relay at all, but we all learned from it. And hey, I got to design another board!
Board v6 is basically the same as v4 except for the addition of three resistors and a diode + slightly higher capacity two diodes. Functionality is identical as far as I can see.
If you have a need of one, check out message under For Sale. I have parts to make several more, just shoot me a message!
~Jason
-
- 215
entries - 580
comments - 108592
views
Recent Entries
 Latest Entry
Meet (Bristol) Milo!
Happy 2002sday! Meet (Bristol) Milo! Rescued this little pup from the local SPCA.
No Recaros were harmed during this shoot ?? Be well, Be safe, and Be kind ? - 215
-
- 12
entries - 30
comments - 3207
views
Recent Entries
 Latest Entry
500 Mile Tune-up and suspension update!
Car is running great. Rick at North Bay Bavarian was able to adjust timing and HP is greatly improved from the first tune. The project is never ending but the car runs better than I would have expected. Pulls strong all the way to 6500. The Schrick 292 was a good choice for around town and highway balance. It's been a better than 2 year adventure with the Bristol 69' but I couldn't be happier with how it all came out in the end.
Also got the Ground Control coilovers put in all around. Really like the new stance.
- 12
-
- 20
entries - 7
comments - 4663
views
Recent Entries
 Latest Entry
Minor update
I’ve managed to fit a a new outer wheel tub, a new outer rocker panel, and a harvested trunk divider. I also have the quarter panel from the ‘69 for this car once it’s time. Rebuilt and powered coat trailing arms and long neck subframe were installed under the car to make it a roller again.
I also removed the engine/trans so I could get a better idea of how bent the front of the car is. It didnt look good from what I can recall.
I won’t likely touch this one ‘til the ‘73 is a runner driver again. That might take a while. Oh well. It’ll be there when the time is right.
Some day...
- Read more...
-
- 0 comments
- 20
-
- 17
entries - 22
comments - 23959
views
Recent Entries
 Latest Entry
It's alive!!
Long time no updates.
I eventually had the car shipped to Austin where Terry Sayther's got to work on it. Got it all up and running and I'm slowly, very slowly working on getting the rest finished up.
Finally got some hubcentric wheels put on last week (Corsa Velocita) and AC compressor and condenser in. Photos coming soon. Next up Restomod AC.
- 17
-
- 3
entries - 12
comments - 757
views
Recent Entries
 Latest Entry
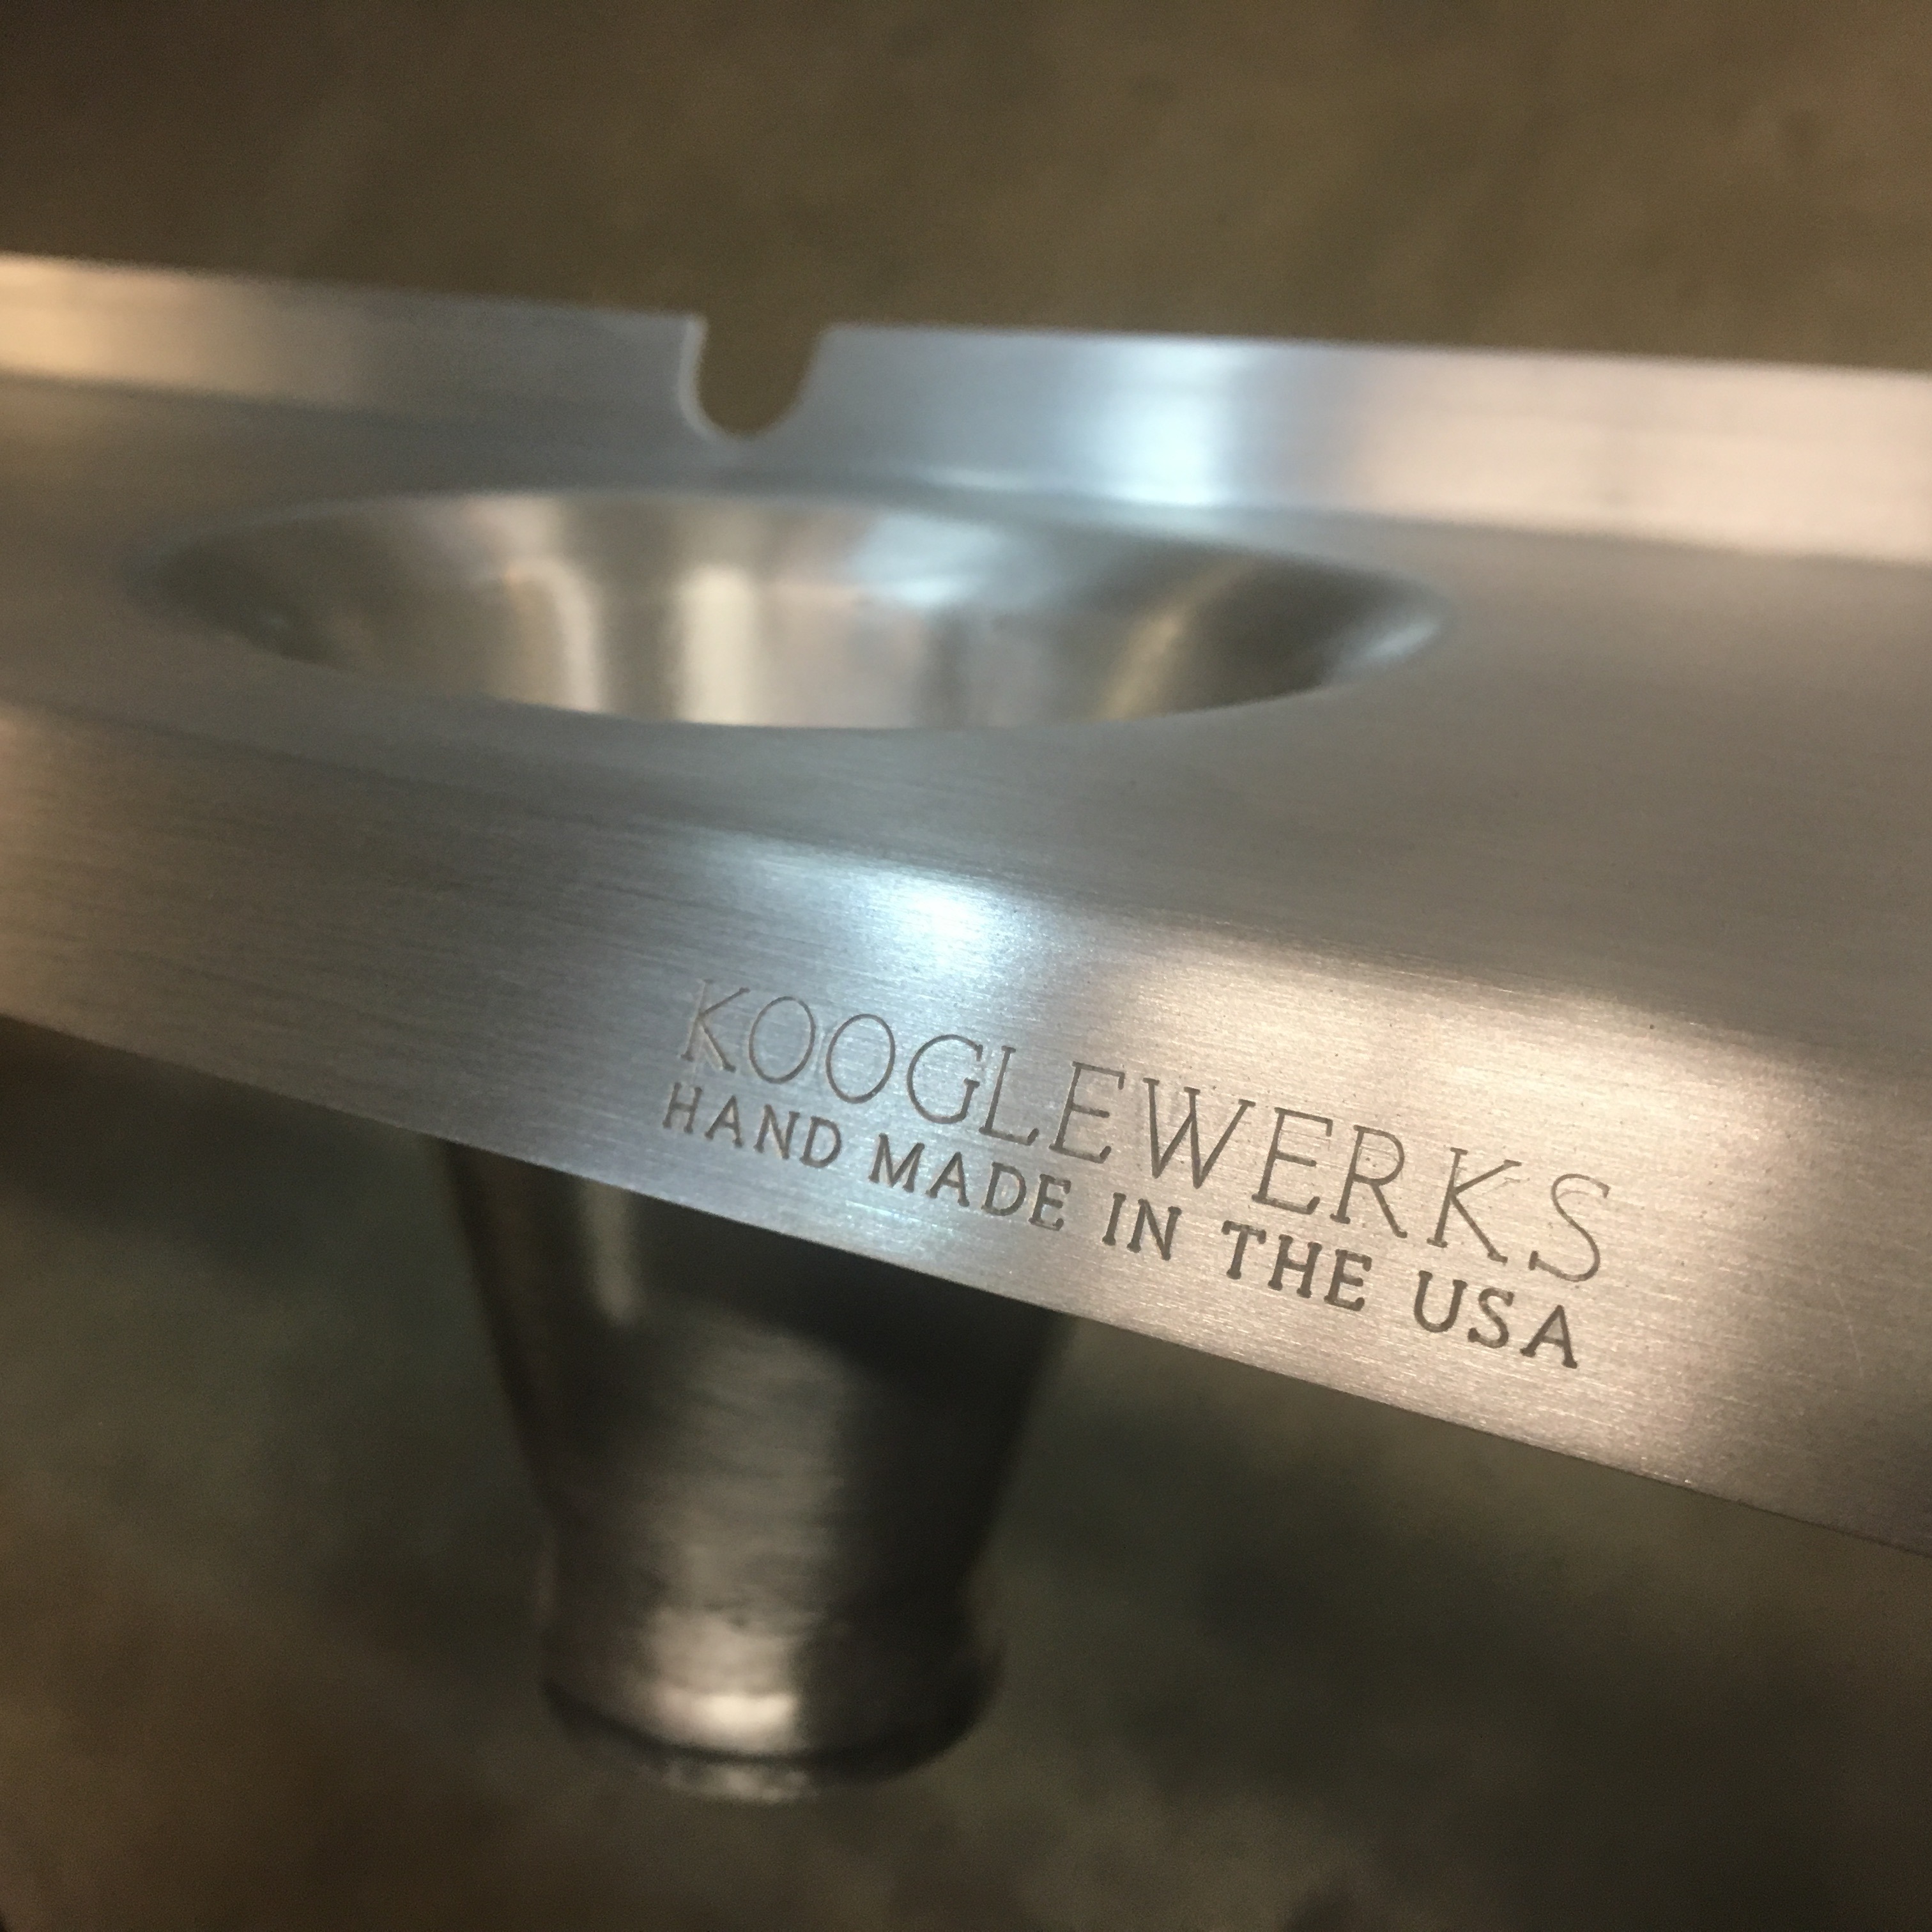
Paint, Steering, Gas
I’ve made some progress in the last couple weeks. I spent many hours sanding, masking, and then painting the car in my driveway. And then sanding masking and painting more. The color is called Light Aqua, from TCP Global. I am really pleased with the color. I did see the car used to be orange, white, red, and green all at various stages in its life.
I also received my Kooglewerks front air dam and tow hook/bumper delete/fog cover, and installed Hella 500FF lights. It took a while to get the wiring correct.
I finally got around to re-wiring the floor mount gas pedal from a 2013 Cadillac ATS. The new pedal feels amazing!
I also finished my steering changes. A new U joint to a 1.5:1 steering quickener to my quick release hub and eBay steering wheel makes up my new top end of my steering. The steering feels miles better, it actually responds now. Low speed maneuvers are mildly tough but no issue at all.
theres still much work to do! My handbrake is leaking brake fluid, so I need to address that and bleed brakes. The car needs a new windshield badly. I received a RAM mount today to help me run my amazon fire tablet diagnostics on the engine
- 3
-
- 19
entries - 79
comments - 8533
views
Recent Entries
 Latest Entry
initial review: "MVP" aftermarket nose panel
made a little video a while back after unboxing the MVP early model nose panel.
- Read more...
-
- 0 comments
- 19
-
- 10
entries - 39
comments - 4854
views
Recent Entries
 Latest Entry
Measure twice...
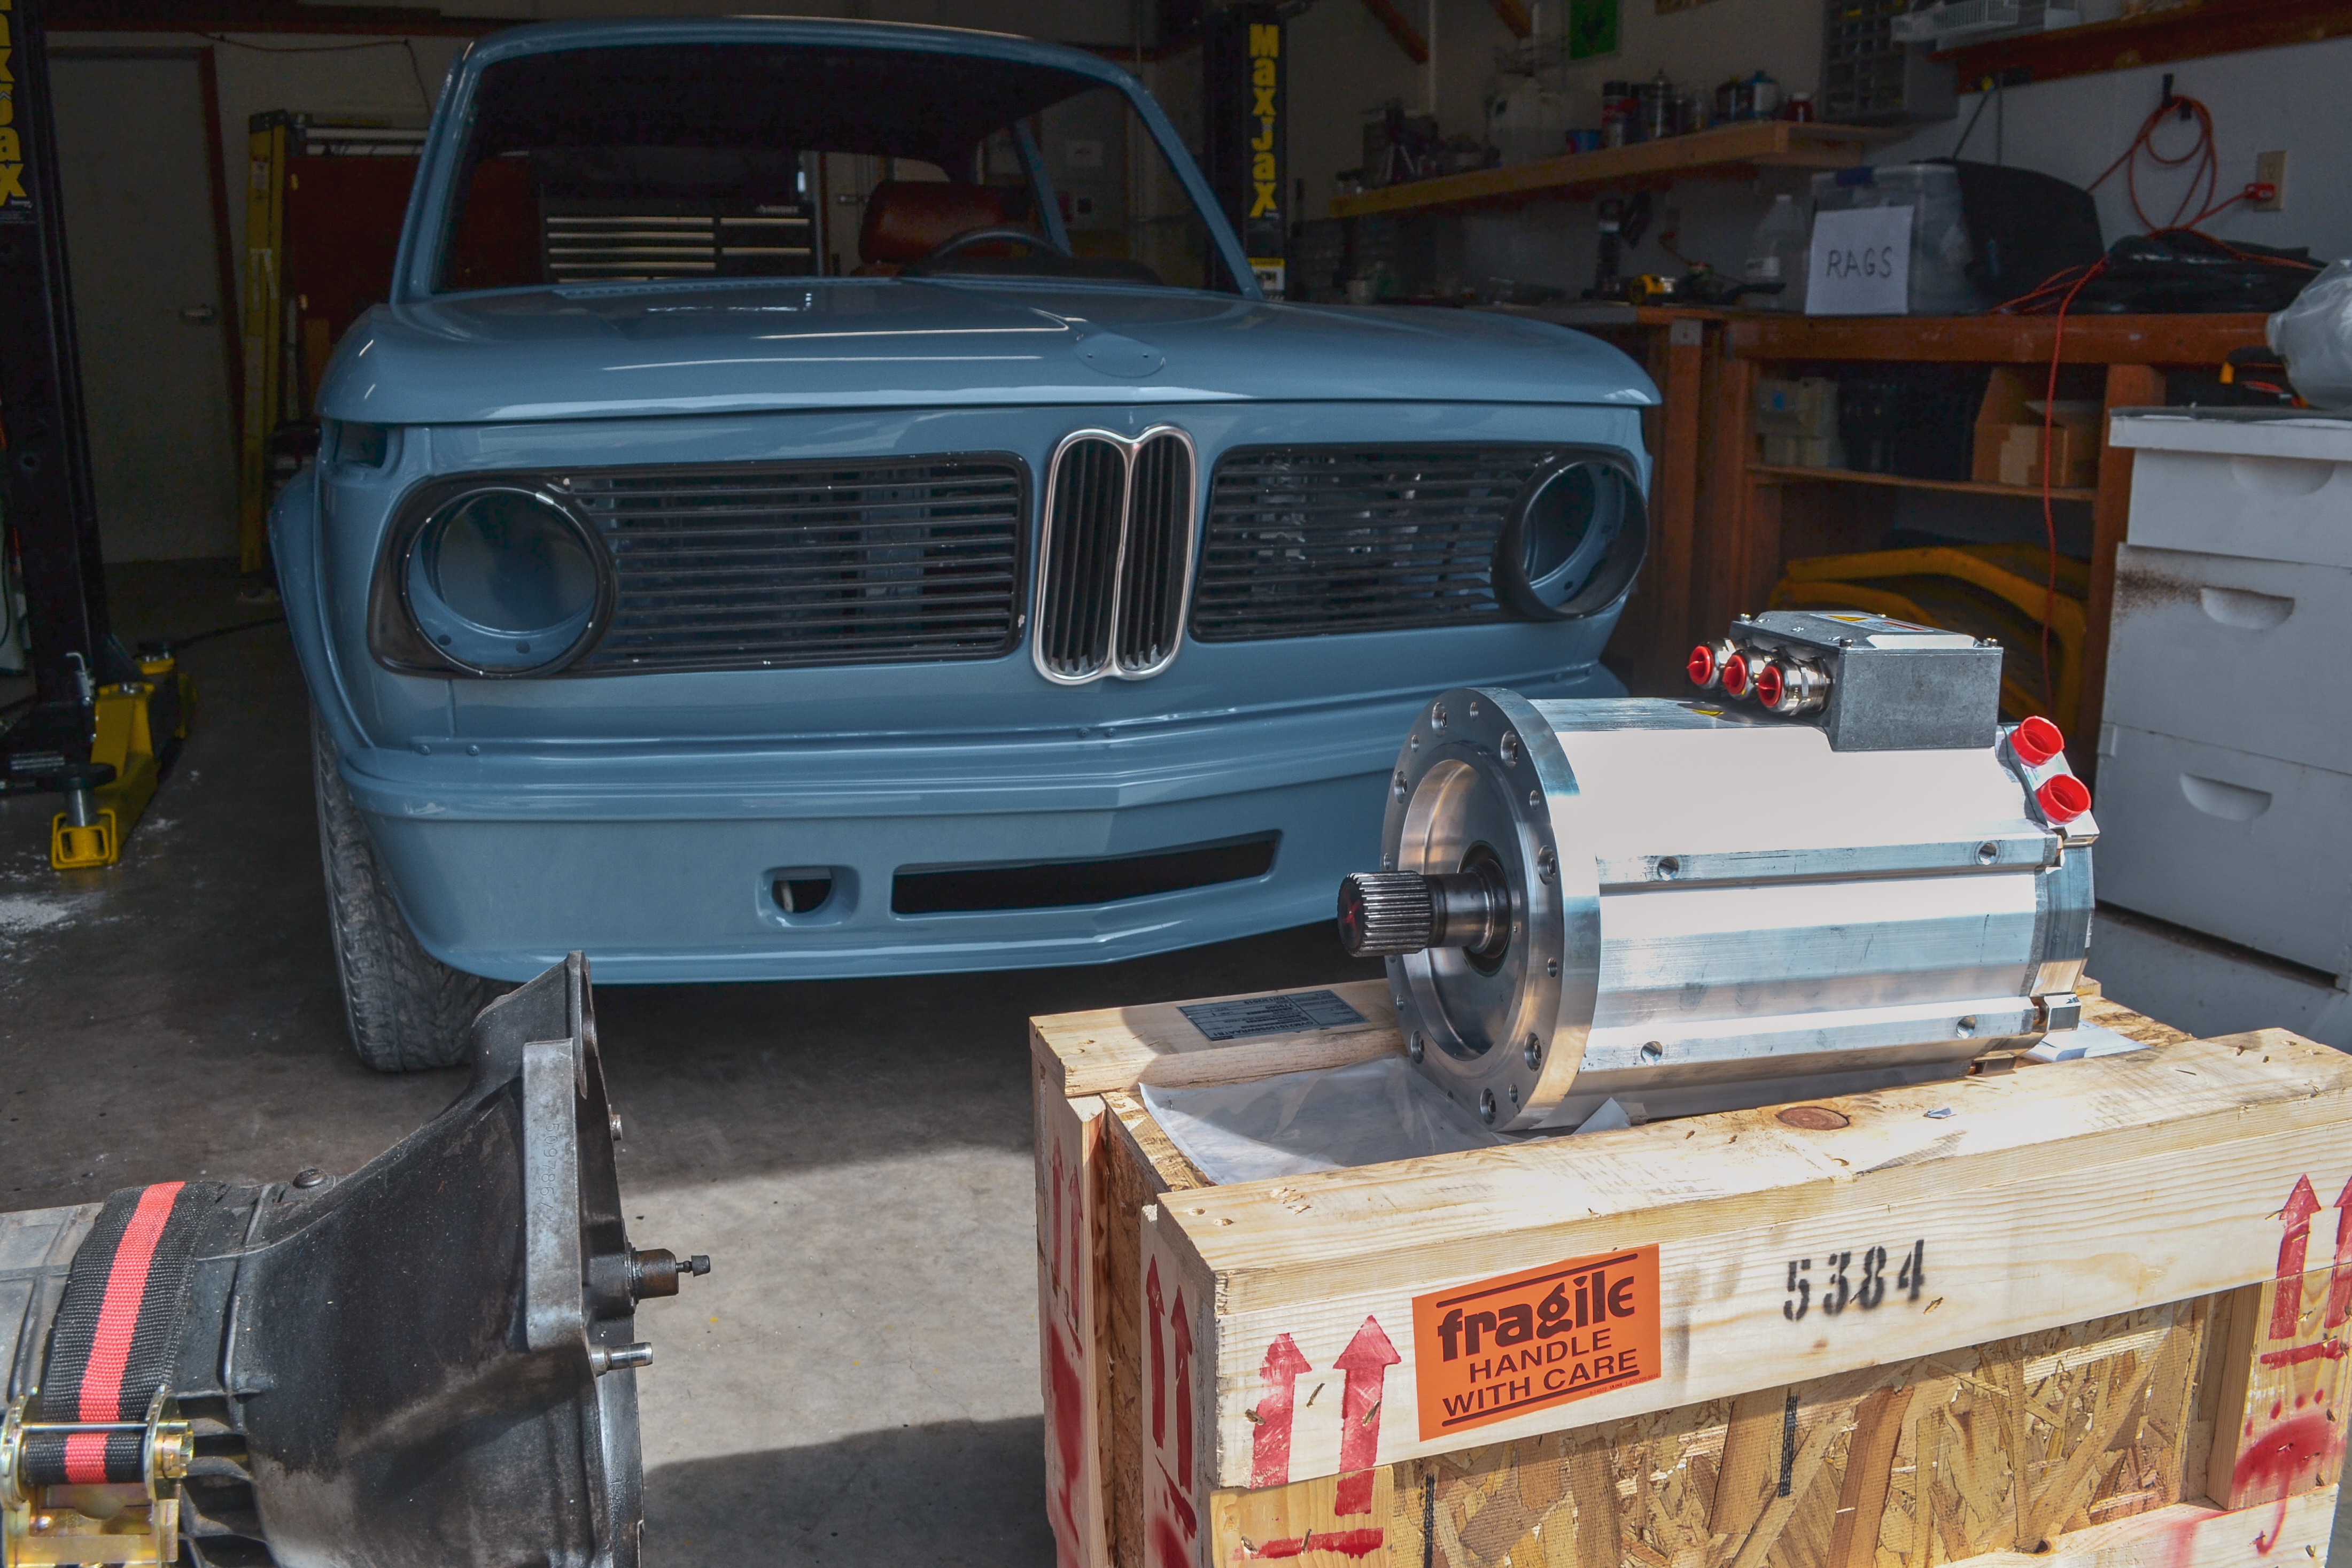
So I thought I was well on my way to completing my 4th battery for my 1968 1600-2 restoversion. Unfortunately, on closer investigation using the foam core mock-up I had built, we realized that the freshly installed rebuilt brake booster and master cylinder created a not-so-insignificant interference. The photos below show the basic idea of the front battery pack sitting under the hood, above the motor and transmission. When we previously checked this position, the brake booster was not installed... doh!
After drowning my sorrows for an evening, I started playing "what if" scenarios with the LG lithium-ion battery sub-modules. We realized it was really the width of the complete battery pack that was the problem, but we had some room to grow vertically if I could come up with another workable configuration. Part of my challenge in this new configuration was self-imposed. I am proud of the fact that I had managed to thermally couple the heat sinks on the cell module to the aluminum base plate of the previous battery design, thus using the entire aluminum enclosure as a heat sink for the battery pack, which would improve performance, reduce thermal gradients, and extend the life of this passively air-cooled battery. With a 90 degree rotation of the cell module, I'd need a new thermal sinking strategy. With more red wine (or a nice West Coast IPA - can't remember), one quickly emerged. I would rotate the modules 90 degrees on their long side and create vertical aluminum heat sink plates inside the pack to achieve the same thing as the top and bottom plates of the "short box" design.
Before we set off down this path, we smartly modified our mock-up to ensure this new configuration, which cut about 5 inches from the overall width, would work. And... it did! We gained room in all the prior interference concerns and were even able to drop the pack overall a bit.
With that confirmed, I set about designing and building the new enclosure...
Since there would be less pressure on the heat sinks compared to using gravity to press them to the thermal plate, I decided to use a thermal gap pad in the interface to ensure good thermal conductivity between the cell module and this plate. It's the bluish-purple pad below. This made tolerancing my box build a bit trickier and in the end, I used some spacers between two of the cell modules to take up some gap and maintain pressure against the sink plates.
Here's a shot of the final configuration. The one section of 80/20 that runs down the pack creates a nice 20mm gap that allows me to run the BMS and CANbus cabling from front to back as these cell modules have voltage sense connectors on both ends as they use double-ended cell terminals.
The cell monitoring boards mount to the back of the cell modules and are more accessible through the back cover over the short box design should they need servicing in the future. Quick check was done hooking up 12Vdc and CAN to the master BMS and checking on the display and laptop that we've got good communication with all the cells and thermistors. All good!
The completed "tall box" battery. The handles will help for installation. They can be left in place or removed once I've got the pack installed. Haven't decided on that detail yet. I also paid extra attention to sealing this enclosure during the final assembly as it will live under the hood. All of the panels have silicone "gaskets" and the connectors are fully sealed. Should water eventually find a way in, the terminals are coated with dielectric grease and power terminals covered with moisture sealing mastic.
Here's a comparison between the tall box and short box batteries. The tall box was a bit fussier to build, but is a bit more efficient in use of space and materials. In the end, it's helpful to now have a couple of different battery configurations for future builds and various space constraints we are likely to run into.
I promise my next blog post will have more "car stuff" than batteries...Onward! Thanks for reading.
-Brian.
- 10
-
- 21
entries - 99
comments - 4488
views
Recent Entries
 Latest Entry
Let there be (driving) lights!
This past week Patrick and I installed the last item on the Phase 1 list: driving lights. Which was way easier said than done.
If you recall I bought an IE light bar and Patrick had to make some minor modifications to it so it would mount correctly.
But the more I thought about it and the more I looked at the picture of the test fit, it just looked really busy between the bar, lights, and bumper guards.
So I decided to ditch the guards and buy some bumper cover clips from Blunt to simplify the front end. That turned out to add a lot of unexpected, to me at least, work to the installation.
I didn't know this because I didn't help install the bumpers previously, but the ends of the clips that come with the SS kits actually need to be bent over and under the rear of the bumper, then slide under the bolt that connects the end horns to the center section of the bumper. This is way easier to do on a workbench before the bumper is installed on the car.
But in my case, the bumper was already on so we decided to do this in place. Ugh.
While I love the SS bumpers kit I bought, and the new sets fit way better than the earlier versions, they still require a lot of wrestling to get them to align and mount correctly. Essentially, you need to pre fit all the pieces and bolt them together loosely, then slowly push/pull/bend the parts to get them to line up correctly. And then bolt them in place before they move out of alignment. Again, much easier to do on a work bench.
Since mine was already on, we kinda needed to do this all in reverse. On our backs. And reaching up in awkward angles. While trying to bend the clip ends over the loosened bolts and pieces - and remember the clips are made out of SS and are really hard to bend.
F-bomb. F-bomb. F-bomb.
There's a reason Patrick charges a good fee to install these damn things. It's a pain in the ass.
Then, after we got the clips installed and the bumper bolted back up, we had to loosen a couple of the bolts again to install the light bar and the driving lights.
But as has been the case on this build, the tedious work paid off and the bar and lights really look great. I'm really glad I went with the clips instead of the guards.
Note the bar. It polished up really nicely. Patrick went back and added end caps and cleaned up all the welds. I just love that kind of detail.
- 21
-
- 5
entries - 2
comments - 1045
views
Recent Entries
 Latest Entry
Grilles and Doors
The chrome work around the outside really helps bring out the personality of the car, the grille being the centre piece. The T-bolts holding the chrome pieces at the end points were so rusted that they were no longer usable so I had to make them up by welding little bolts to pieces of drilled metal plates. There are also 2 hooks on the side of the grilles next to the headlights which pull the grille flush, one of these was missing and the other was broken so more fabrication. The spares car is a 74 model so I couldn't raid that for these parts, looking at the parts in the different year models I came to the conclusion that for the later year models they've done things to make assembling the cars quicker but not necessarily making them stronger and longer lasting.
Then I started on the doors which actually have a fair fews things on them which need to be adjusted properly. Up to now I've had this big box of all the window winder pieces, locks, door handles and quarter windows sitting in the corner of the garage and finally I've got to the stage of looking at all these pieces and trying to make some sense out of them. The previous owner of the car took it apart to restore it and that's how I got it 12 years ago and now it's all coming back together, I'm so thankful of the PO who sold me the parts car as well, so I have not only spares but also a reference to work with. This was invaluable with the doors because there is a lot going on.
I started with the passenger door, mounted everything on it before mounting it on the hinges, but for the second one I put the empty door on the hinges first and then added things as that made it easier to first adjust the position of the door before all the other things go in. The window winder mechanism has a lot of adjustment points and took some fiddling to get the window to go up smoothly and stop at the right height, I should've read all the books before I started but eventually I got the passenger-side door closing and the window winder working.
Thinking now that I'd done one, the second one should be easier but it wasn't to be. After mounting the driver door it became clear that no matter how I adjusted the door hinges, the door would not open properly because its edge would collide with the edge of front side panel. I was getting so frustrated that I was considering sanding down the edges of the front panel, luckily I didn't do that as I noticed that the edges were folded over and sanding them would open them up. I had a closer look at the passenger door and noticed that the door was about 1-2mm in from where the front side panel was and this allowed it to slip past the edge as the door was opened. Somehow the driver door hinge mounts had deformed over the years and the door was flush with the side panel and as soon as I tried opening it, it would collide with the side panel and not open.
First thing I tried was undoing the bolts for the side panel to see if I could make it sit a mm or two out, but there didn't seem to be anyway to adjust things there so the next idea was to insert some shims between the hinges and the door mounts which would make the door sit in a bit. I used 3mm pieces of aluminium with holes drilled for the mounting bolts. This worked great and the door opened and closed properly but not before I had chipped a fair bit of the paint off the various edges and corners, so out came the brush and the touch up paint.
I missing one of the door mouldings so I have to see if I can buy one locally, or I might have to go with the stick-on stuff, wonder how noticeable it would be to have different body moulding on the two sides of the car?
There are still lots of things to do on the car but they are getting held up by the headlining. The headlining was unusable out of both cars so I am going down the path of making my own one! The material has been ordered but has been delayed because of all the lockdowns, might be a good time to get the sewing machine working.
- Read more...
-
- 0 comments
- 5
-
- 22
entries - 38
comments - 4372
views
Recent Entries
 Latest Entry
It only took a year, but Polaris is back from paint!
When it rains, it pours.... I close on a house down in South Carolina on Friday so things are hectic here in Pennsylvania as I prepare to renovate that house, sell this house and move over a dozen cars to someplace where I will be able to drive them more than a few months a year. Out of the blue, my paint guy calls me. After 10 months at the paint shop, Polaris is DONE! Holy crap! I don't even have a space for it right now! I shuffled some things around and we loaded it into a warehouse space. It all happened so fast I only had time to get one image. I WILL get to it...but it might not be until I finish building the garage addition at my new place....
- 22
-
 Latest Entry
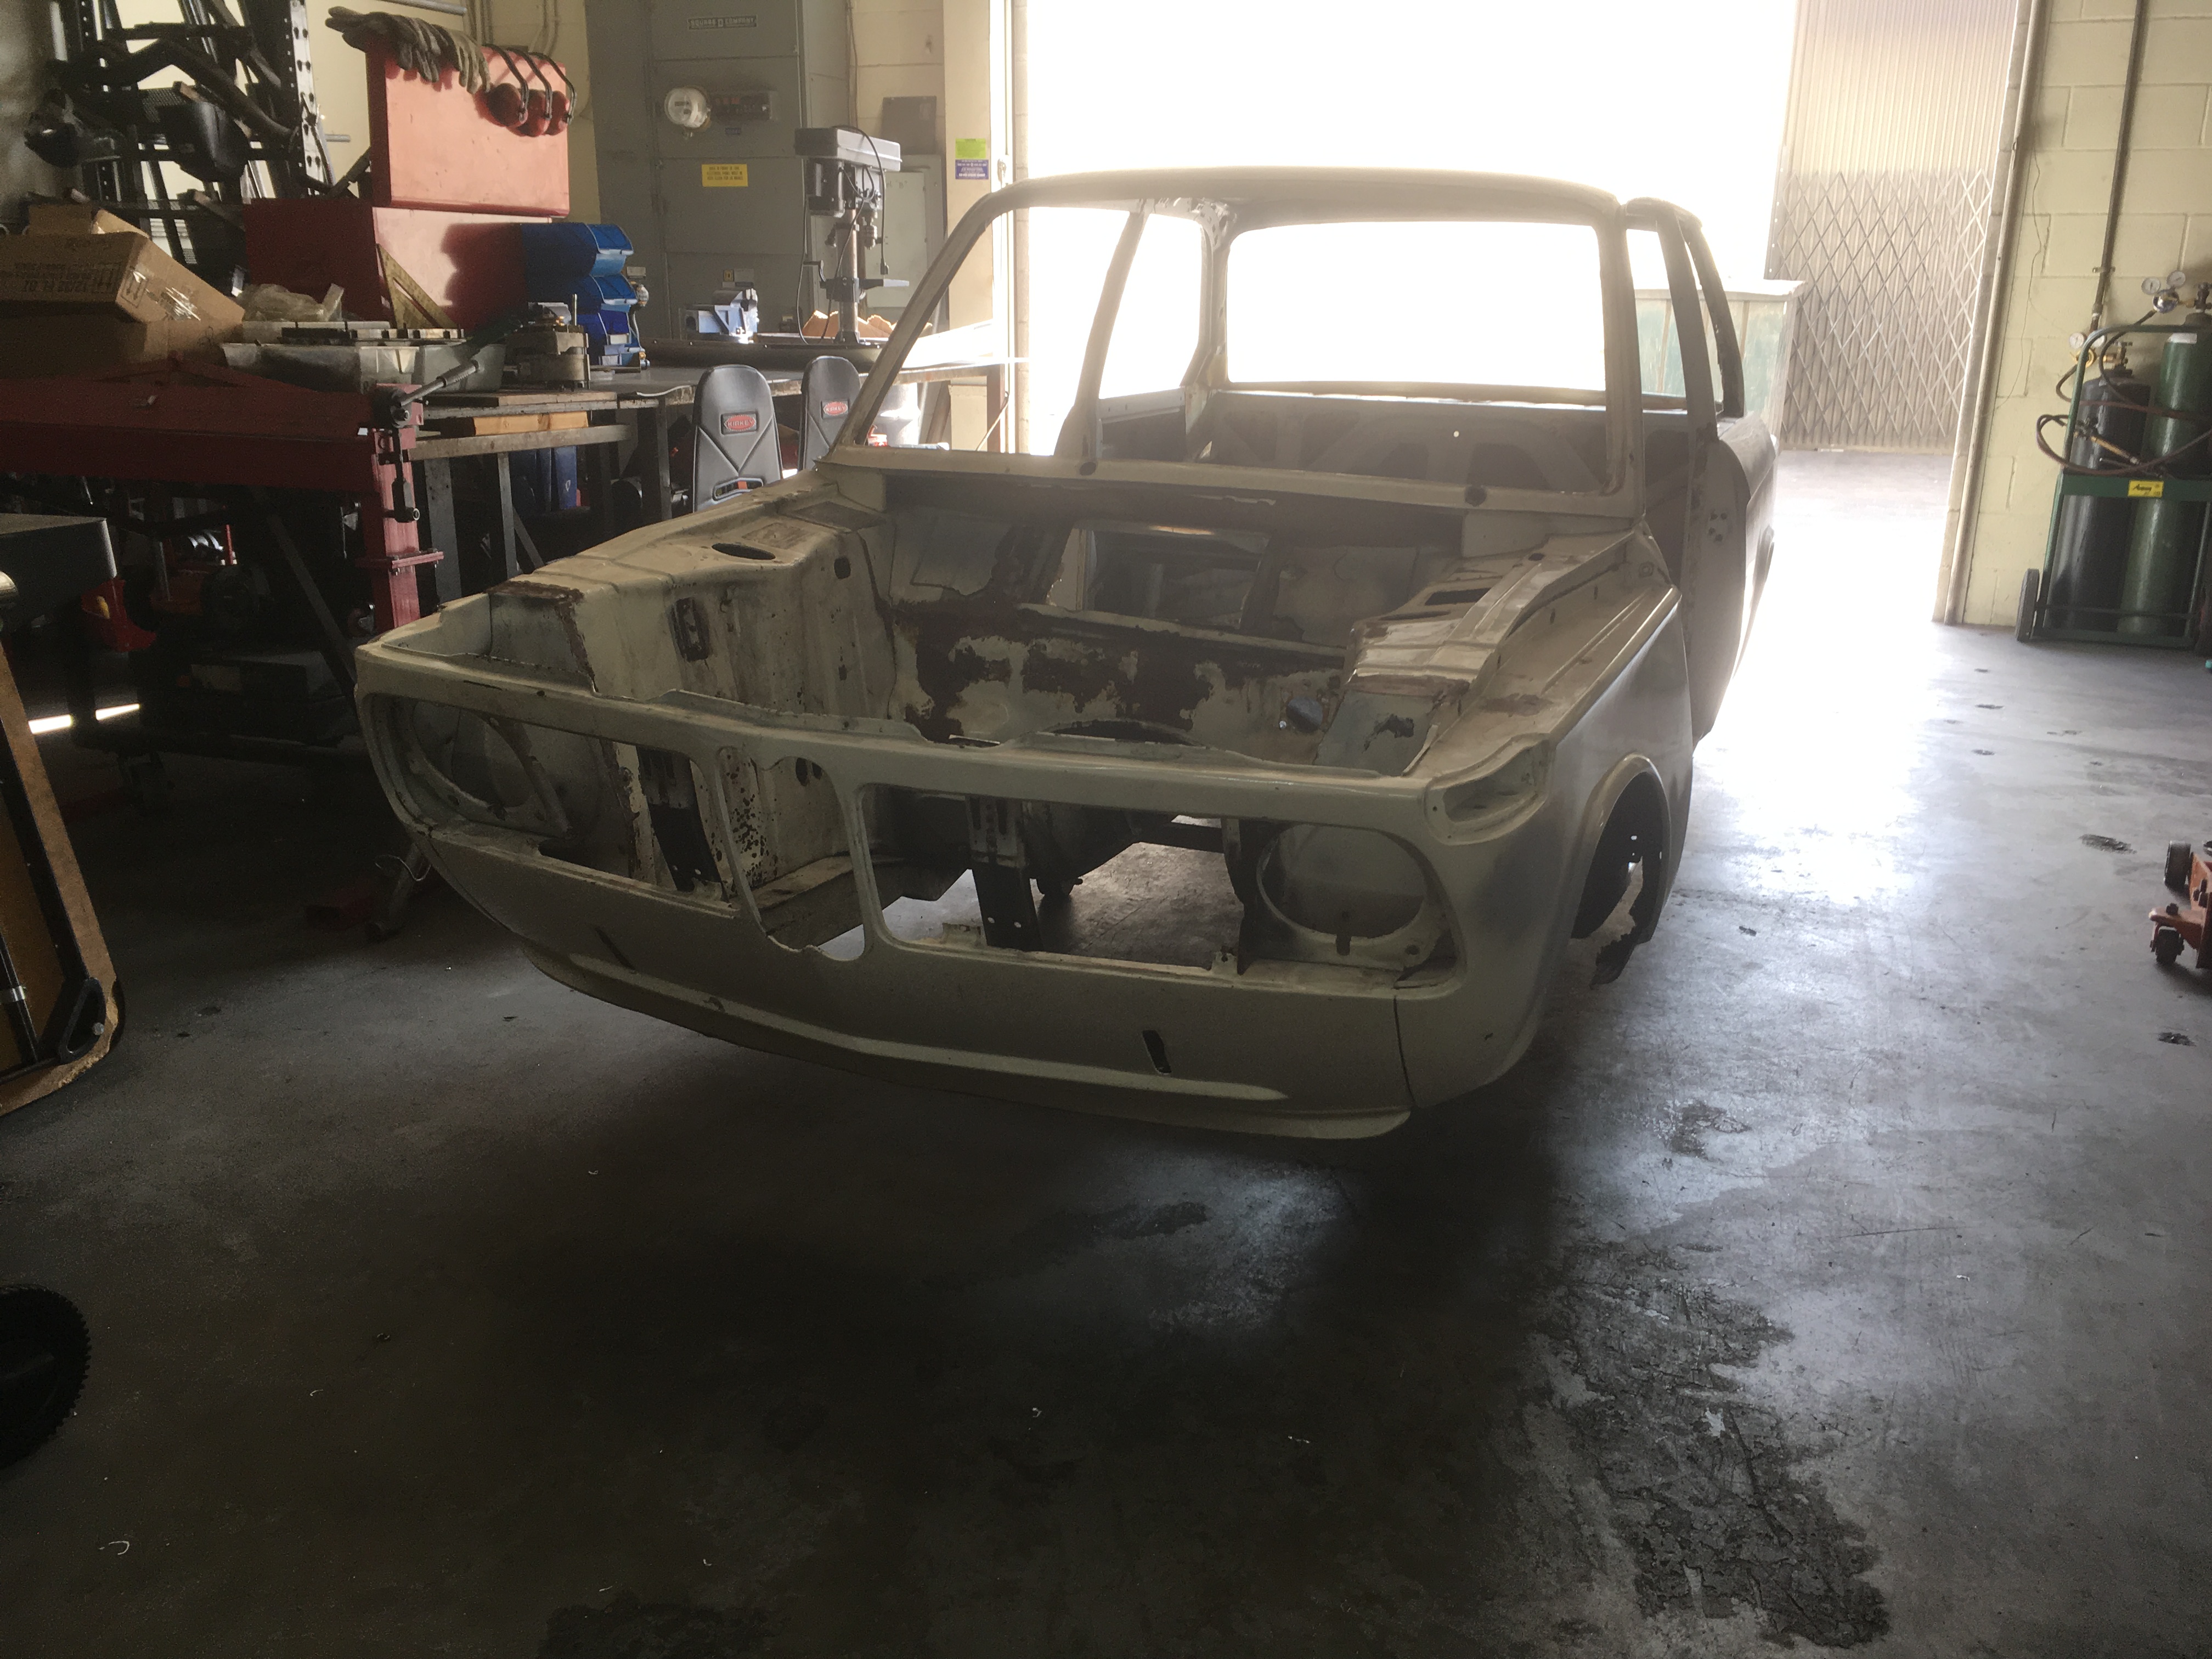
Just getting started
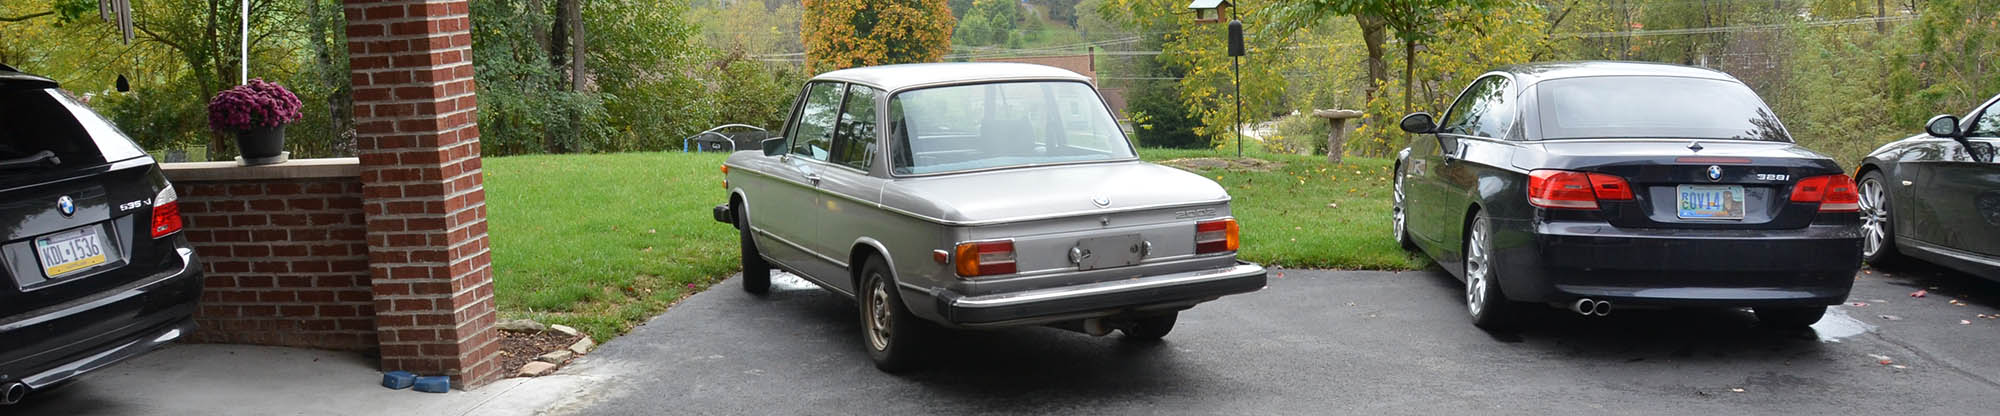
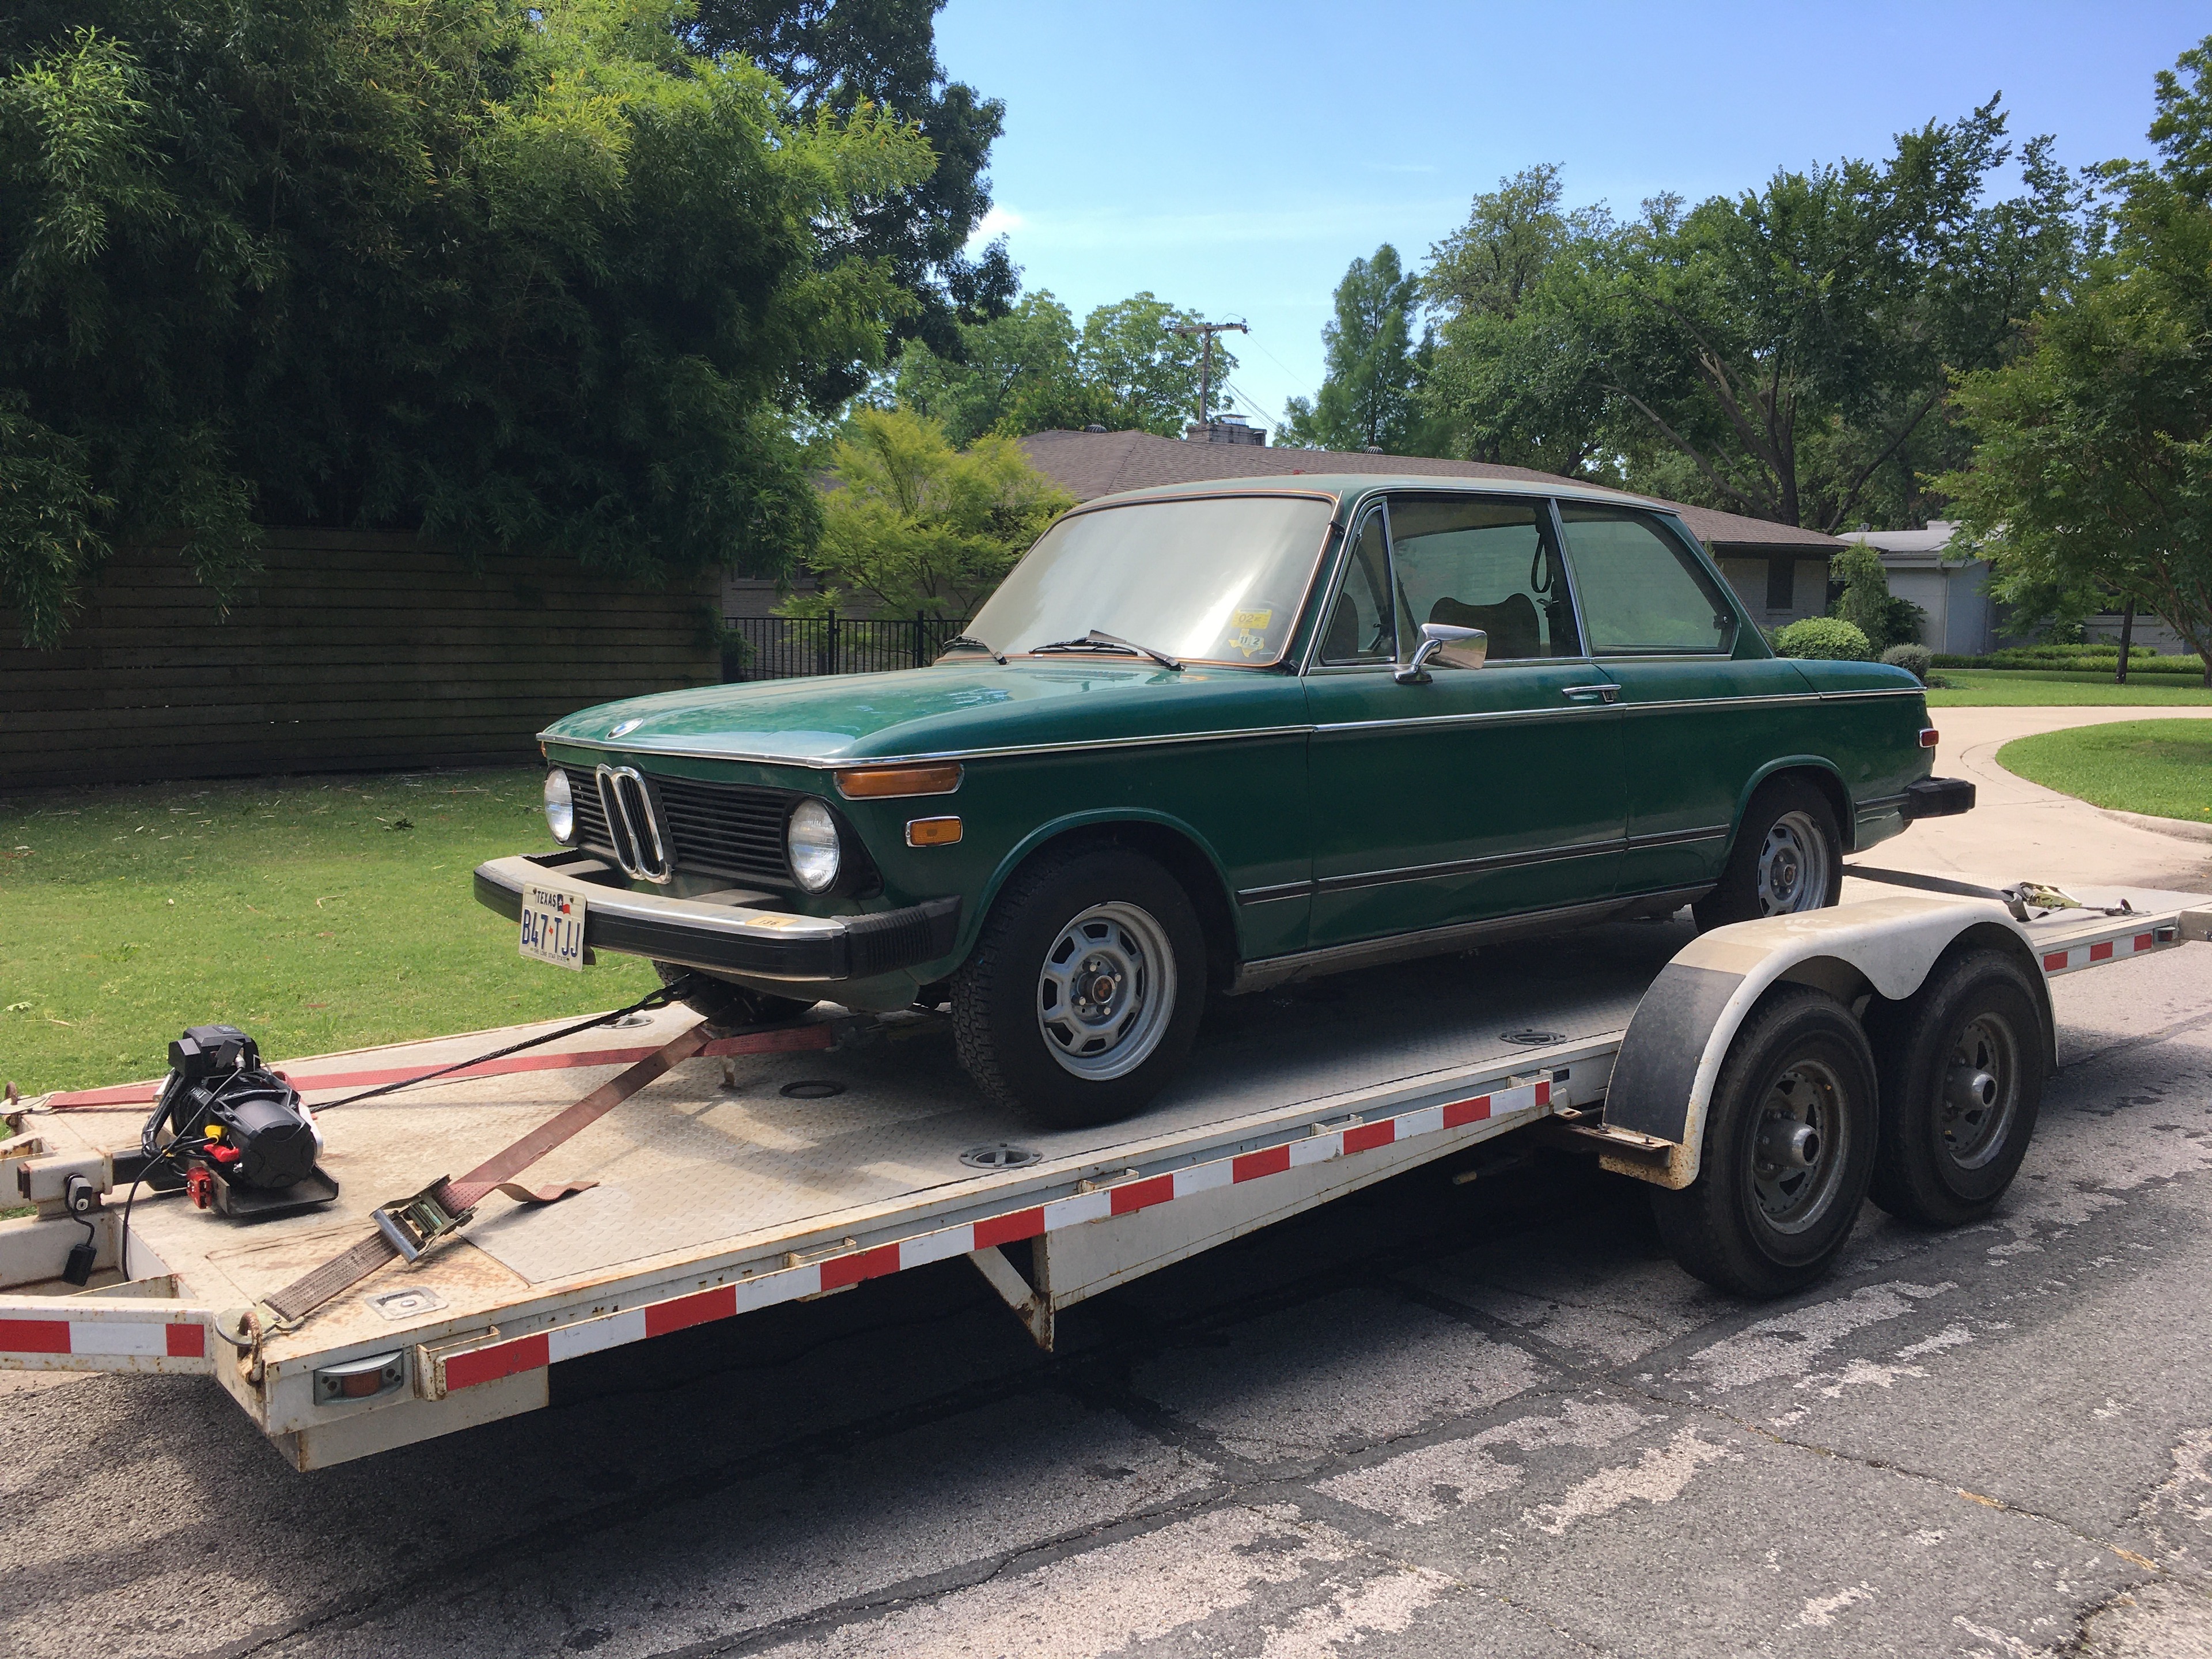
I've had 2002s on my radar for a while, but they never seem to be around in my circle of BMW pals.
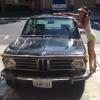
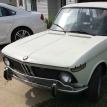
This one turned up for sale near me. It's a low mileage, zero rust, 1976 that was driven by a little old lady to the golf course and back. It's been parked since 2002.
I'll get it up and running and see where it goes from there.
Photo of the as-found condition.
-
 Latest Entry
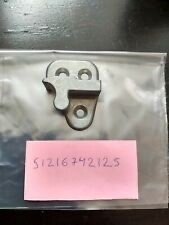
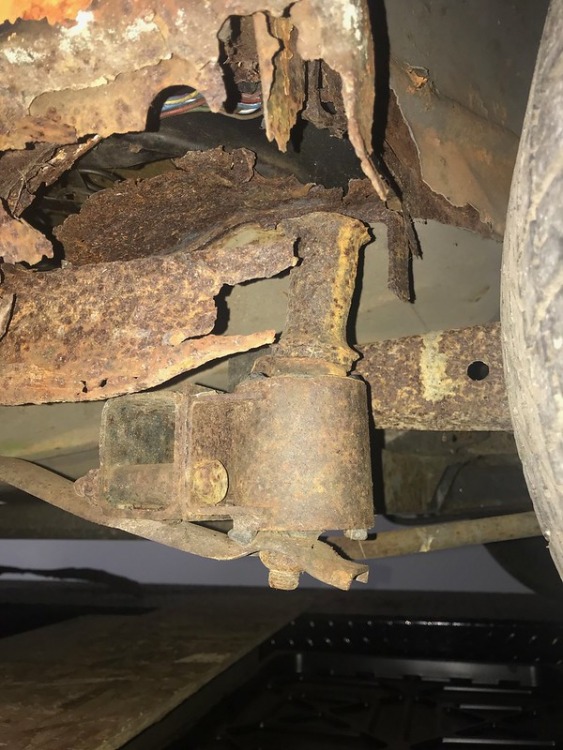
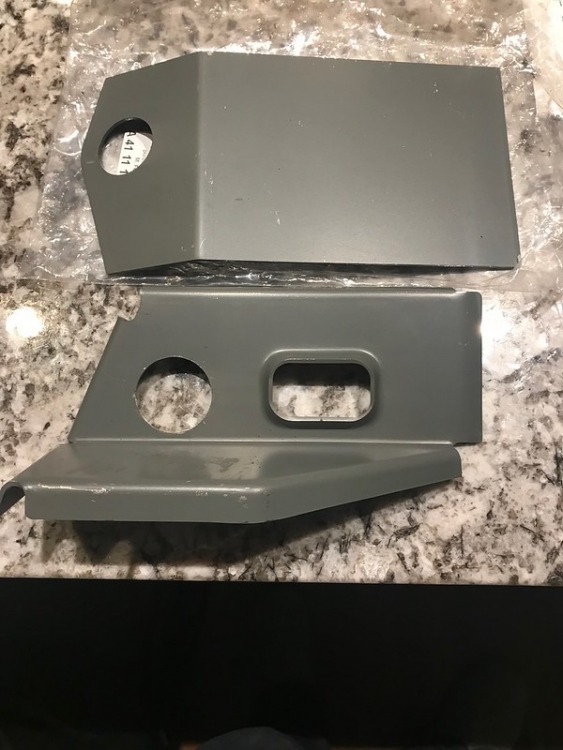
Rear Subframe Mounts
This is a bit out of order in terms of what's been worked on but worth a post. The second-worst rust on the car is the rear passenger side's subframe mount. The upper plate is mostly still in tact, but the lower one doesn't exist at all. And the sill is hot garbage. Inner sill is flat 16ga but it gets a bit more complicated as you work your way outwards. Car came with replacement outer sills suggesting it was bad for a long time.
Digging through this site over the winter I found a couple threads on this subject. I ordered a fairly large collection of parts from W&N and their replacement panels for these areas were part of that.
Reference Thread 1:
Reference Thread 2:
W&N Panels
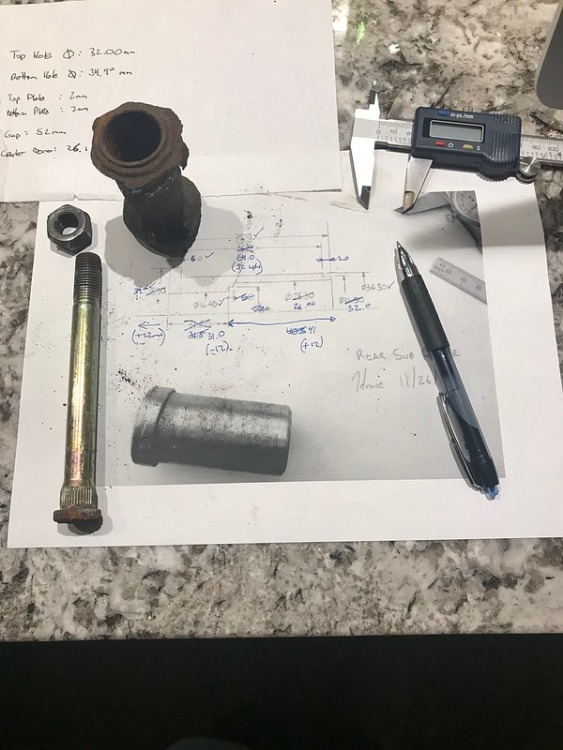
Measure twice and check the reference. Turns out the W&N panels are about 12mm (1/2") shallower offset than the originals from what I can tell from the references and rusty part I have left.
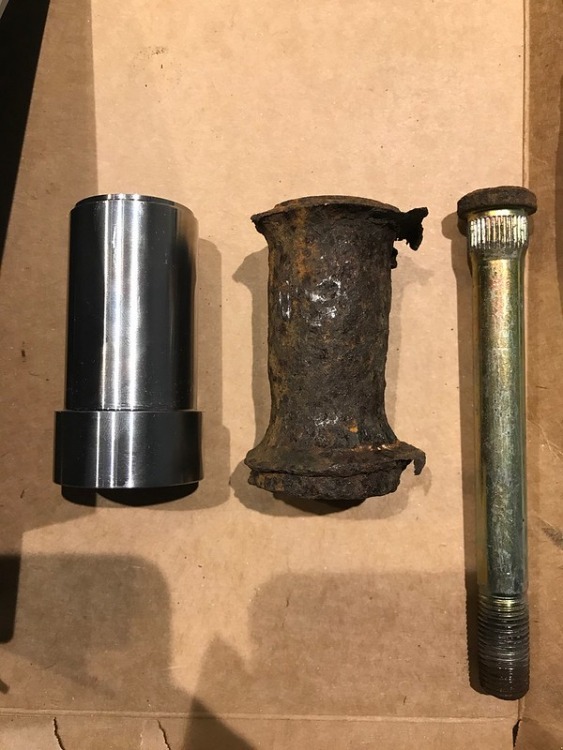
In to CAD and off to the machine shop
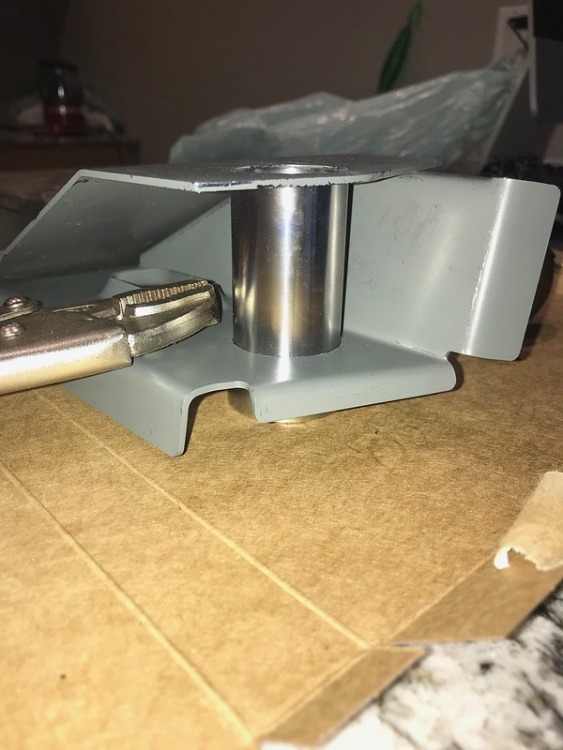
Back from the machine shop & fit-checking. Here you can see that the offset of the lower panel is different from the original. Have to move the step in the bolt capture to keep the subframe mounting surface in the correct place. Someone cleverer than me could've put a shim here instead for more suspension geometry adjustability.
Bonus photo for the next thing I'm working on. Stay tuned...
-
- 15
entries - 22
comments - 3506
views
Recent Entries
 Latest Entry
Sharing Youtube
I had to share even tho it’s four years old. Intriguing........
- Read more...
-
- 0 comments
- 15
-
- 10
entries - 6
comments - 1964
views
Recent Entries
 Latest Entry
Three whole years later.
Here you go ?
Next up, engine and coilovers.- Read more...
-
- 0 comments
- 10
-
- 8
entries - 14
comments - 3479
views
Recent Entries
 Latest Entry
Alpina Gear
Alpina Automobiles Germany has steadily been adding some of their old school stuff to their on-line store, they just did add '70's 'Deko Set' (s) with the green/blue stripes. So much better than all the copy cat crap out there, not cheap at EUR 385,00 but whatever. You get what you pay for you always do. The also added these 'Deko' T-shirts that have my car on it in its 1975 paint scheme. Going to have to get myself one or two of those I think.....
- 8


.jpg.30093a2b8c9b217b16f5faa2990b1ec7.jpg)

.jpg.f7725ac04274507b229e4024c708500a.jpg)
.jpg.2b369b121234293e63473b1758a2ebe6.jpg)
.jpg.c9cc70bdd2980060636a40e99a9648bd.jpg)
.jpg.1f05a04fadfcd572c9937af6058b2bbb.jpg)
.jpg.e84cb9a8ca81a9de7c00f7bc631be918.jpg)
.jpg.5c2d142871fced6bddae1a7d786f77cb.jpg)


.jpg.11c3807002434e5fb4ba084a0ea85d77.jpg)


.jpg.b0e041001689775a01fe315ae8761617.jpg)


