
Blogs
Our community blogs
-

 Latest Entry
Intro
So yes , purchased through offerup and shipped to where I live in San Diego for $1095 , this is it. It has seen better days but I have seen worse and I am already eager to start the transformation progress . Original color Agave Green , Has a 5 speed (possibly g245) , Complete m10 , only thing is it doesn't run , and today discovered does not have a gas tank . Given the amount of bodywork and other things the chances of this thing driving again soon could definitely wait ; so the motor and transmission will definitely be coming out once my m52 for my e30 is off of the stand and the car is ready for Bimmerfest '19. That way I will have a lot more room in the garage for this thing and all of the parts that will be dropped off here soon . I do want to keep the M10 and have a set of Italian weber 45DCOE carbs to mate with an OEM intake manifold plus cast velocity stacks with foam opening covers on them , I want a full rebuilt m10 with raised compression , nice flowing head with 292-304 schrick cams .
First things are first , Tail panel/under section plus quarter panels are going to be cut out and replaced. The person I am getting the body parts from thankfully had a great condition tail panel/under section and quarter panel all cut out together off of another 02 , Should be getting those dropped off this week along with good fenders from a 1602 , a nose piece looking better than mine that will be re-skinned with either a walloth or jaymic nose skin . It happens to have a good trim delete which I am fine with . Fix any dents , san to bare metal , undercoat and paint interior since it is already bare , with zero to little even surface rust , not even where the pedals are .. so we are looking good so far .
pictures
-
 Latest Entry
FLEXSEAL ... Here It Is!!
After a 17yr hiatus from owning my last 2002 (sold on 02/02/02)...I finally obtained a project car. A 1976 2002 - Pastellblau, 4spd, Behr A/C ...found in SC....Most all original paperwork from purchase included....History from Dealer in Tennessee....1st Owner in Atlanta, GA. Can a high travel lifestyle enable me to resurrect this vehicle?..Let's see!!
Many challenges....the name "FLEX" Comes from various patches of FLEXSEAL from previous owner to patch holes in roof (sunroof plugged/leaked/frame rusted) Amazingly that's the only major rust ..the framerails, floorpans, shocktowers, rockers are rust free. The car was originally an Automatic...converted at some point to a Manual 4spd. Car barely runs...body & Interior needs full resto...yeah...probably more of a project than I should take on...but i'm game...in theory.
Today (02/02/19)...I pull the car from the trailer....can't crank it for more than 5 seconds....clutch is inoperable..and can't make it rolling into the garage....well...off to a start of sorts...hahah
-
- 3
entries - 16
comments - 1330
views
Recent Entries
 Latest Entry
• More BMW 1600ti Parts Arrive-Car Off To The Shop!
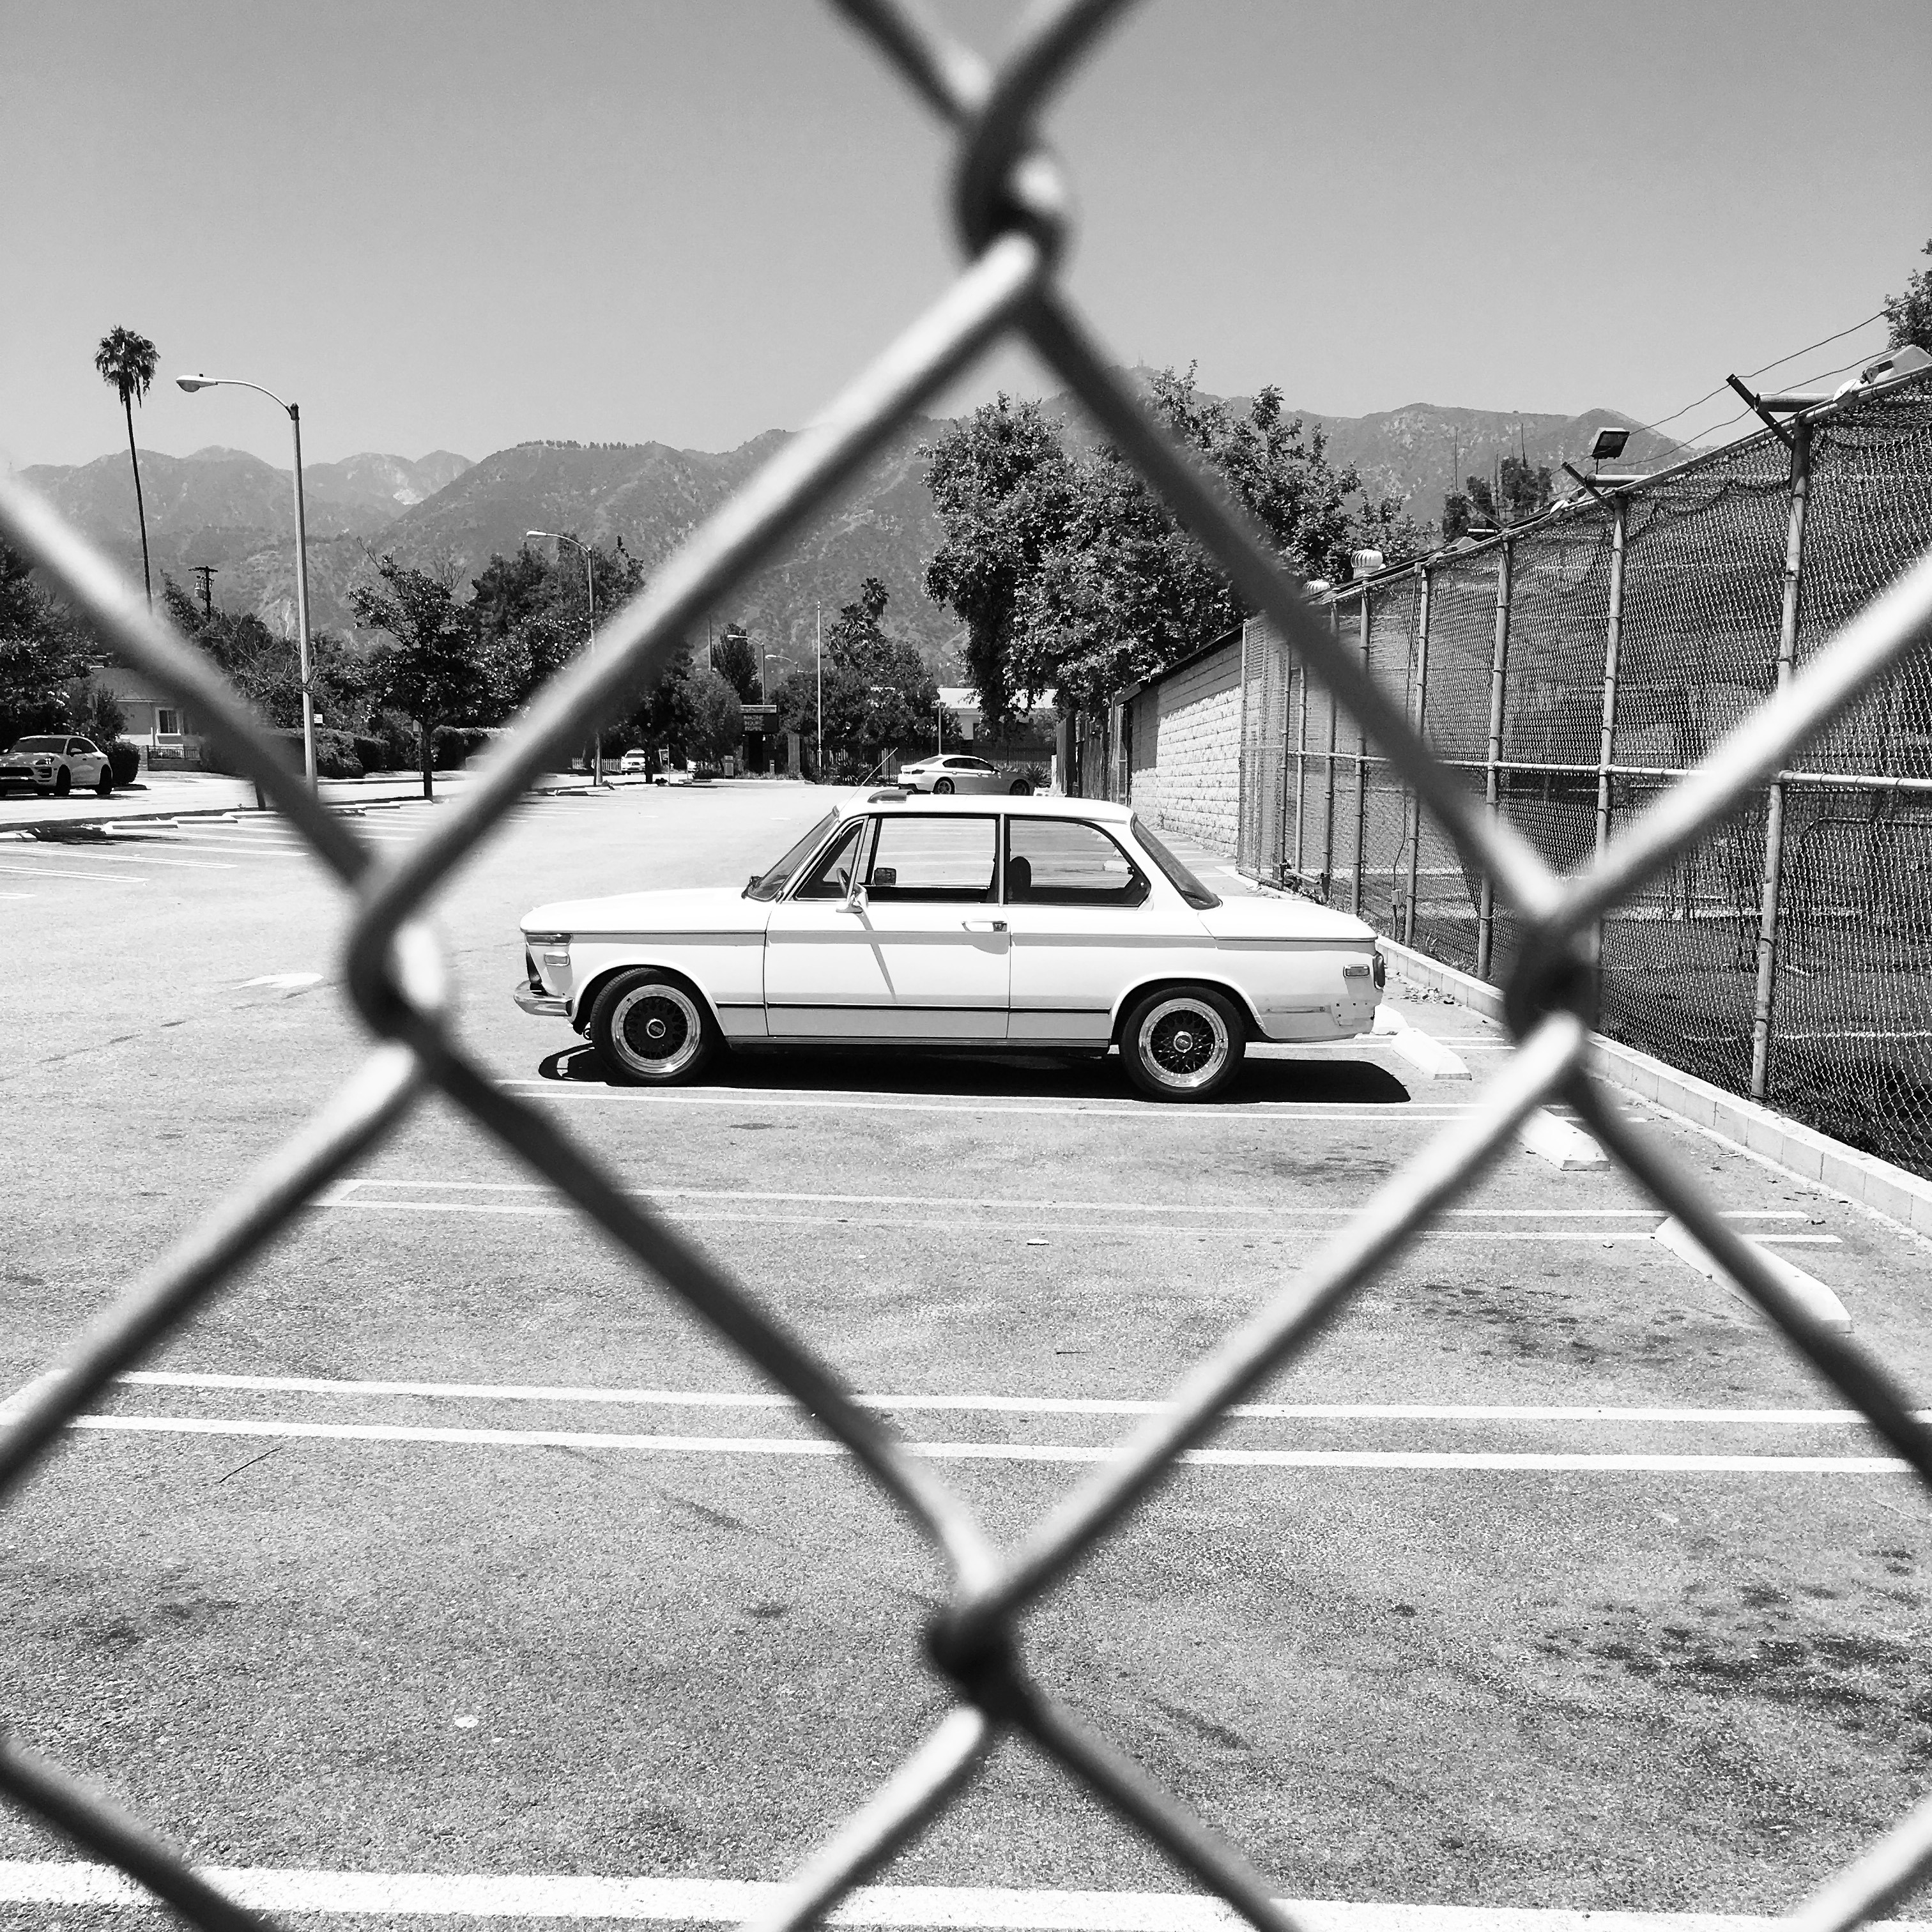
Most of the parts have been gathered for the project (or at least a critical mass), and yesterday the car was off to the shop. My mechanic is about a 45 minute drive one-way from our home, and with no one to help with the shuttle, I loaded the car on my trailer for delivery. (Photo 1 below).
Upon arrival at Richard Rushton's shop in Puna, Hawaii, I am reminded of why this fellow is popular among Big Island vintage sports car enthusiasts. My car got put in a side garage, because his main work area was taken by a beautiful, Meissen Blue Porsche 356 "C" coupe, in for regular maintenance. The car belongs to a friend of mine, came from the Willhoit stables in California, and is stunning (see Photo 2 below).
While swapping cars around, Richard showed me his retro-mod Austin-Healey Frog Eyed Sprite. It looks tame enough, until you tilt the bonnet. The motor is from a 1977 320i, with engine mounts, oil pan, pump, and oil pick-up from a 2002 320i. Twin Weber 32/36 progressive downdrafts provide the atomized gas. The motor has a Delta camshaft, and BMW performance exhaust system. The brake booster set-up is Fiat. The transmission is a five speed from a 1981 320i, and the car has a 3.64 differential. First gear winds to 40 mph, 2nd gear 70 mph, 3rd gear 90 mph, 4th gear buries the speedometer at 120 mph, and Richard says fifth gear is too fast for driving! (see photos 3, 4, 5, and 6 below)
New parts for the 1600ti vary from used OEM to what is available. Conner Elkington at Vintage Autobahn came through with the proper, angled velocity stacks for the Solex PHH 40's. While realoem.com does give part numbers for these stacks, I found (as did jgerock) that the numbers are not embossed on the stacks, only "L" and "R" on each part. Photo 7 shows a picture of the new (old) stacks. Thanks to all for helping with the search. Conner got these stacks from a set of carburetors that were on a 1600ti at some time, but I suspect the trumpets are the same for 1600ti and 2002ti.
Rocky Srl, the eBay Solex parts seller in Italy (eBay user name alfa 1750) came through in top form with all the carburetor parts I ordered. The plan is to convert a set of Solex PHH 40's, now set up for a 2002ti, into all the proper jetting, venturi, and rebuild requirements for this 1600ti application. I got two complete rebuild kits, plus main jets 120, pilot jets 50, idling air jets 100, and 30 mm venturis. The service was fast from Italy, and order complete. I'll post later as to how these parts actually work out in my carburetors! (See photo 8, below).
Tsingtao_1903 helped me tremendously in locating two, rare items for this project. He found me a Kienzle "look alike" clock for the dash, and repaired/wired/bench tested for installation. He also sold me an original steering wheel from a period BMW TI or GT. See photos 9, 10, and 11 below.
A complete set of 1600 engine gaskets came from Walloth & Nesch in Germany (photo 12) and Steve at Blunttech Industries supplied new rubber bushings for the front suspension, and new tie rods. (see photos 13 and 14).
Last but certainly not least, among all helping me, Slavs is my rock! He's an unbelievable source of information on these early 1600 cars, and is helping me with OEM front and rear sway bars, and a variety of other parts and wonderful advice. Not sure I'd be doing this project without him. Thanks, Slavs!
All for now, and please enjoy the photographs. Aloha, Robert (Mahalo to you too, Ray_)!
- 3
-
 Latest Entry
Lynx Manifold Throttle Control Upgrade
This car has had more carb upgrades than all of the other 12 BMW 2002's I have owned. We started with the original 1 barrel Solex, to a horrible Weber 34 ICH, to a Weber 36/32, to a Weber 38/38, to a Weber 45 DCOE 152 and finally to a Weber 45 DCOE 152G. During the final upgrade to the 152G, I decided that the cable-based throttle control that came with the TEP Lynx package (https://www.racetep.com/bmw-m10-2002-320i-single-sidedraft-weber-kit.html) should be upgraded at the same time, so I started reading all the FAQ posts on the subject and reached out to a couple of FAQ members that had upgraded the throttle linkage on their Lynx manifold setup... Crickets! So this was going to be an exercise in trial and error.
I started with a Universal Single DCOE Linkage kit from Pierce Manifolds (https://www.piercemanifolds.com/product_p/99006.104.htm). From the description, it looked like it had everything I would need to convert my cable throttle linkage to a top mount crossbar linkage. After the package arrived, there was an immediate issue, the holes on the Lynx manifold are 3/8" - 16 pitch and the rod ends in the kit are 3/8" - 24 pitch, so they don't/won't screw in. OK, easy fix, I just need an adapter stud with 3/8" - 16 on one end and 3/8" - 24 on the other. I actually found a kit of 5 on Amazon, (https://www.amazon.com/gp/product/B003QZG3H0/ref=od_aui_detailpages00?ie=UTF8&psc=1), ordered them up along with new 3/8" - 24 female 5/16" rod ends from McMaster to match the rod in the kit.
In my original setup, I fabricated a throttle return spring using the top mount linkage holes on the Lynx manifold. Now that that area was being repurposed for the crossbar linkage, I needed another solution for the return spring and purchased DCOE EXTERNAL SPRING KIT LT5000 from Pierce Manifold and installed it on the new Weber 45 DCOE 152G. When all the parts arrived, I assembled the new linkage and found that the lever connecting the stock throttle rod to the pedal box throttle linkage wasn't long enough to reach the rod end, so I used a piece of stock steel from home depot to extend the lever, (first photo). Another issue was the rod in the kit was only 11" long, so the lever controlling the stock throttle rod was at the very end of the rod and the levers in the kit were not very robust, (flexible). The result was very disappointing, too much flex, not enough throttle opening and not the smooth action I was expecting at the gas pedal.
My first thought was upgrading the levers to the longer, more robust aluminum versions from Pierce Manifolds, so I ordered 2 of BILLET THROTTLE LEVER 3/8 SHAFT 32000, without realizing that these won't fit the 5/16" rod from the kit. When they arrived and obviously didn't fit the rod, it was on to Plan B. Let's just upgrade everything to 3/8", so I jumped on McMaster and ordered a 12" 3/8 Rod, 3/8" - 24 Female threaded 3/8" Rod Ends, and 3/8" Shaft Collars for my setup. I also ordered a new 8mm Ball throttle lever for the DCOE, because the one from the kit had a stiff action. If you were starting from scratch, these are the 8 parts I ordered.
1. BILLET THROTTLE LEVER 3/8 SHAFT 32000 - $28.65 x 2
https://www.piercemanifolds.com/product_p/32000.htm2. DCOE EXTERNAL SPRING KIT LT5000 - $32.24
https://www.piercemanifolds.com/product_p/lt5000.htm3. DCOE Throttle Lever 45041.009 - $18.40
https://www.piercemanifolds.com/product_p/45041.009.htm4. JPS adjustable rod 75500.100 - $22.50
https://www.piercemanifolds.com/product_p/75500.100.htm5. Rotary Shaft, 1566 Carbon Steel, 3/8" Diameter, 12" Long 1346K11 - $7.58
https://www.mcmaster.com/1346k116. Ball Joint Rod End, 3/8"-24 Thread 60645K34 - $3.78 x 2
https://www.mcmaster.com/60645k347. Set Screw Shaft Collar for 3/8" Diameter, 303 Stainless Steel 6462K14 - $3.86 x 2
https://www.mcmaster.com/6462k148. Hard-to-Find Fastener 014973217150 Automotive Studs, 3/8-16 x 3/8-24 x 1-1/2 - $10.04
https://www.amazon.com/gp/product/B003QZG3H0/ref=od_aui_detailpages00?ie=UTF8&psc=1After receiving all the parts and assembling them (see pictures), the results didn't disappoint, the action at the gas pedal is instantaneous and snaps back perfectly. No stretch or lag from the cable setup. The billet lever to the pedal box throttle rod was still too short, so I extended it as before. I treated myself to a pair of new air horns from Corsa Velocita https://www.corsavelocita.com/store.
I hope this helps someone looking for the same upgrade.
Mark92131
-

- 6
entries - 16
comments - 1711
views
Recent Entries
 Latest Entry
Make the body work!
So I have made at least some progress with getting the body ready. I completed the modification of a tiptisserie that Roundeie inherited to me. Now it can be broken down, and even shipped to the next person who might need it when I am done.
Using my scissor lift, I was able to lift the body into the air, remove the entire rear sub-frame, and the body shell has been mounted to the tiptisserie. The teardown continues.
- 6
-
 Latest Entry
Tear down
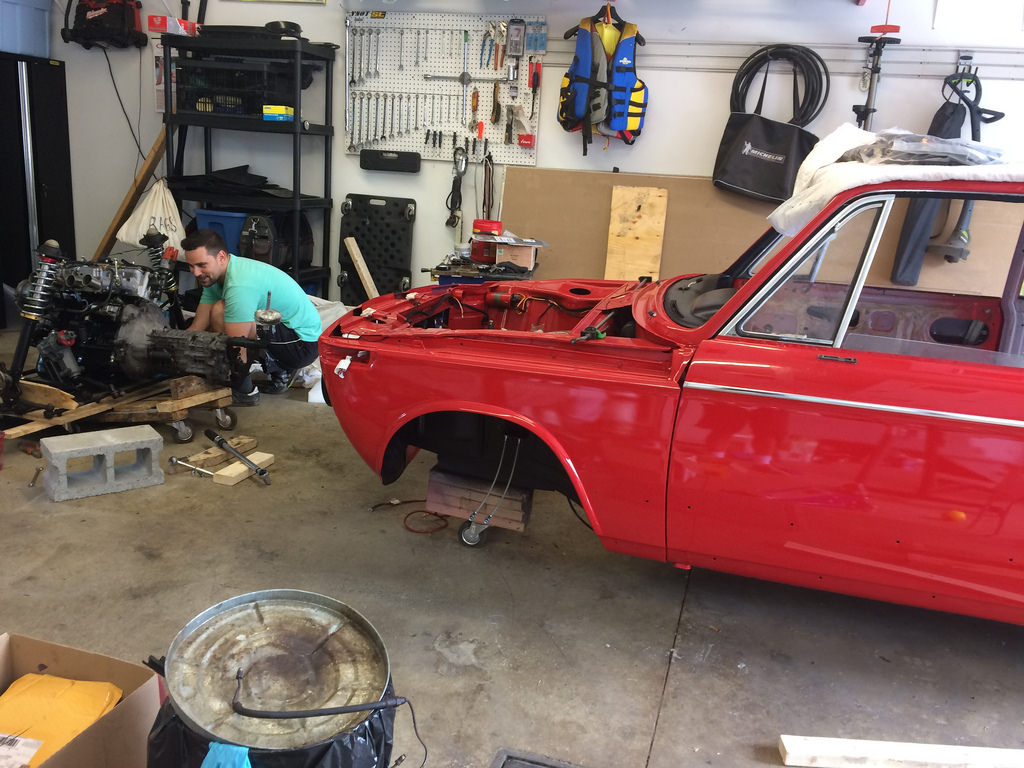
Well, after a 6 hour round trip we got "Walter" home. My buddy, Chris Roberts, came up with the name (named after Walter from Breaking Bad). There is a story to this car hence the name.
Anyway, we got her home, selling off the spare parts I do not need. Over the weekend we gutted the interior, dropped the subframes etc. Motor was already pulled so saved us some time. I am looking for an M42 with 5 speed for the build. My nephew has a spare Motec so he will be doing the wiring, setup and tuning on it. He tunes some of the fastest supercars in the world so honored he would do this for me. He normally runs Syvec systems on those cars but, obviously, my M42 does not need that level.
Also sources some rear quarters, rear tail, and spare area sheet metal. Still looking for rockers and both front fenders. By end of this week all old, rusted sheet metal will be removed and will be prepping for new panels. Luckily it has zero structural rust, it was just on exterior panels.
Ordered all components to rebuild front and rear suspension from Blunt, as well as ST sways (I have ST springs already), BBK setup etc.
- Read more...
-
- 0 comments
-
 Latest Entry
Single side draft Weber
HAHAHAH this project was the biggest aspect of building this car and it was fun because I didn't think I would actually attempt this because I hadn't given the idea too much thought. But one day at #neueklasseandkaffee I told a buddy of mine that I wanted to do this weird single side draft set up but the manifolds were back ordered and sure enough he pointed me in the right direction to my now good friend named Eric which just happened to have a lynx manifold sitting in his 02 storage unit!! so that same day he took me up and I ended up buying it off of him.Now this ended up being a slightly larger project than I had anticipated and ended up taking me three months to get to the point where I could just get in the car and go anywhere!!
-
- 5
entries - 2
comments - 1996
views
Recent Entries
 Latest Entry
Suspension Done Picked Up Motor
I picked up the motor and got the suspension completed. Front and rear are completely rebuilt with all new bushings and components.
I also got the body work a bit more cleaned up and ready for paint. There are a few little spots that need some attention but it should be ready for primer. I think the roof has come a long way since the tree fell on it a while back. That was probably the most time consuming part of the body work so far.
I also got the motor picked up from Terry at Terry Tinney Performance Motors in Livermore, CA. http://terrytinney.com/services.html He put in new custom high compression pistons for a 10:1 Compression ratio. Rebored the block and assembled the lower end. Head has been rebuilt with a Schrick 292 cam. I've got the mega squirt parts semi sorted and have to work at getting that all together next.
Then I moved it all from CA to CO.
- Read more...
-
- 0 comments
- 5
-
- 4
entries - 6
comments - 1576
views
Recent Entries
 Latest Entry
Body Modifications
While I was refreshing the car, I wanted to make some changes to the body. While at the body shop for the floor repair, I had them close the impact bumper holes and shave off the reflector lights. I installed a chrome rear bumper, a set of euro turn signals and some nicer belt line trim. These were all extra/spare from my 73tii project that weren't good enough to put on that car. I went with a pair of driving lights and mounting brackets from Kooglewerks. I like the end result and I didn't get too carried away with paint and body to deviate from my objective.
- 4
-
 Latest Entry
Flinstones S1:E3
Properly titled, this entry reflects one of the biggest achievments, pesonally, on my project so far. When I bought my car I knew there was some work to be done and I welcomed the challenge. The previous owner had started to replace the front passenger floor pan but abandoned the project for whatever reason. The first picture is the condition it was in when I bought it and yes that is the ground ?
Picture #2 is of the inner sill that needed to replace because some bozo put the car on a lift with a rotted outter rocker and crumbled the entire piece
Picture #3 & #4 are of the new and improved state...repaired floor pan, inner sill, outer rocker, and even ran a patch in the frame rail while we had it open
Slowly but surely I am reviving this 75' 02
- Read more...
-
- 0 comments
-
 Latest Entry
Intro and Some Parts
Figured I'd share my project since parts are starting to pile up and I'll start to get time to work on it.
The heart of the car is going to be a built lq4 5.3 that originally powered a suburban. Trans is not yet decided, but will either be a muncie 4 speed or a Nv3500 out of a 90s 2wd s10. All managed by Holley EFI Terminator. Fueled by a cell in the trunk and in line fuel pump.
Full e30 rear subframe swap for wider stance, strong diff, and disk brakes.
Attempting to make my own coil overs with sleeves. If all fails I'll get a proper set up.
Autometer gauges going into a custom dash.
We were in the works of an s2000 swap but drivetrain was sold to another member on the forum and I picked the shell up.
The car is in the process of pulling the drivetrain and then getting it back to my place.
Things I would appreciate some help with sourcing/ideas:
-Aftermarket Pedal Assembly installs
-Budget Front Big Brake setups
-Rack and Pinion conversions
-Biggest radiator you've stuffed in the nose of the car??
-Anyone ever do Lexan glass?
- Read more...
-
- 0 comments
-
- 27
entries - 64
comments - 19502
views
Recent Entries
 Latest Entry
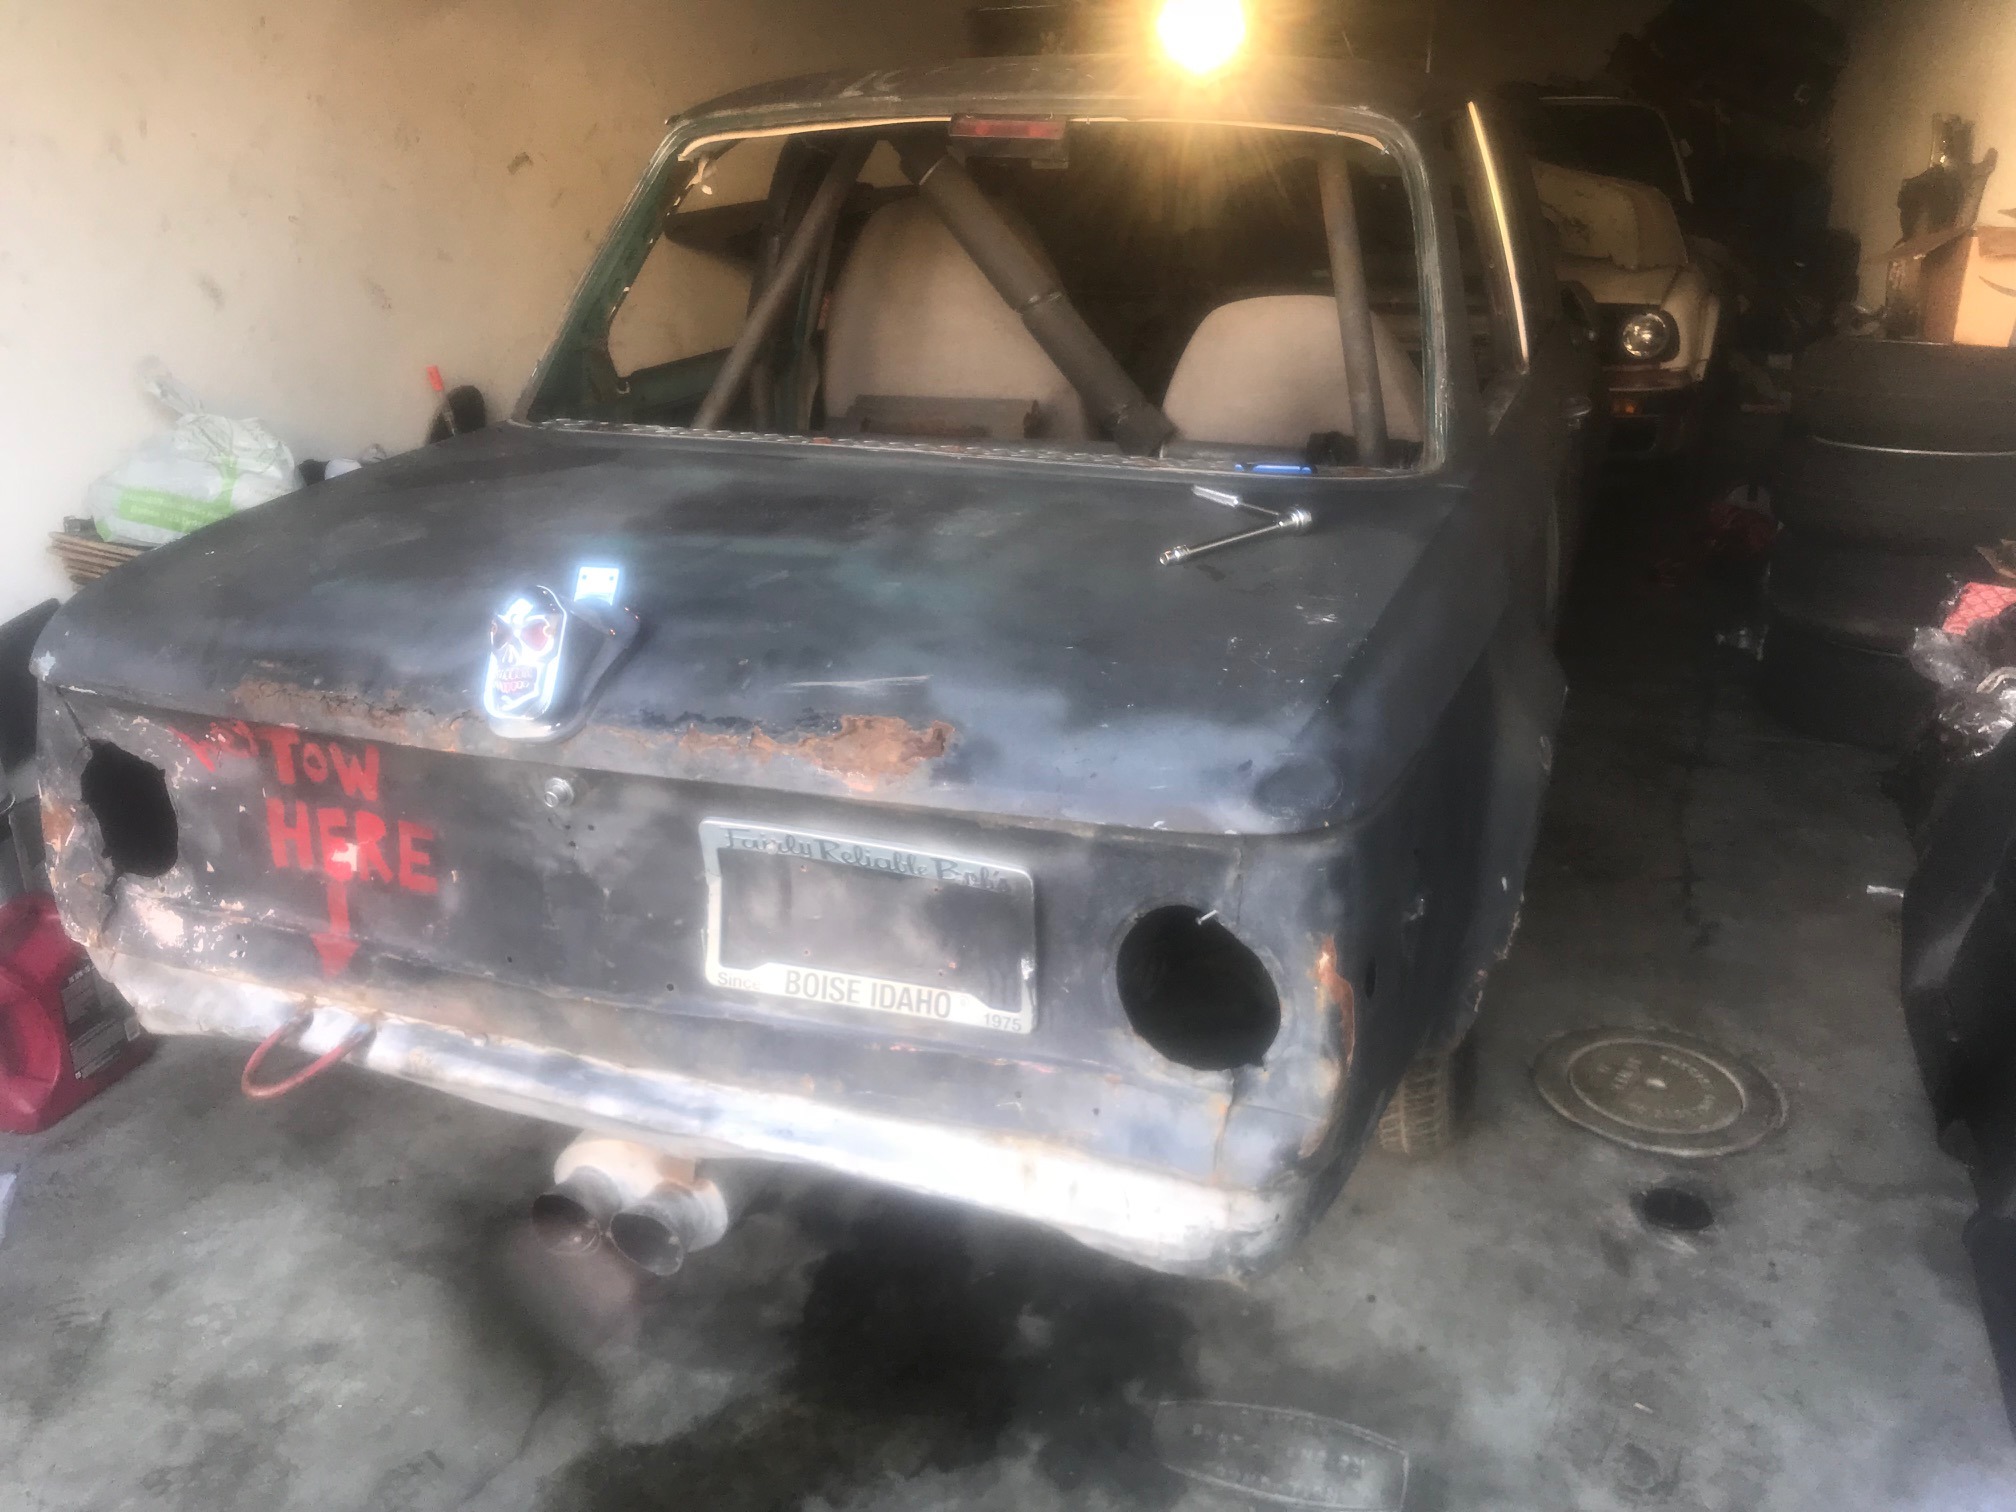
"Der liebe Gott steckt im detail"
For those who do not speak or understand German (me included) it translates to "God is in the details". Who knew. It happens to be an old German proverb that dates back a few hundred years although sometimes misattributed to a gent named Ludwig Mies Van Der Rohe a German/American modern day architect who appears took the liberty to replace one word, no doubt to express his level of frustration in dealing what ever he was working on at the time. Quite possibly his own BMW
Wikipedia defines the phrase as the following:
"The devil is in the detail" is an idiom that refers to a catch or mysterious element hidden in the details, meaning that something might seem simple at a first look but will take more time and effort to complete than expected and derives from the earlier phrase, "God is in the detail" expressing the idea that whatever one does should be done thoroughly; i.e. details are important.Regardless of the interpretation it is fitting and somewhat ironic that this catchphrase finds itself rooted in German lore. Something no doubt many a German engineer takes great pleasure in.......but I digress.
If you have not guessed by now, I have experienced all the above in spades these last few month, six and counting to be precise, sorry I once again digress. Although I have been reminded by a couple of pro's that this is normal for a build such as mine, the waiting at times is agonizing. I am slowly resigning to the fact it may, scratch that..... it will take more time to get to where I want to be. Last February I thought I was close to the end, had everything covered, everything figured out, had all the bases covered.....boy was I wrong.
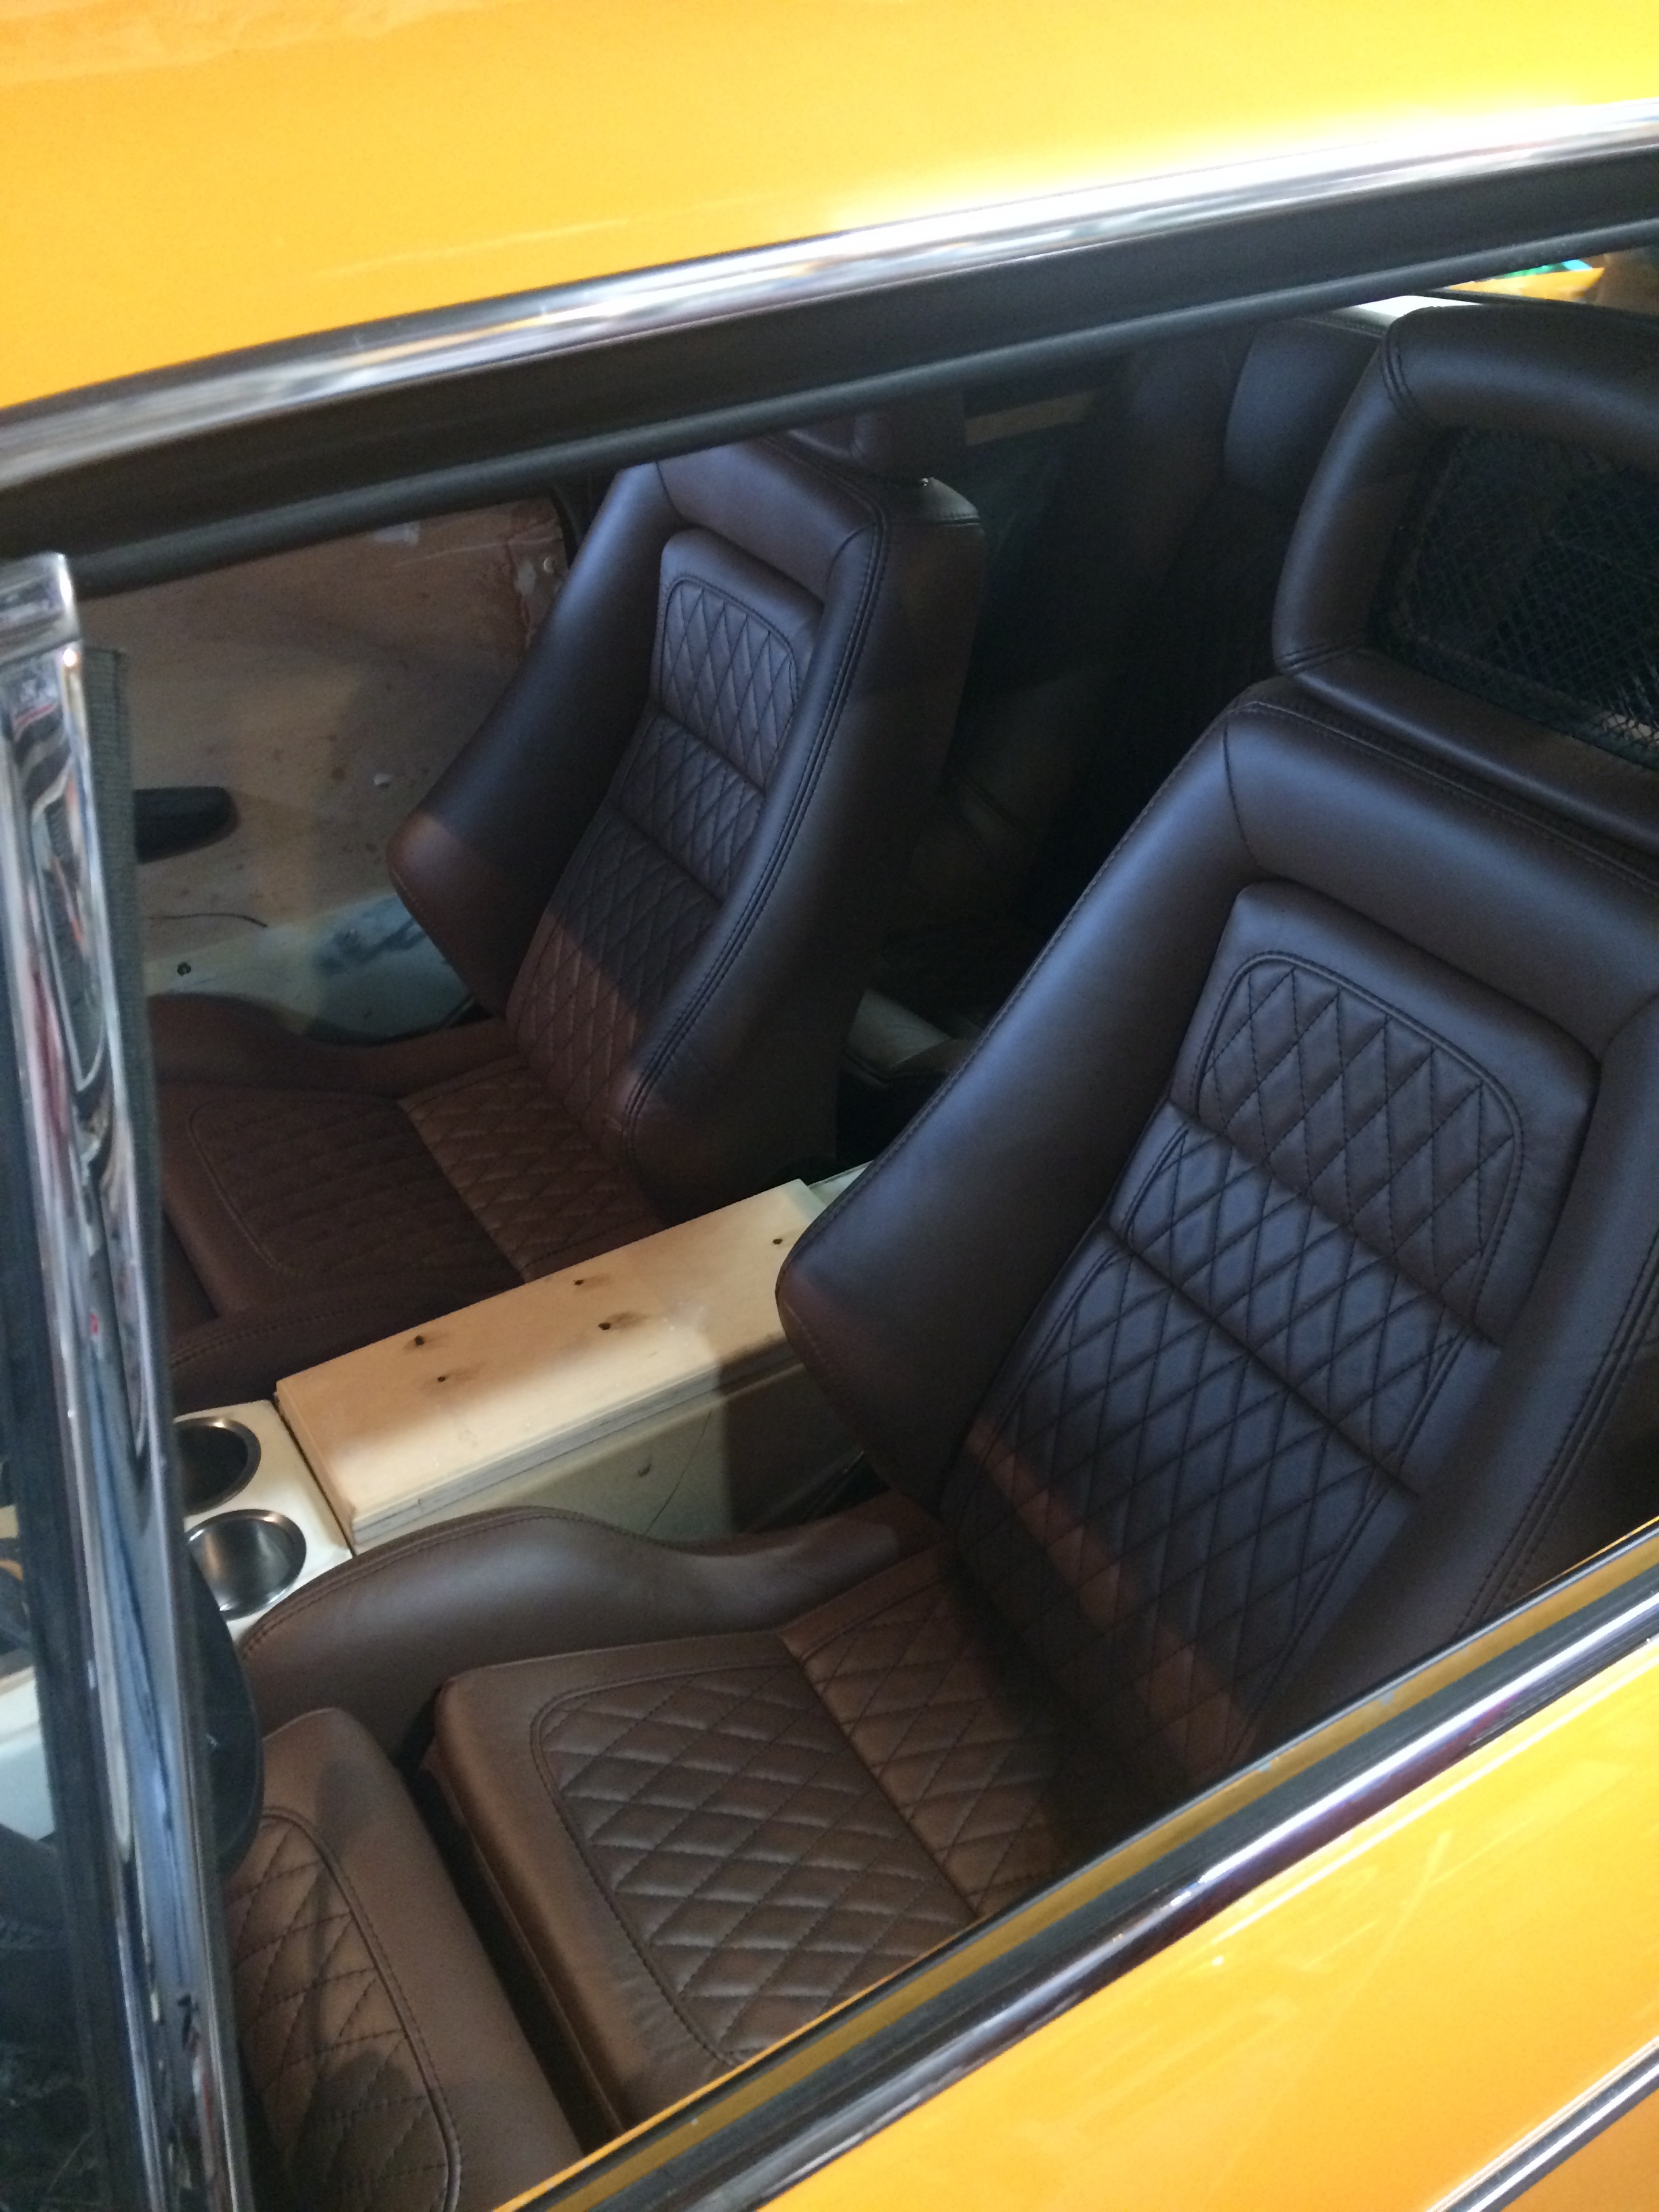
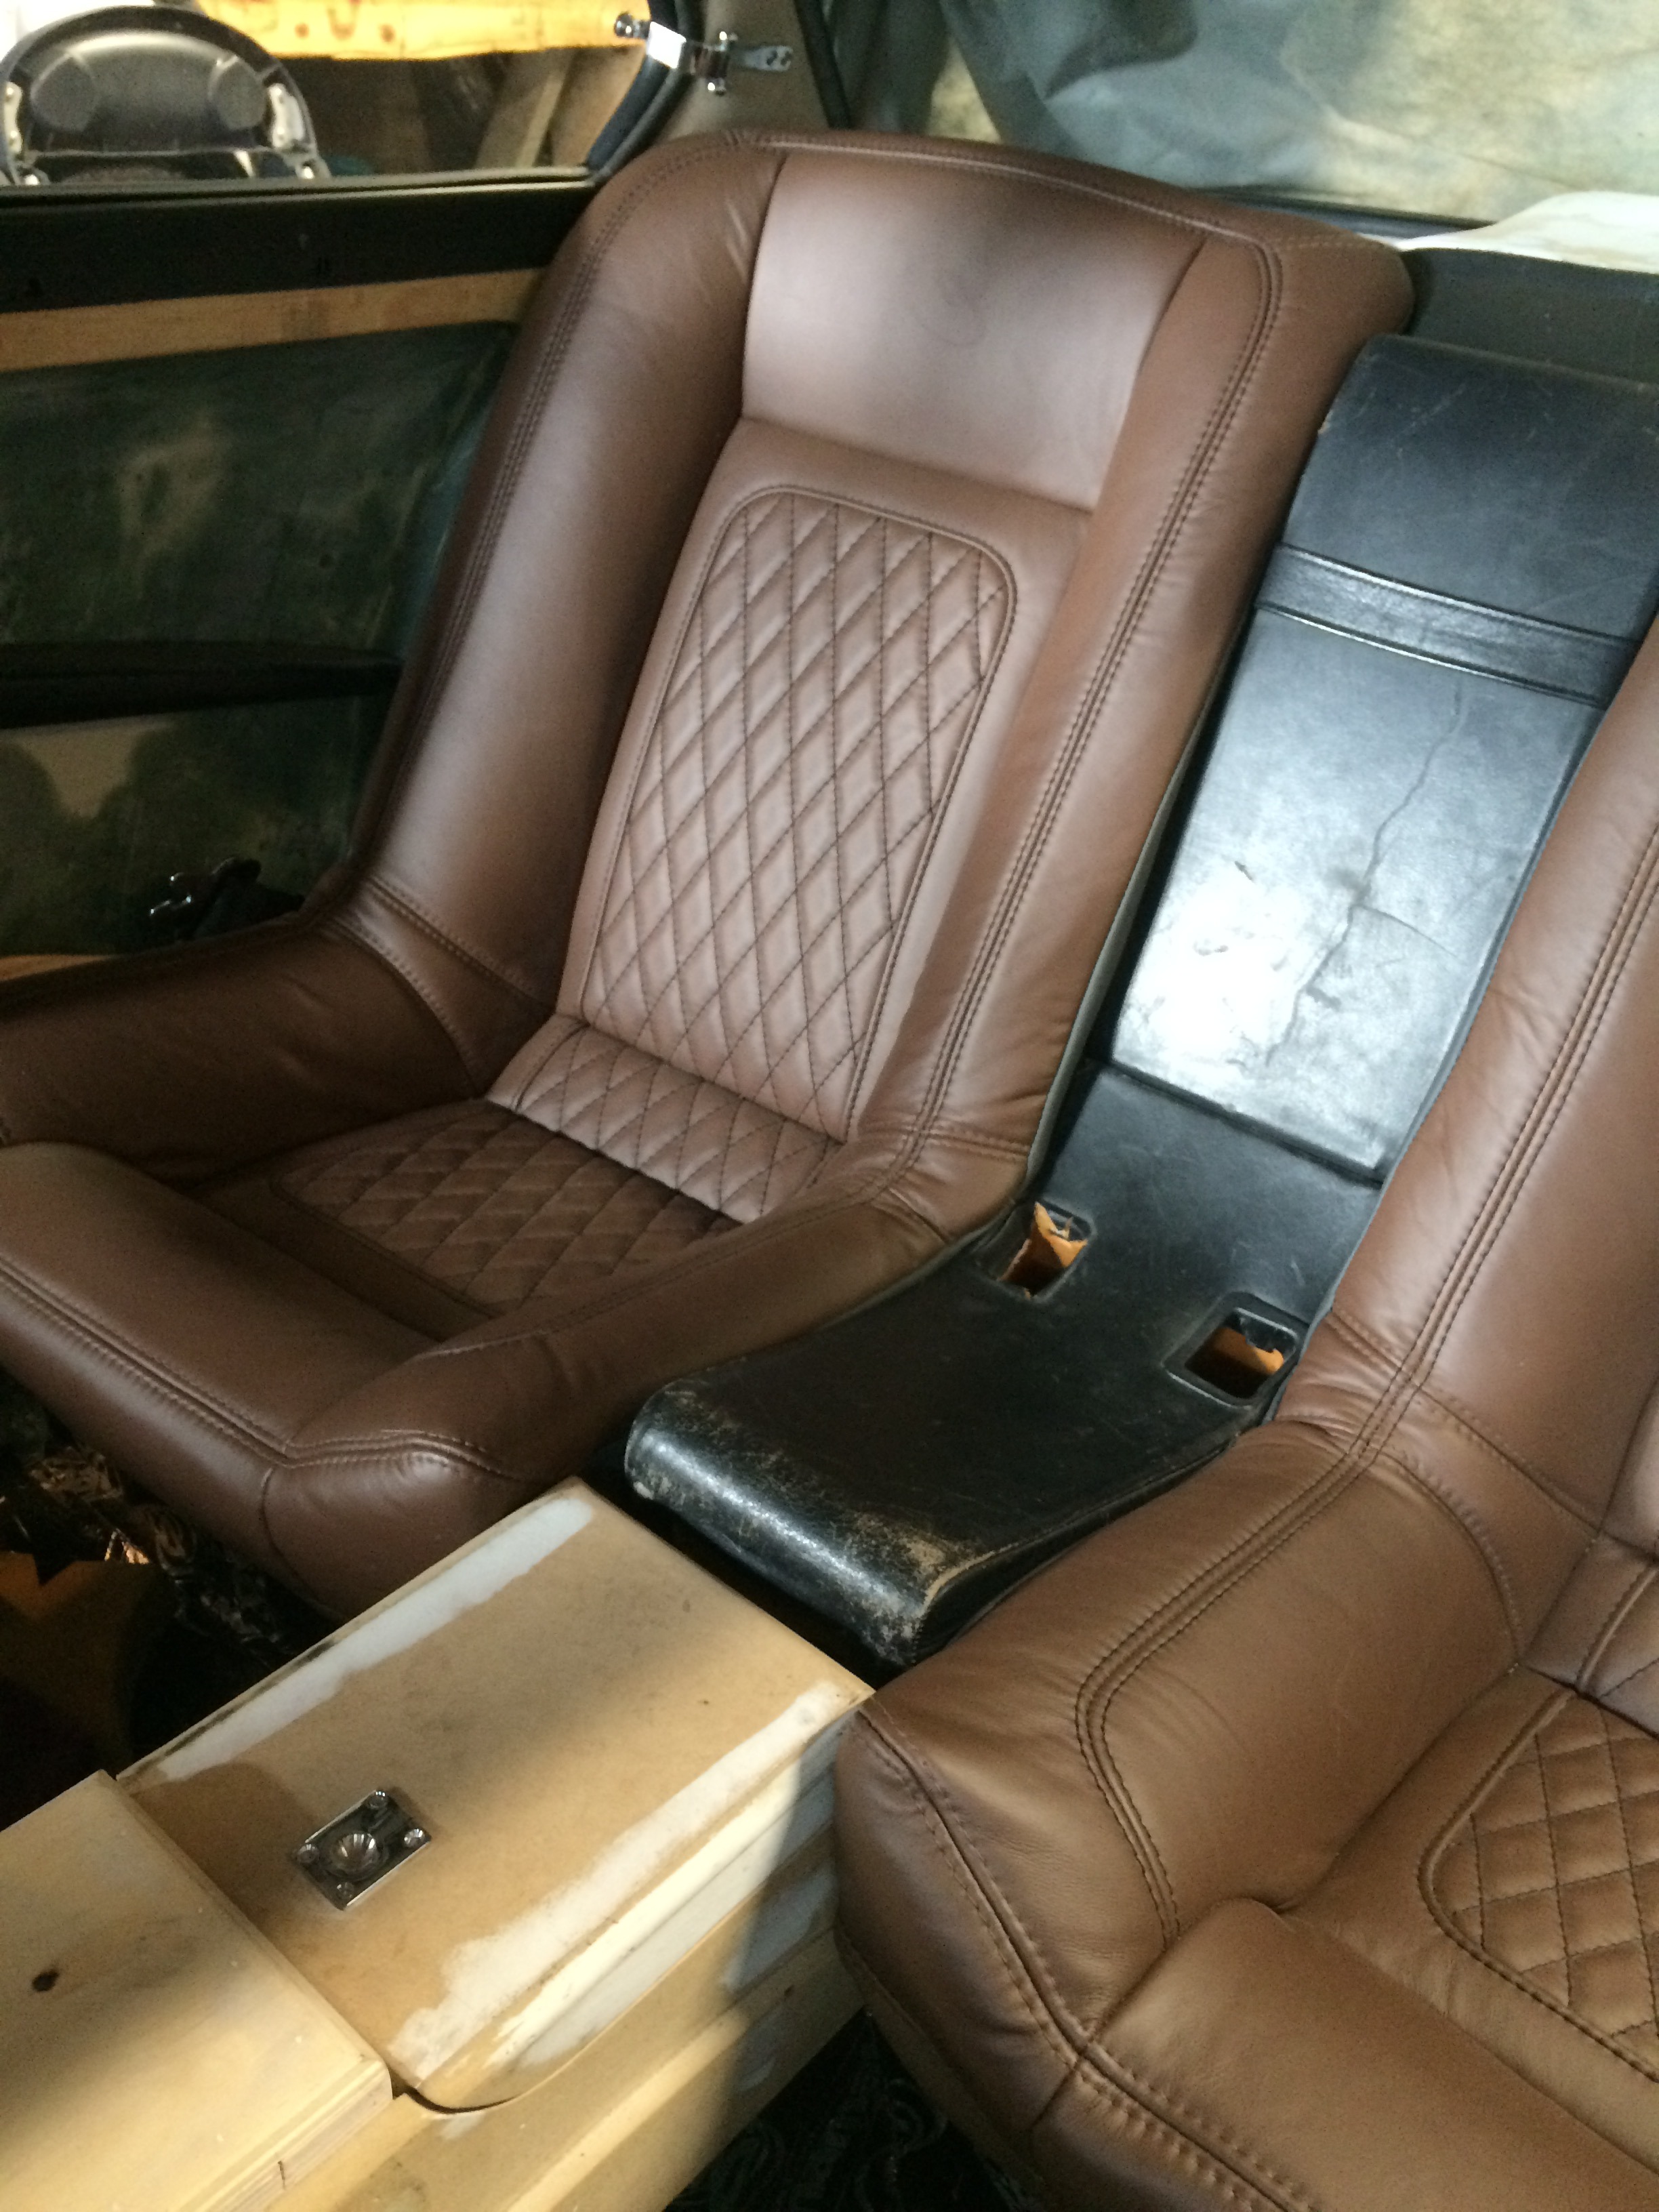
Since that last entry I swear my cherished , much loved ride has decided to fight back at every turn with my attempts to make her whole again. From scheduling issues, parts availability, vendor/service issues or newly installed parts failing unexpectedly. Oh ya and a small electrical fire too.... saw my life flash in front of me. Fortunately it was a very small matter, more smoke that anything else, (a short while fitting the seats but did cause some concern.) but very unsettling at the time to say the least. It just seemed it has been one thing after another that has brought me to this level of frustration. I was so focused on have this road worthy this summer that it drove friggin' crazy with every setback and the great weather. I should interject I have been able to drive the car but just to and from getting some of the outstanding issue addressed. Sitting on a essentially a box with a back rest is not what I would call enjoyable. I am slowly learning to accept it will take as long as it takes......as one friend and fellow enthusiast told be recently, " it will all be worth it in the long run, be patient you will be glad you took your time. It's the devil in the details that will make your project worthwhile"
Here are a few additions to the car as it progresses.....
They say that "necessity is the Mother of Invention" so after my electrical scare I decided to cover the amp under the rear seat and this panel for the alarm and locks that sits under the drivers seat for some added protection. Took me a few days to fabricate the covers but they will be able to provide some protection.
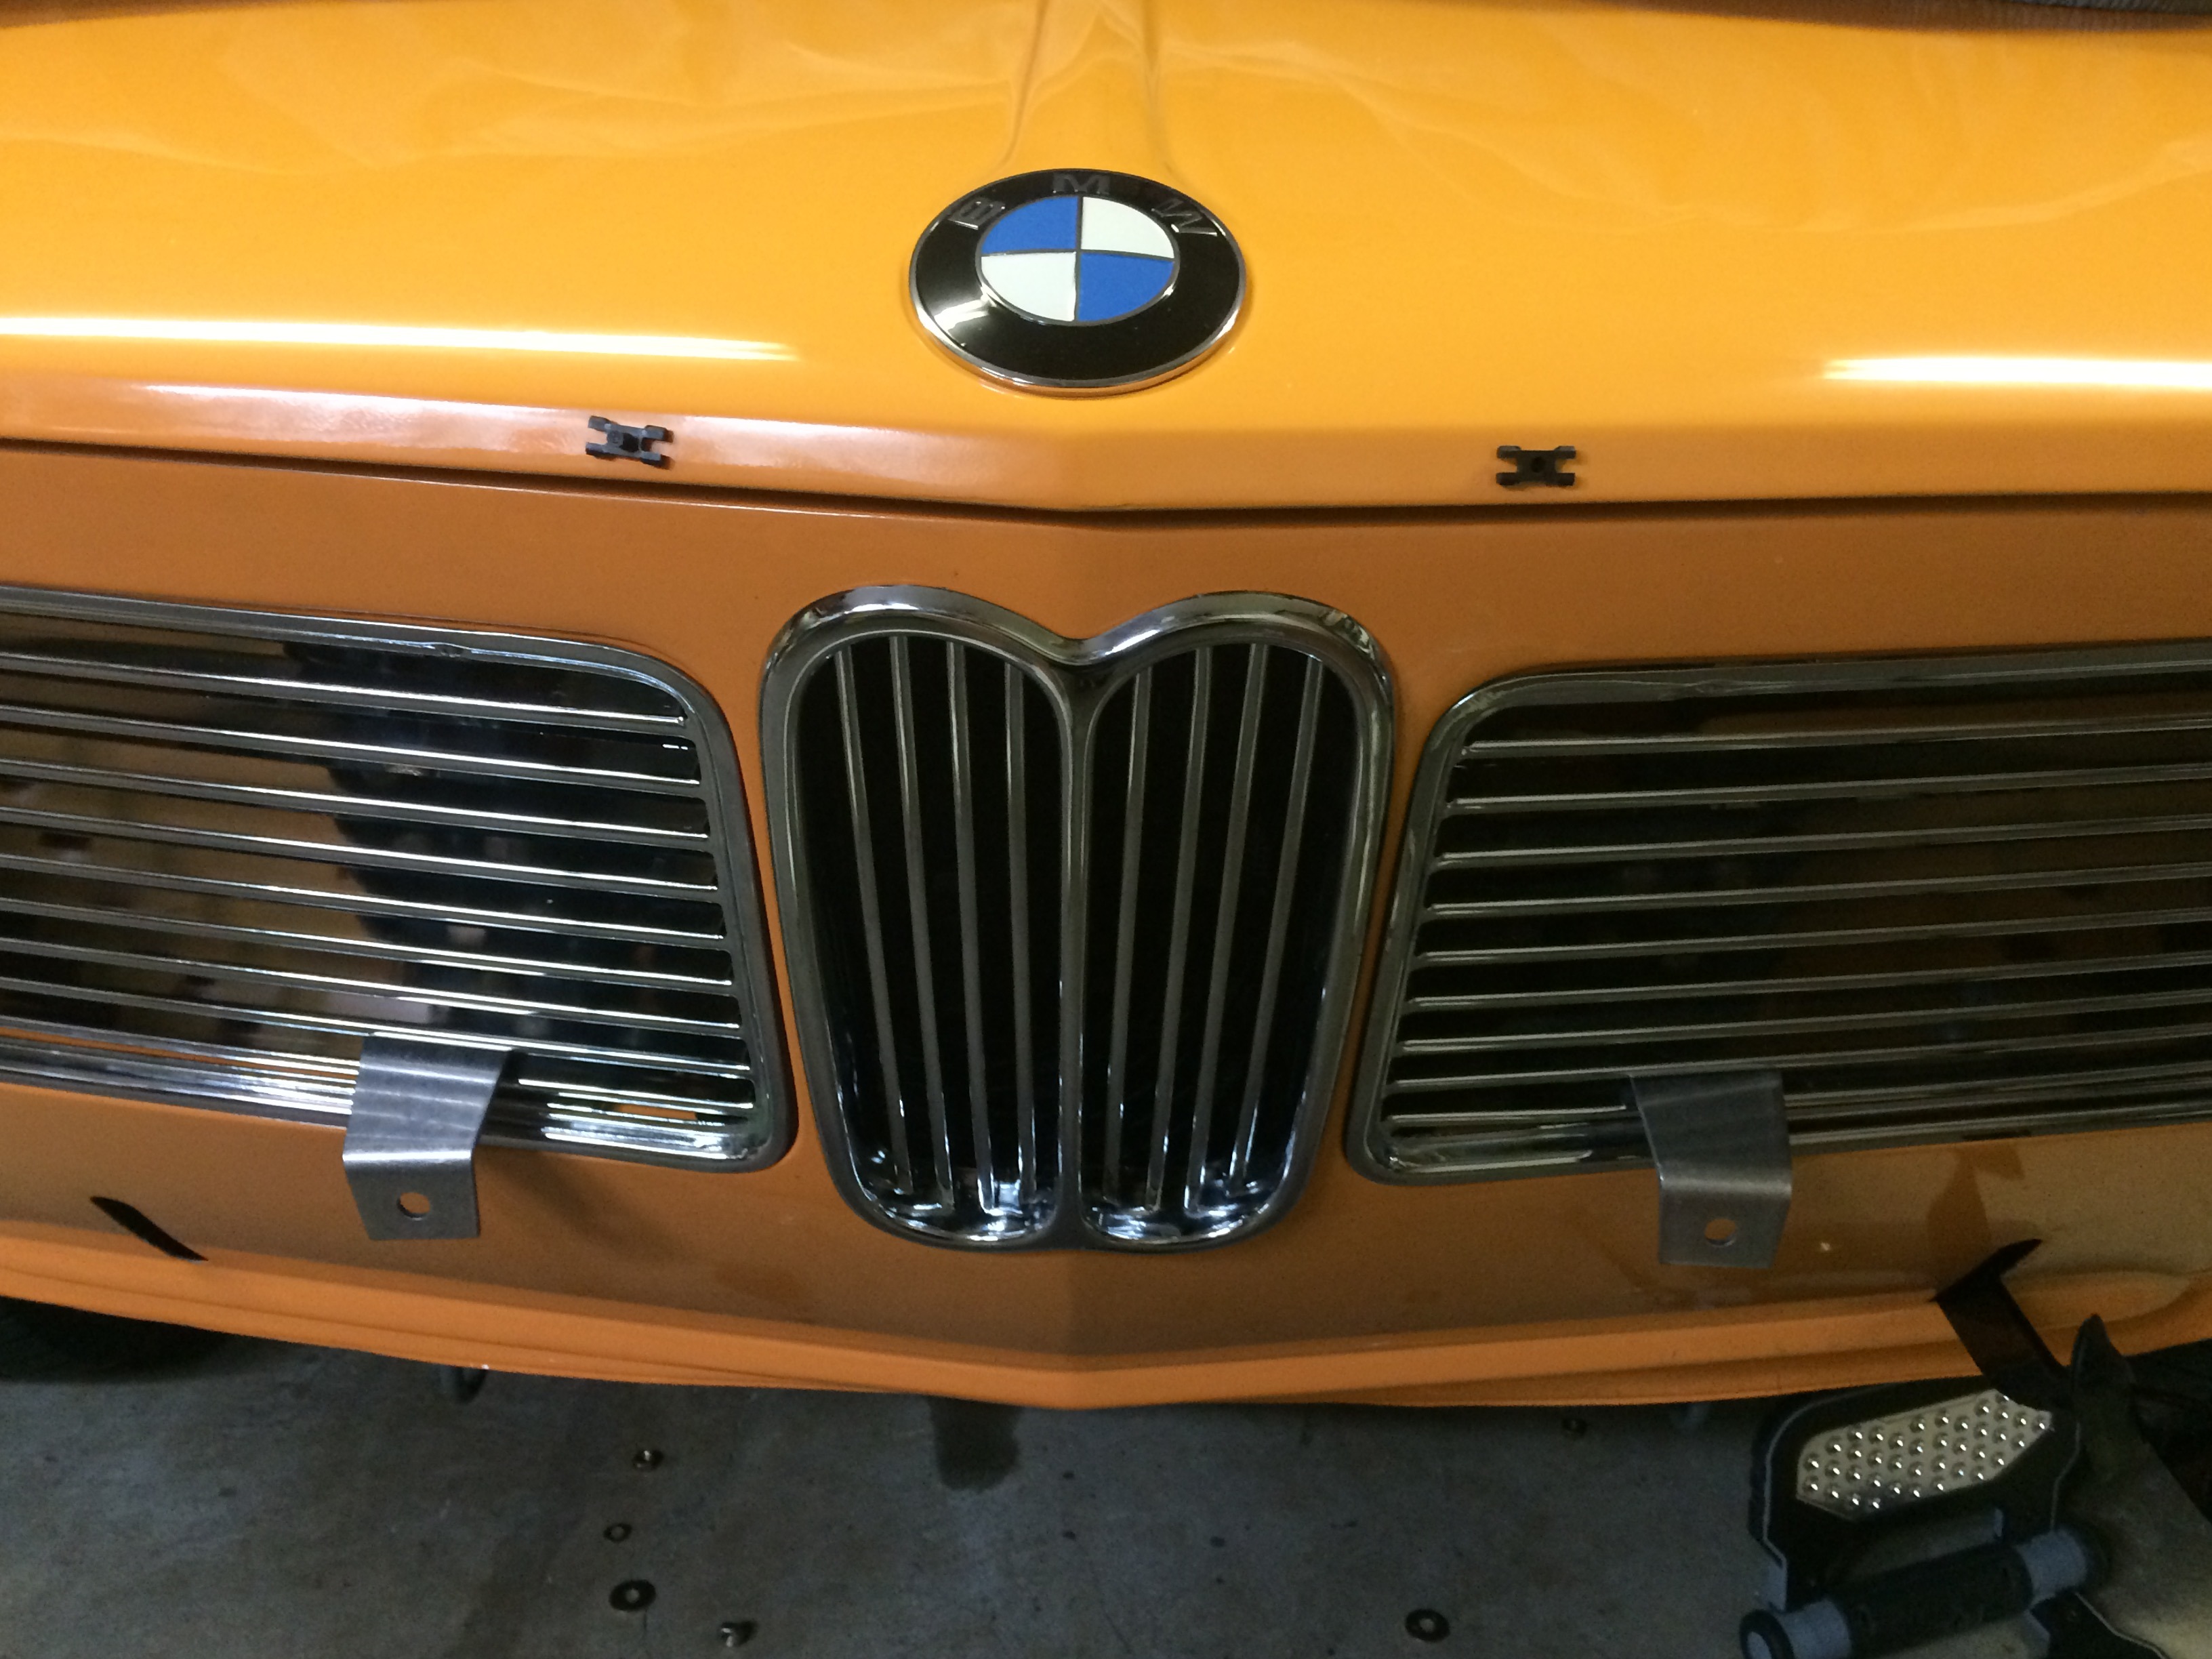
Got a few more of the shiny bits on the car........
w
Had some interior bits re-plated.....and a few new ones too!
........and a bit of a teaser with the first test fit
Thanks for your the time and allowing me to vent.
- 27
-
- 6
entries - 10
comments - 1690
views
Recent Entries
 Latest Entry
Road Trip!
I've nailed down a few more projects: Steering, seatbelts and more, but that all lead to a massive road trip.
The goal was to replicate a drive from Ontario to BC, intended to reunite my cousin with his car. Sadly he passed - so this was a tribute to prove that the car would have made the epic trek.
The route was to go from London, Ontario to the end of the James Bay Road - right on the edge of the Arctic Ocean:
Here's the vid - It's a little long, but I hope it inspires more crazy trips!
- 6
-
 Latest Entry
Weber dcoe 40s
Just scored a set of dcoe 40s that I’ll be in the process of rebuilding and acquiring parts to fit them into the 74
-
 Latest Entry
How this all got started
I owned many o2’s back in the 70’s
i also own a 1972 known as “square Grouper “.
my first Bmw was a 1600 that I purchased back in 1971 and drove from west palm to as far north above Quebec as possible .
This is a picture from that trip.
there have many more Bmw’s And always
used for road trips and camping. Many of
My bmw pictures from back then the car
was just in the back ground. I never knew
that someday these cars would become
a cult in them self’s .
34 years later I decided I should work on my bucket list and I always said I’d do another road trip in a o2.
the decision was made to purchase a perfect o2 roundie with sunroof. Easy decision, tuff search. Tough, dispiriting ,
travels across country meeting liars and cheats, every sort of bondo filling low life
shithead.
then I found the perfect car for me
1972 Bmw 2002 , roof and completely original, every last piece and most of all
No Rust. That car was transported to palm beach where the complete interior was removed and cleaned, the complete brakes, suspension replaced and then it was shipped to Ray Korman who rebuild engine to stage II and had the car repainted. Stunning ...
i have driven it to the Vintage 3x, trips down the blue ridge parkway and total
9,000 miles of fun.
Now for this car I’m starting the Blog about.
late one night I find myself looking at a BAT
auction of a 1968 bmw 1600 from a estate sale. The details listed a inherited car that had been parked with 43,000 miles
( yeah sure, ....)
too good to be true and the car was listed
and displayed in the worst manner.
It was advertised as a project and although it stated that all parts were included and there was only a little surface rust, it looked terrible and it appeared to have
lots of rust red everywhere .
The BAT critics are brutal and rude bunch
most ard lurking in the background trying to show their knowledge thtough criticism .
they tore it apart and I think caused interested parties to Not Bid.
i found it interesting that no one could see past a few trivial matters and know the value of this car.
looking at the location ( Brasstown North Carolina ) and knowing the geography I
suspected that all the red rust color was really Red Clay and it was.
After a bat battle I found myself the owner
of yet another rust free o2.
And now I’m blogging
- Read more...
-
- 0 comments
-
- 4
entries - 7
comments - 1870
views
Recent Entries
 Latest Entry
1 Step Forward 2 Steps Back
Been a while, figured it was time for a little update.
I have been chipping away at her for the past few months. I ended up redoing the mounts on the rear subframe because I wasn't happy with the wheel placement (this is the first step backwards). I just need to test fit it the next time I work on her. The cylinder head for the engine is with Bimmerheads in CA, so no new news on the engine. But I did start getting to some of the body issues... I noticed in the front foot-well corners there seemed to be some rubberized coating/built up material around it. I started sandblasting it and it ended up being rubberized coating over fiberglass patchwork... (this is the second step backwards). So I went ahead and busted the patches out and this is what I found
I went to work cutting out all the spot welds and ended up with this... (this was the one step forward)
Went further back on the outer rocker because the PO put a terrible patch on it and didn't match the contour of the rockers.
Lastly, I got some goodies in the mail!!!
Reason why I haven't made much progress (other than only working on it for select weekends) is I bought a truck! So it has been sucking some of my time to just get it road worthy.
Clearly, I am a gluten for punishment...
That is all for now
- 4
-
 Latest Entry
MikeWooldridge
Somehow all the entries were lost. However, please visit these two links.
https://indiandales.blogspot.com/
https://www.flickr.com/photos/indiandale/albums/72157603029691084
Thanks for looking.
MikeWooldridge FAQ member 60
- Read more...
-
- 0 comments
-
- 31
entries - 53
comments - 27681
views
Recent Entries
 Latest Entry
Foggy
Let's light up some moisture.
So, I got some Marchal fog lights from : Schickentanz, thanks again.
When mounting them, I wanted to avoid drilling holes, anywhere. I've seen that a lot of people will mount them to the hood hinge brackets, but that means the lights are close to the center (near the kidney grill). I wanted the lights to be pushed out (near headlights), I also wanted the brackets to be semi-hidden.
So, I decided to use the bumper-mount bolt holes to support the bracket… I doubt I’m the first to do this, but I hadn’t previously read about it.
I started by making a (mock up) bracket with a left over 3/8” MDF sheet. I would cut out the pieces with a jigsaw and glue them using wood glue. I found this step to be super helpful with the overall design, it’s much easier to cut and glue MDF, then cut and weld Metal. Unfortunately, I didn’t take any photos of it and I threw it out already.
In addition to the above, I added a trapezoid shaped piece at a 90’ from the vertical part of the bracket, this piece also has a triangle shaped support, welded below it to reinforce the 90’ from flexing.
The trapezoid piece will stick-out of the grill, through the 2nd opening from the bottom of the grill.
I had to make the bracket in 2 pieces, if not I would need to cut the grill. So, I drilled the trapezoid piece, to install a bolt near the end (the portion which sticks out of the grill).
For the 2nd portion of the bracket, where the actual light will be mounted/bolted. I wanted the bracket to be angled towards the car, to keep the lights as close to the body as possible.
I used 4 pieces.- I drilled 3 holes to adjust the mounting height of the lights, but then I ended up joining the 2 lowest holes so that I could slide the light up and down for more adjustability.
I painted the 2 pieces black and added a grommet to pass the wire. I test mounted them again (below).
Here’s the final product, installed with the grill on.
POWER. The first time I flipped the switch, the fuse blew and I'd be lying, if i didn't say I tried it a 2nd time with a new fuse. So, I ended up having to take apart my center console. It turns out I mislabelled 2 wires, the ground and the load (wire which feeds the lights). So flicking the switch would join the negative to the positive :s. Wasn't cool. I thought I was all finished and then I had to find an issue. luckily it wasn't a huge thing and I was able to sort it out within 30-45mins... without damaging my delicate custom console.
Lights on!
Out for a drive to mom and dad's
I'm really happy with the way the brackets turned out, I'm even thinking about fabricating some to sell.I think, I prefer my 02 with the fog lights. What do you guys think about?
Thanks for reading,
Anthony
Next project: Custom fibreglass duckbill. - 31
-
- 2
entries - 8
comments - 1698
views
Recent Entries
 Latest Entry
The oh-two arrived!
Last sunday, I went to pick up the 1602 from the seller, with a friend. The car was already parked outside. When we wanted to start it, there were some start problems however. The seller tried to 'fix' it by bashing a hammer on the starter, but that didn't really help since he couldn't reach the starter very well. So he called up a mechanic he knew, who immediately took a long steel pipe to bash the starter a bit harder, which seemed to help. He also knew the cause; bad fuel. Last year, in Belgium, octane 95 gasoline got replaced by octane 95 with 10% ethanol (95 E10), which is really bad for old cars, as the added ethanol 'eats' through all the (old) rubber hoses and stuff! A couple of classic cars were already destroyed due to fire, most likely as a cause of leaking fuel hoses, which again is most likely a cause of the 95 E10 fuel. So almost everyone has to use octane 98 now (even more recent cars), but that's also more expensive (and gasoline and diesel prices are already sky high due to added taxes
).
Anyway, the 95 E10 has to go out asap, any suggestions on the best way to do this on an 02? I was also thinking of removing the entire gas tank while it'll be empty, to remove the rust and add a new anti-rust coat and paint on it.
I also drove my first meters with the 1602 (actually the first time I drive an 02 at all), but because the bad fuel, the car was stuttering and didn't run well so I quickly parked it inside. For now, here are some better (phone) pictures!
On the trailer:Any tips of what to change on an 02 that has not driven for several years? I'm thinking of:
- oil and cooling fluid, brake fluid
- filters
- spark plugs
- brakes?
Any other tips are welcome and appreciated. I'm kinda new to the mechanical stuff, so I hope I get to learn a lot here by trying to get this car on the road again (I want to try most of it myself).
Thanks for reading.
- 2
-
- 4
entries - 4
comments - 1291
views
Recent Entries
 Latest Entry
Damage!
In the past two weeks, the car has been hit twice. First, on sometime during the week of 5/14, someone rammed into the drivers-side rear quarter panel. I think that it happened on 5/17 between 3:20 and 4:45, when I noticed it, but I can't be sure that I didn't see it before. I am pretty sure that someone pulled out of the driveway across the street and hit it, but I checked my neighbors security footage form that time and it didn't record anything. It triggers based on motion, though, and I've thought that maybe someone in his family deleted the footage after hitting the car.
Regardless, I was able to pull out the dent with a suction cup and some boiling water. There is still a very small dent where the initial impact happened, but I'm trying to keep a positive attitude since the car isn't in great shape anyway.
The frustrating thing is what happened 5/24, when I came back from the office to see that Mr. Toots' left taillight lens got obliterated. I strongly suspect the recycle truck, because the operator picks up the cans with a giant mechanical arm and a neighbor parked their recycling bin right next to my car the night before. I haven't gotten my hands on any footage yet, but my roommate claims that the truck came between 8:30 and 8:40 so I have a concise window. I'm interested to see how the recycling company responds to my complaint.
I've ordered replicas off of RockAuto ($131 for replicas vs. $270 for originals on pelican, will get back on quality). I'll bill the recycling company once I get them installed. The sucky thing is that somehow my brake light fuse got blown in this process, so I got pulled over and got a fix it ticket for my brake lights not working. I've fixed it and I think it will be about a $25 fine once everything is checked off. The real disappointment is that I was 4 months away from going 10 years since the last time I was pulled over! Fuck!
- 4
-
- 7
entries - 4
comments - 3756
views
Recent Entries
 Latest Entry
Initial Tuning Setup and Tips
When I was running the engine on the stand, I used the default tables and only modified a handful of settings specifically to the engine. It started and ran "fine" that way. Once I moved everything into the vehicle and was ready to actually start tuning, I wanted to establish a more rational baseline to work from. The very first thing I did was upgrade my MegaSquirt firmware to the latest version. Mine was very old (3.1.0 vs. 3.4.2), and this change alone made the engine run noticeably better. I then made changes to the settings and tables following the approach of Andy Whittle on YouTube. Lastly, and this made the greatest improvement, I generated a new initial ignition table.
You can watch Andy's initial setup how-to video here. In just 11 minutes he walks you through the key initial settings that are specific to your engine and sensors. Since I am not running boost, his instructions on how to change the scales of the MS tables to give greater resolution for N/A builds was a nice insight. If you've done a MegaSquirt build before, there is really nothing new here, but for us first-timers, it's a concise, helpful walk-through.
For an initial ignition table, this tool is really handy. The table it generated with M10 specific information was radically different from the default table and dramatically improved running and driving. In the image below you can see the data for the M10 typed into the tool. Your idle vacuum may vary. If you don't have a vacuum gauge, you can calculated the idle vacuum from the MS MAP reading like this: Your in-Hg of vacuum at idle = 0.346 * (100 - your kpa of MAP at idle).
I made one more change after driving around for a bit, which was to turn Overrun Fuel Cut-off on with a delay of 0.5 seconds. This eliminated deceleration backfiring, which was really intense since I was driving with no exhaust system.
I hope this has been helpful.
Jesse.
- Read more...
-
- 0 comments
- 7
-
- 7
entries - 6
comments - 1244
views
Recent Entries
 Latest Entry
Paint and body
Well the car was at Le Trans from August until a few weeks ago. We drove from Miami to Le’s place. We did get to spend a few more days driving it around the area. Made more memories!
Now it’s time for paint. The car has all new suspension,cooling, 123 ignition, rebuilt rear end, rebuilt 5speed etc. Basically the car looks prettier underneath than it does on top.
I was happy to see how dry the car is after removing all the glass and interior. Unfortunately I dropped one of the rear side widows removing it.
I haven’t decided wether to use single stage or 2 stage paint. Sometimes I see old cars with 2 stage paint and they don’t look right to me, too shiny, too deep. 2 stage is probably better longer lasting paint so I haven’t ruled it out.
Our car had tons of small dents but luckily they where mostly all asccesable from behind. Some we welded small rods too and used a body puller to pull them out.
I want to detail the trunk. I am considering stripping all the paint with either chemical stripper or wet blasting. Then treating the surface with ospho, then primer and then paint I would like too protect the area for years to come. I am not crazy about the bumpy protective finish usually applied to the shock towers and trunk sides. I think it can look dirty, then again I’ve never seen what it looks like fresh.
The motor will be removed when I get back from the vintage. The plan is to detail and prime the engine compartment also.
I hope to paint the engine compartment, trunk and engine compartment myself and leave the outside to the pros.
Stay tuned for for a BIG update after the Vintage.
- 7
-
- 12
entries - 36
comments - 4654
views
Recent Entries
 Latest Entry
Cardboard M10 head complete
Originally I was gonna make the valves and valve springs open and close.
After a year in building this, I came to my senses and went for the look instead.
Made some stylized spark nuts too.
The rocker arm shafts had to be made independently to account for the variances in the head assembly.
The valve springs I coiled around some PVC pipe and glued linear struts to hold them to shape. Works for this application.
- 12
-
- 13
entries - 11
comments - 2644
views
Recent Entries
 Latest Entry
brake time.
I was just taking the car off the stands when I noticed that the rear inside wheel was wet. The only thing, wheels cylinder. This spiraled into another round of parts.
cracking the drum reviled bad new.
Everything was contaminated.
even the cylinders are not even worth rebuilding.
So new parts ordered. drums shoes, wheels cylinders, and since I was there I decided to new new flex brake lines all around.
I also cleaned up the rotors.
installed/
rear brake flex tubing
im assuming the the old ones were originals.
Thanks it for now,
Cheers.
- 13
-
- 43
entries - 71
comments - 9396
views
Recent Entries
 Latest Entry
Trim n Ting
So i had a few days off so i started work on finishing the center console and the rest of the interior bits. i do need some help with how to fit my wing mirror as ive lost all the clips/bits from the mirror so need some other ideas.
got a door card all together
got to finish the faceplate on it, smooth off where i have screwed it, paint it again, and then flock it before fitting.
nardi wheel without the wooden center, the horn is raised slighty so looking to get a flush one.
also gave it a quick wash and took some photos
paint looks great when its cleaned.
got the swage line trim fitted, wasnt exactly the most fun job as all the holes were full of paint, so i have to reem them out, nd then a light coating of paint on the inside to prevent any water going to the metal
quite happy with how it looks!
so next on the menu is the wing mirror, the drivers door interior bits, finish the center console and then maybe ill take it out for a spin
thanks for looking
- Read more...
-
- 0 comments
- 43


 . So, I ended up having to take apart my center console. It turns out I mislabelled 2 wires, the ground and the load (wire which feeds the lights). So flicking the switch would join the negative to the positive :s. Wasn't cool. I thought I was all finished and then I had to find an issue. luckily it wasn't a huge thing and I was able to sort it out within 30-45mins... without damaging my delicate custom console.


