
Our Picks
Top content from across the community, hand-picked by us.

5 Speed Install
Roundeie posted a blog entry in Roundeie's Golf Yellow,
To be sure I hung out with my local independent shop manager and watched him prepare to install one in this
Again I left with confidence.
But reality bites...
jgerock reminded me to lengthen the reverse switch wiring (wasn’t on the punch list) so I did that.
I took my time with the pressure plate + clutch torquing (1 turn at a time on each bolt diagonally),
Then I was ready.
Box on lift, forward, up, input shaft too close to springs, back, bumping tunnel, down, snag plate lip, back and down, too far left, wth I’m moving in the wrong direction. Ok, up, forward, stuck on tunnel again, down, right, up, check input shaft placement, up, shove, crush reverse switch blade connector ...
Aargh@$67hg#!!?!!!
4 days later new switch arrives, along with
the 2 quarts of Redline MTL I forgot to put in the gearbox.
Yesterday, went smoother though it still required a bit of adjusting positions and some physical effort. As Zaza Pachulia once said “nothing easy, NOTHING EASY “
-
-
- 1 reply


Head came back today.
Jbaumshelter posted a blog entry in 73' M42 Rediculousness,
-
- 0 replies

rear subframe
King+Sons posted a blog entry in Fountain Square Roundie,
-
-
- 0 replies

as bought
collin738 posted a blog entry in brunhilda02,
Full 320 is swap. Motor, Tranny, LSD and recaro seats from an e21.
1.8l M10 Factory remanufactured motor with approx 20k
5- speed upgrade with UUC short shift kit
lightweight aluminum flywheel
rebuilt 32/36 with sync link, rejected by patrick at midnight motorsports
polished valve cover
-
-
- 4 replies

How to Install an Esty Carpet Kit
M3M3 posted a article in Body and Interior,
When you get the box with the kit in the mail, open it up and check out all the cool pieces.
Do not lose or misplace one and think Esty forgot to put it in the box. She didn't, you lost it.
:-)
-
-
- 12 replies


Starting post
Krynvel posted a blog entry in Red 1975 '02 Restoration "Vixen",
-
- 0 replies

Primer, Shutz and V E R O N A!
adawil2002 posted a blog entry in Andrew Wilson's Vern & Veronika Restorations & Adventures,
Huge amount of work has all come together culminating in final paint.
The paint will cure for several weeks while the engine is rebuilt. The bottom end is already assembled, head should be back from the machine shop Feb. 28th.
-
-
- 10 replies

Some progress and some set backs
Dionk posted a blog entry in Derby - my 1968 1600,
While cleaning out the trunk I started to see more evidence that this car has been in a rear end collision.
Sigh.
Lots of welds and the seams don't seem to line up very well anywhere on the car. Something that I didn't really see until I really stated looking. One of these days I will look before I keep....maybe.
My friend who's helping me sand, paint and weld said "don't worry I'm a metal whisperer". So far the mug has come in handy on several occasions!
Wish me luck.
-
- 2 replies


Front suspension refresh
N2MY2002 posted a blog entry in Resurrection of my 2002,
-
- 0 replies

Changing Front Strut Bearings
tups posted a article in Suspension and Steering,
So, what is a strut bearing ?
-
-
- 2 replies

It's a 1802 automatic and it flies !!!
Alex Benedek posted a blog entry in My02s,
I replaced the one barel pdsi solex that i had from a 2002 engine cause the jets were not matching and made a mess somehow ...
The engine is smooth, idle is perfect , it only drinks too much ... , maybe the electric fuel pump has anything to do with it or it's just the wrong jets ?
32 liters - 117 km ...
-
- 0 replies


New Product! late model driving light brackets
Forrest_KoogleWerks posted a blog entry in KoogleWerks prototype and production shop blog,
It required a friend sending a pair of lights and telling me he was 'waiting for it', so it happened. I'm happy with the result.
quoted from www.kooglewerks.com :
this kit is designed for late model US market impact bumper cars, (requiring the front bumper removed) adds to the function and vintage rally look by accommodating most common aftermarket lamps. (with two mounting positions for deep or shallow style lamps) comes with two CNC cut .090 steel brackets, two .090 steel mounting tabs, zinc coated metric mounting hardware and two formed ABS plastic cosmetic covers (install with 3m automotive tape) brackets are coated in semigloss black.
-
- 1 reply


A Little Color
adawil2002 posted a blog entry in Andrew Wilson's Vern & Veronika Restorations & Adventures,
-
- 7 replies

Paint acquired
Dionk posted a blog entry in Derby - my 1968 1600,
-
-
- 7 replies

Engine and Induction - Different Styles
steve k. posted a article in History and Reference,
-
-
- 15 replies

Why the gas smell in the cabin!?!?!
N2MY2002 posted a blog entry in Resurrection of my 2002,
I removed the trunk panels to reveal what looks like a 71 tank. Is this a sign that something is up from a PO? Hmm...
-
- 5 replies

Giveaway - 2 Pint Glasses, 2 Mugs
steve k. posted a raffle in BMW 2002 FAQ Raffles and Giveaways,
The last Birthday giveaway includes our new items in the store: a pair of BMW 2002 FAQ Pint Glasses and a pair of BMW 2002 FAQ Mugs for your drinking enjoyment.
The giveaway is open until Midnight on Feb. 13th Pacific Time. Register your entry prior to that time.
As with the previous giveaways, this one is open and Free to all Supporting Members.
-
-
- 2 replies
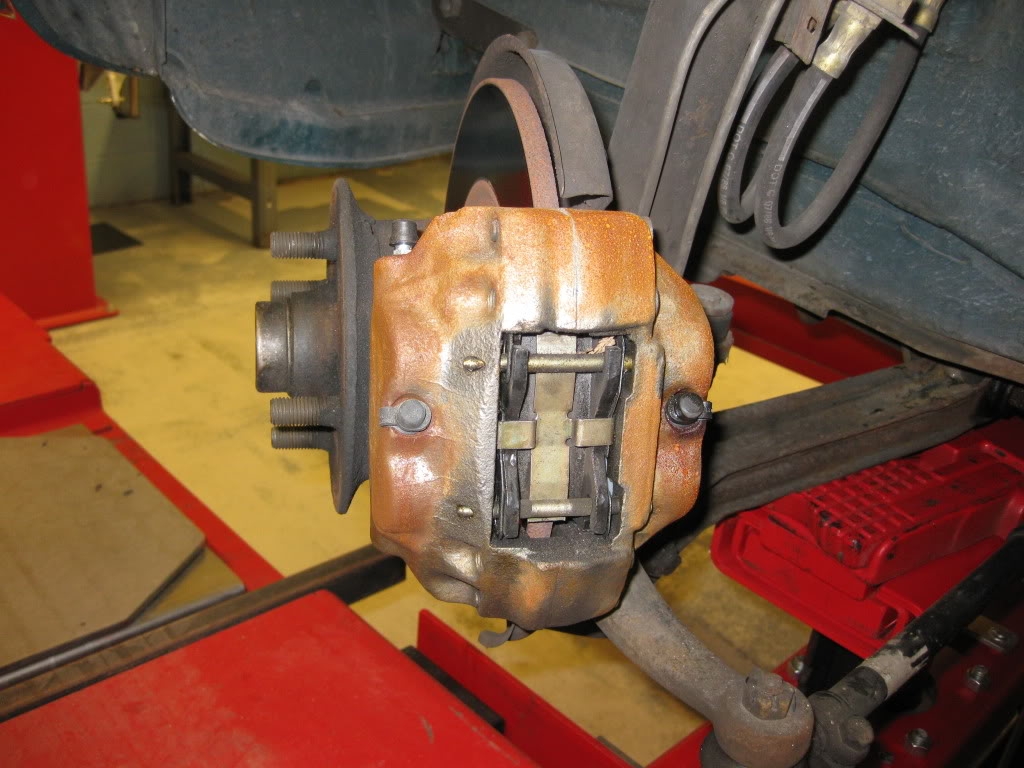
Conversion to VW Disk Brakes
steve k. posted a article in Brakes,
-
-
- 50 replies

02 Series 50th Birthday Celebration featuring Mike Self
King+Sons added 02 Series 50th Birthday Celebration featuring Mike Self
- 14 images

Cars and Coffee Portola Valley - Feb 2018
steve k. posted a article in Events,
Conversation seems to take over what should be an "adult show and tell"
The event did not disappoint with a great collection of old
and new
Something very unusual
And something very familiar
You can see all the photos at
Or if you prefer a slideshow with some music
A great looking Isetta.
And a video of the Tourings making an grand exist.
-
-
- 0 replies

Day 120: Emissions controls out, plus more....
Hodgepodge posted a blog entry in This should be fun! A 1975 2002 restoration diary.,
-
- 3 replies

Fuel injection for the Win!!!
Kingryan86 posted a blog entry in The Nimbus 2002,
I just completed my fuel injection today!! This should have been my first upgrade. Ive been slowly collecting everything and the weather was in the 50s today which for spokane is unheard of, it should be in the 20s. I chose the lh2.2 because it was cheap and simple. Wiring makes my head hurt just thinking about it, so the plug and play-ness was quite appealing. not counting the battery relocation, it took me about 6 hours for everything. I scored big time on a throttle cable bracket which seemed like it was going to be the biggest hurdle. I got some pieces from an abandon project from Tom at 02again. the rest of it is just brake cable from the bike shop.
I relocated my battery a few weeks ago with the e30 cable, I just bought and marine battery cover for $13 from Oreilys and screwed it down. the today pulled out all the carb stuff and slapped on my 318i manifold. I had the harness all plugged in on my spare motor on my stand so I was able to extend t a couple of wires and figure out all IAC stuff. initially the car idle very very high like 2500-3500 so i figured it was vacuum leaks, spent some time figuring that out and it still idled high.. I ended up clamping some vice grips on the IAC hose to limit air flow and got the idle perfect.
Ill just upload some pictures. I know my car looks like garbage, but I wanted to make it a fun and reliable driver before worrying about cosmetics.
-
-
- 5 replies

Trunk Opener/Light Kit
grizzlebar posted a blog entry in No more BTR,
Finally got around to installing Cal’s trunk opener and light kit.
First things first - Cal, you have made a hell of a kit. From the packaging to the instructions, this thing is top quality.
Installing is incredibly straight forward. Definitely take the time to clean your old latch system. I spent a few days soaking it in degreaser, carb cleaner, and then wire brushing it. A bit of lithium grease at the back end should keep it in great working order.
Ininstalled a switch on the the positive side of the light so I can turn it off when I don’t need it, though I’ve verified that the plunger interrupts the circuit nicely.
Plan is to tap the light into my aux fuse panel in the back seat and when I finally get around to redoing my center control I’ll put in a switch to pop the trunk.
-
- 3 replies

Primer!
adawil2002 posted a blog entry in Andrew Wilson's Vern & Veronika Restorations & Adventures,
-
-
- 3 replies
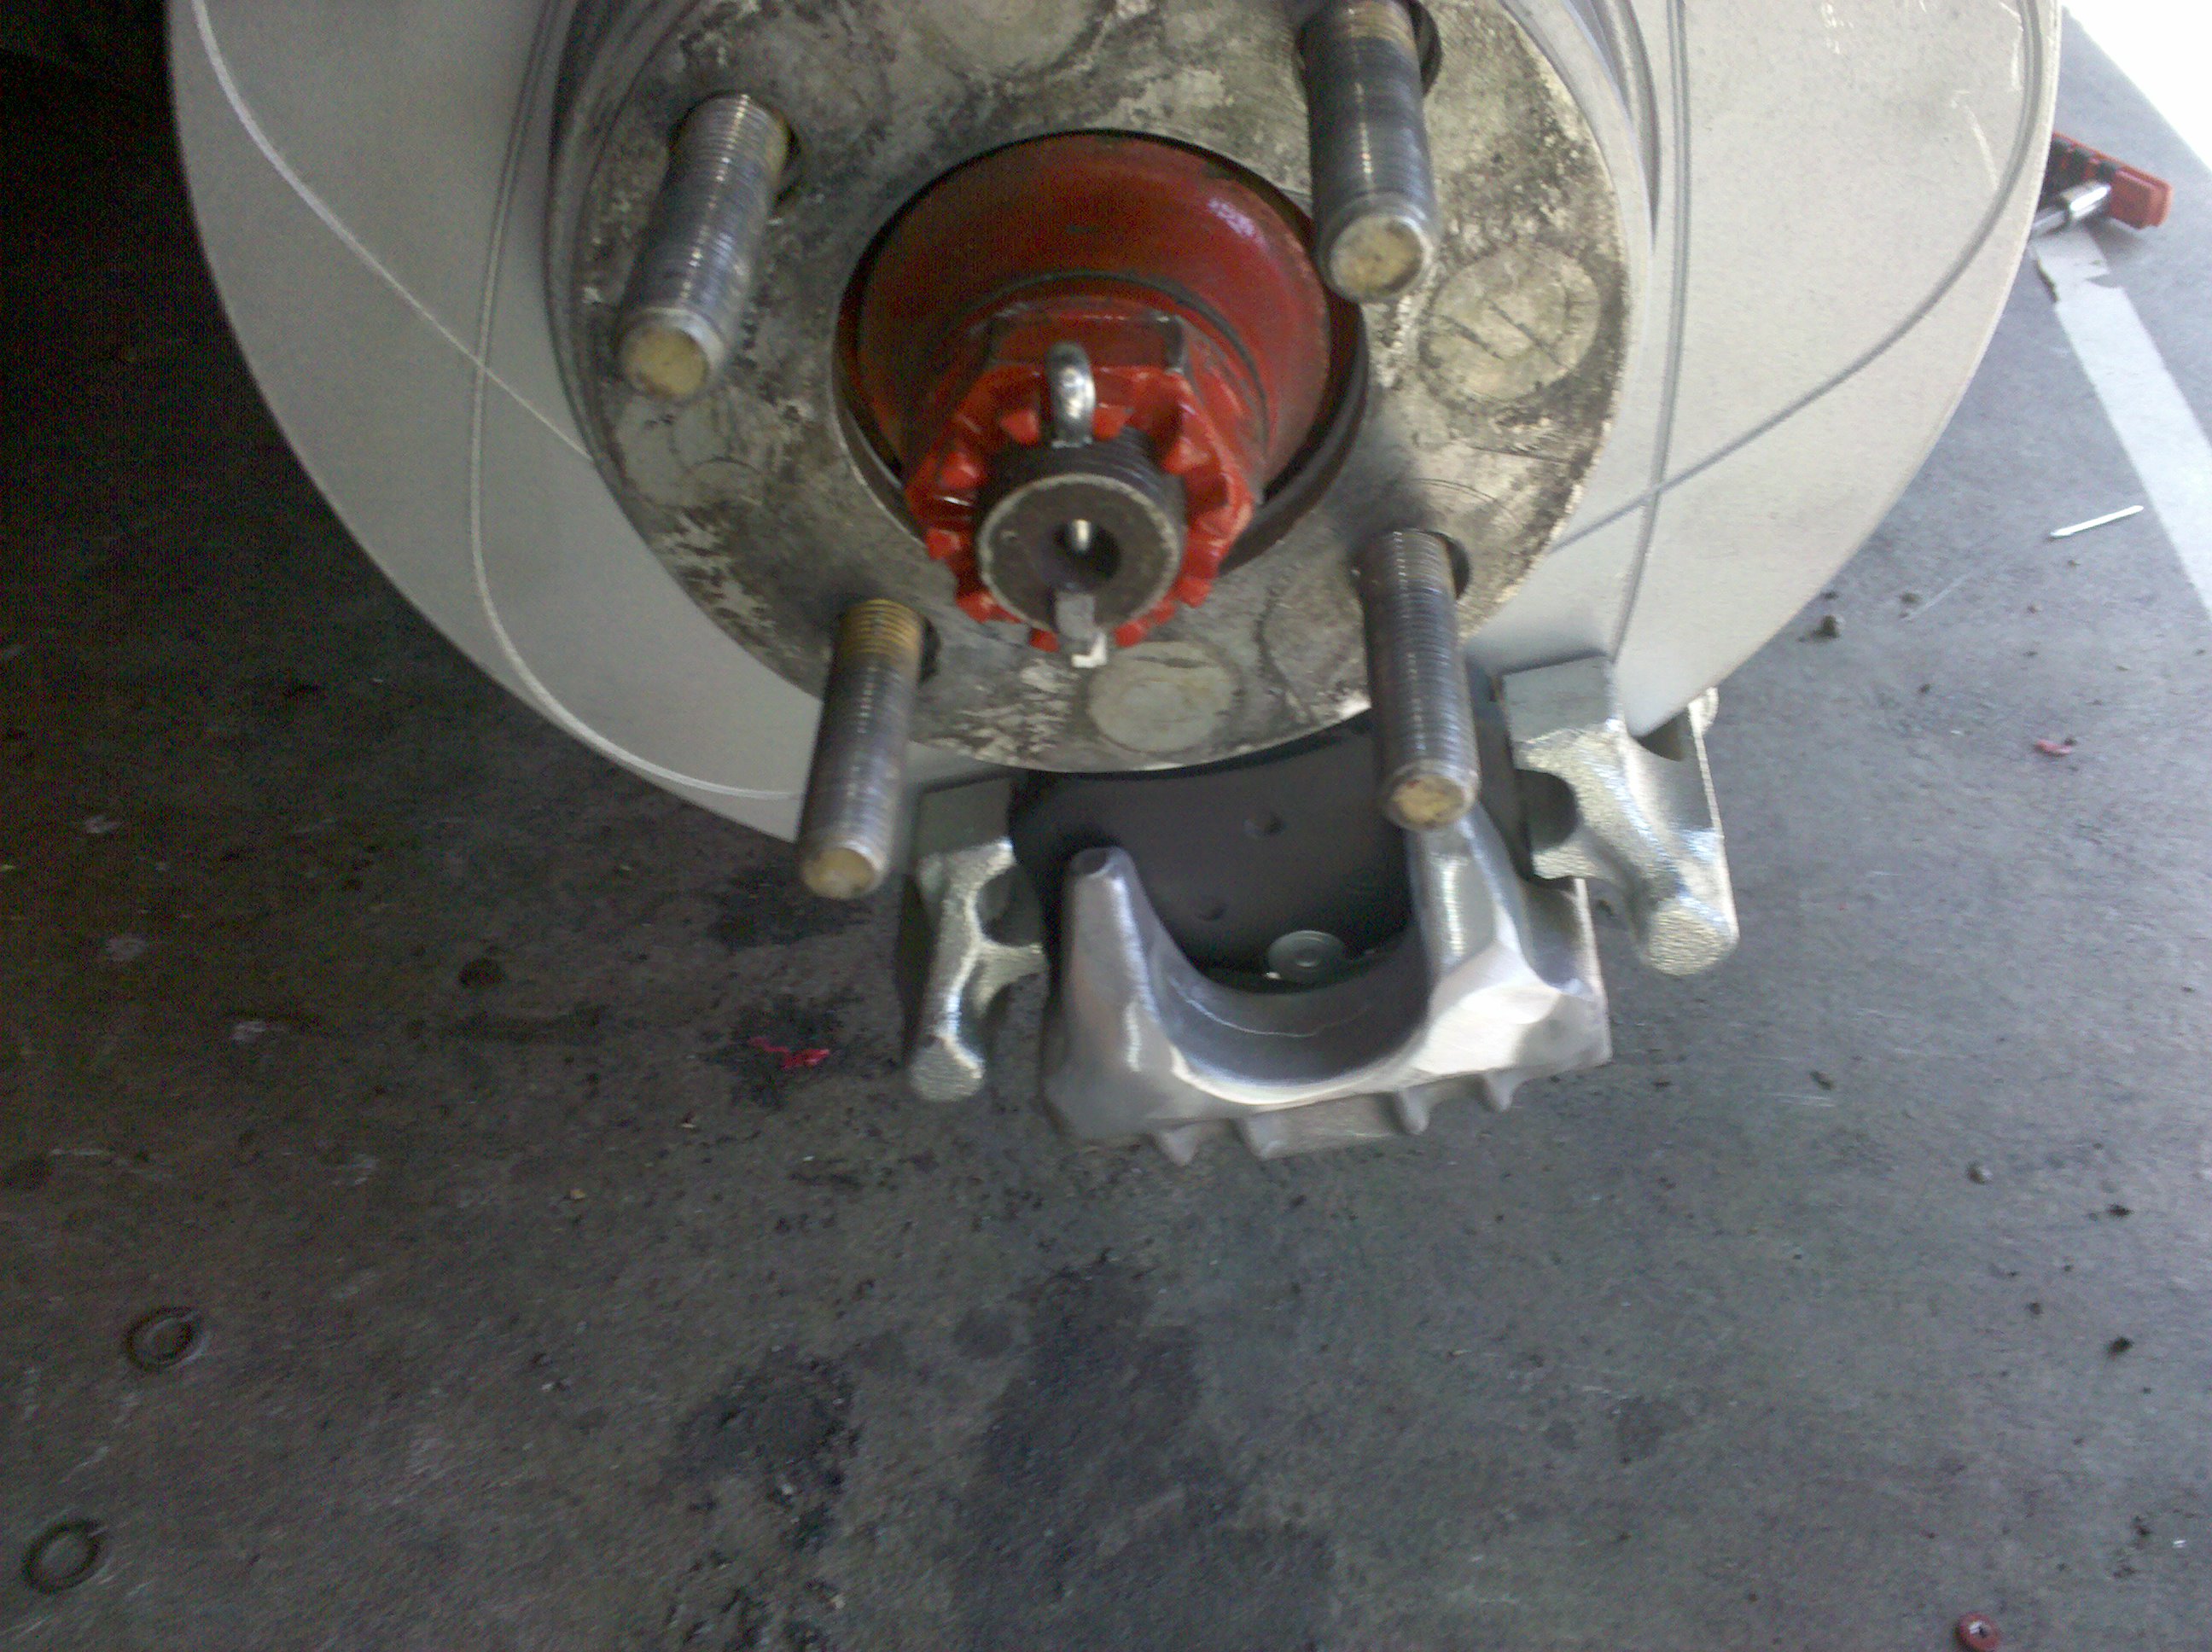
Front Brake Pad Installation
mcaden posted a article in Brakes,
My process followed from Haynes:
-
-
- 7 replies