
I went to install front brake pads on my '73 2002 with stock brakes earlier this week. My current pads ended up still having plenty of life, but I thought I would post pictures to the extent that might help others.
My process followed from Haynes:
1. Parts/Tools - new brake pads, 1/8" flat head punch, small hammer, brake cleaner (note: depending on the condition of your retaining pins and anti-rattle spring, you could need replace them)
2. Jack up car and remove the front wheels
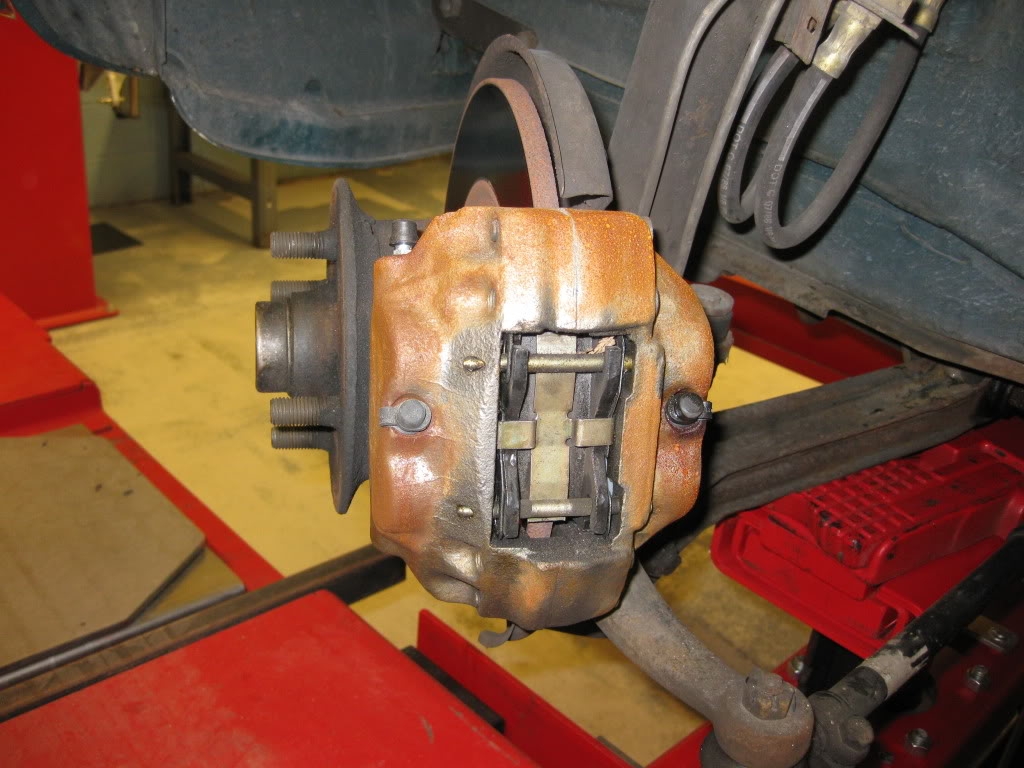
3. Extract the two retaining pins using your small hammer and 1/8 inch flat head punch to gently tap out the retaining pins and the anti-rattle spring. You tap on the small end of the pin located on the outer side of the caliper. See pic below of two pins and spring.
Before picture of caliper, two retaining pins, and anti-rattle spring:
4. Withdraw the pads by gripping ends with a pair of pliers or using a flat head screw driver. In the picture below, I have removed the pins, spring, and the outer brake pad.
5. Once the pads are out, brush any dust from the ends of the pistons
6. Here is a picture of the pins, spring, and pads out of my car (you can also see the tool kit you'll need - mentioned in step 1).
7. Inspect the thickness of your disc pad friction material. If it has worn to 2.00 mm or less than the pads should be replaced on both front bakes as an axle set. My pads were okay.
8. Clean your pins, pads, and anti-rattle spring with brake cleaner. This is also a good time to check your rotors for runout/wobble, cracks, thickness, or other problems.
9. If you need to install new pads, use a syphoning device (I had a turkey baster - see below picture) to withdraw some fluid out of your reservoir. When you compress your pistons some additional brake fluid will be displaced and it will ensure your fluid reservoir doesn't overflow. If installing new pads, after removing the brake fluid from the reservoir (remember brake fluid eats paint and causes rust, so be careful with it), use a flat peice of wood or metal to compress the caliper pistons into their cylinders in order to accept the new thicker depth pads.
10. Install your new pads, the spring, and the pins in the reverse order. Here is what mine looked like after cleaning up the pins and springs.
11. After you put your wheels back on and lower your car to the ground... remember to pump your foot brake hard a few times, test your brakes, and top back up the fluid reservoir. You're done.
-Marc


Recommended Comments
Create an account or sign in to comment
You need to be a member in order to leave a comment
Create an account
Sign up for a new account in our community. It's easy!
Register a new accountSign in
Already have an account? Sign in here.
Sign In Now