


MildSeven
-
Posts
836 -
Joined
-
Last visited
-
Feedback
100%
Content Type
Profiles
Articles
BMW 2002 and BMW Neue Klasse Wheels
Colors
Steering Wheels
Production Years
Models
Registry
BMW 2002 Vendors and Shops
BMW 2002 Books
The Hack Mechanic
Forums
Blogs
Gallery
Events
Store
Books
Community Map
Videos Directory
Blog Comments posted by MildSeven
-
-
 41 minutes ago, backeis said:
What wiring method did you decide to use? I'm debating hooking mine up to just the fog light switch, or whether I should combine them with the regular headlights.
During my restoration, I had installed a fused block (4-5 spaces/fuses) which is powered directly from the battery (via a relay with ignition on).
I ran a wire from that block to a switch in the center console and from there straight to the fog-lights.
-

Thanks again...
I just used you automatic door write up as a guide, it really helped.
I'll just add the following tip, for the wiring from car to door, to help others.
To pass the wire from the car to the door, I drilled two ¾” holes, 1 on the door, other on the a pillar.
I used a rubber grommet on the a-pillar and a plastic grommet on the door + a rubber hose for the wires to sit in.
The rubber grommet on the car (a-pillar) is smaller (in terms of inner diameter), so the rubber hose is snug (held in place), the plastic grommet on the door has a larger inner diameter so the rubber hose will be fed in to the door.
Final result:
-
 1
1
-
-
thanks for this!
-

Is the smell also in the trunk, like when you open the trunk will a fuel smell smack you in the face? If not you might want to check if the smell is being pulled in to the cabin from the heater fan. Check the seals all around that area.
...but if it smells int he trunk, they keep working back there first.
-

holy cow!
-

cool stuff!
good luck finding the cause.
-

keep it up, nice work!
question.. how do those 3-point rear belts work? they look retractable. Where is the top point mounted?
-
2 hours ago, Swiss 2002Tii said:
Hi MS, I did much the same when I renovated the interior of my '72 MBZ last year. First a UK product called Peacemat that is a rubberized instead of bitumen-based sound isolation. I also covered the Peacemat with EZ Cool. Great product.
I'm thinking of doing the same for my Tii.
I'm curious: I can't quite tell from the photos - Did you install the Dynamat inside the door panel on the exterior-facing surface, or on the interior-facing surfaces?
Thanks,
Kit
I did neither.
I was thinking about in the door (on the inside of exterior facing sheet)...but heard too many people talk about the stuff falling off. I also thought about the interior panel but was worried about the door card fitment.
would be easy to get to in the future if I change my mind.. but it's ok for now. let me know if you end up doing one or the other.
-

nice stuff...
-
looks great!
-

Nice work!
Just going to mention this in case...
I am not familiar with "Por15 Top Coat." I just googled it and read the main product page. Generally I don't think you can apply a top coat to por15 after it has fully cured (read label) without scuffing it up, but maybe this product is formulated to do that. If not you will need to scuff that Por15 before applying a top coat. I scuffed up the under carriage before applying the seam sealer, then top coated with some basic flat black metal paint.... but maybe that por15 stuff is developed for that. For the floor pan (inside), I left the por15 as is, no top coat.
Looks like you're doing a great job! keep it up!
Anthony
-
On 12/14/2016 at 5:53 PM, michaelbend said:
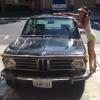
What a great project! Whats your wheels/tire combination?
The wheels are 15" BBS RM. from a VW. They originally come with .5" lips but I have 1.5" lips in front and 2.5" in back (I would prefer 1.5" everywhere).
My fenders are rolled (from previous wheels), not sure it's it's required, but I'm 95% certain.
Offset, I've never bothered to calculate it because math.
Stock Front Rear Barrel width 6 6 6 Lip width 0.5 1.5 2.5 BBS RM width 6.5 7.5 8.5 Overall width 7.5 8.5 9.5 ET (mm) 33 ? ? -

bonkers! I love it.
-
this is bananas!
-
15 hours ago, ron sambrooks said:
what a fantastic job keep up the good work
14 minutes ago, jmel02 said:Kudos to You!
Awesome Job!
Awesome Car!
thanks a lot guys.
-
Nice. I thought the driver side was NLA... did you also buy new a new driver trim? it was available?
-
I was a little disappointed with the content in the blog versus the title.
Good job and good luck! I was another victim of deceiving looks.
-
16 hours ago, ClarenceTE72 said:
Car looks great!
So you don't recommend the URO door seals? But the windshield seals ok?
Well, I'm not sure if I would recommend them but I would buy them (door seals) again. My logic is... I had read that the OEM seals aren't perfect either and there's a significant difference in price.
There are a lot of opinions out there, not installing the seals properly, not adjusting the windows accordingly... etc. There's a "current" thread in the gen. discussion forum on the subject.
The reasons I bought the OEM windshield seals, the price difference isn't that substantial plus they're holding in the windshield in front of my face
. I can't say that I've read anything bad about the URO windshield seals... but I also haven't really dug in to it.
good luck!
-
18 minutes ago, duckdudess said:
What did you use for "weatherstripping adhesive" to get the Uro door seals to stick? Nothing I've tried has worked.
Permatex Super Weatherstrip Adhesive, 59 mL
It used to be called Permatex Weatherstrip Adhesive "Pit Crews Choice" or something... because the first tube I bought was of that, then the labeling changed slightly. Don't use too much, put some on each side (body + strip), make sure there's no powder (if it's new). It's especially important to wait until it's tacky, then attach.
It looks and behaves like Armaflex adhesive (armaflex, the insulation for refrigeration piping), if you have some of that you could test it out.
-

so what was the unknown wire for?
-
the end is in sight!
-
congrats on completing your lovely project!
-
On 6/16/2016 at 6:42 PM, dang said:
My Esty carpet kit is waiting to go into my '76 as soon as I'm finished with some paint fixes. Keep posting as you go...
Same story, bought esty carpet in Feb-Mar 2015 for my '76, still haven't opened the box.
-

keep on fighting the good fight!


Door Lock Adventure
in Andrew Wilson's Vern & Veronika Restorations & Adventures
A blog by adawil2002 in General
Posted
I ran in to a similar issue and broke a key.
A few months later I opened the door up.
Found when locking the door, the lock's little "arm" (on the back of the lock cylinder) would jump out of the channel (part it raises up and down) and become wedged against the side.. making it (probably) impossible to turn back straight.
I bent lock part (with the channel) a little to avoid it jumping out in the future. I also installed some cheap automatic door locks :D.