


VWJake
-
Posts
706 -
Joined
-
Last visited
-
Days Won
9 -
Feedback
100%
Content Type
Profiles
Articles
BMW 2002 and BMW Neue Klasse Wheels
Colors
Steering Wheels
Production Years
Models
Registry
BMW 2002 Vendors and Shops
BMW 2002 Books
The Hack Mechanic
Forums
Blogs
Gallery
Events
Store
Books
Community Map
Videos Directory
Everything posted by VWJake
-
Rear discs: Audi A4 caliper carrier instead of MK2 VW?
VWJake replied to skylund's topic in BMW 2002 and other '02
While you’re hunting for upgrades for your VW rear calipers look at the MK4 calipers. If I recall correctly they’re alloy castings not steel (Lighter), perhaps less prone to seizing, and I believe they will mount up to the earlier carriers. I think the only real difference was the use of a bango connection for the brake line instead of an inverted flare fitting. I could be misremembering all of this, but it might be worth looking at -
It’s hard to remember all of things that have taken place since last I updated this blog but here it goes: With the shortblock/trans/subframe in the car I turned my attention to the shift tower. I’m using the early style linkage as that’s what I had available to me. I shortened the the tower to fit centered in the opening in the tunnel, then cut down the shift rod to match. All new bushings/isolators/and a shortened support rod were installed. I ended up ordering a new clutch master cylinder and calipers as the master I had intended to use had deep pits in the bore after cleaning and I realized that for about $35 ea for reman’d calipers it just wasn’t worth my time to tear into old ones. I’ll save those and the kits for an emergency situation/rainy day. I recreated all of the brake hard lines in Cu Ni alloy. The trailing arms were cleaned, new bushings installed, painted, and all of the braking components were refurbished/replaced. The parking brake handle got some attention: cleaning, straightening, lubing, shiming. After that the new cables were installed along with the resealed/painted LSD and subframe (complete with new mounts/rebushed diff hanger). I now have a set of Poly subframe mount inserts that I will get around to installing at some point. IE stage 2 springs, 1 dot pads, and Bilstein Sport shocks finished out the rear suspension Both front wheels now point the same direction again thanks to a new center link, new inner and outer tie rod ends and freshly blasted/painted turnbuckle tubes. Reconnecting the steering column to the steering box will happen soon. There were quite a few rust blisters on the underside of the car that were scuffed and treated. Most of the seams have an application of 3M seam Sealer now. There are a few yet to. In the interior I’ve managed to POR-15 the floor pans and apply Kilmat to most of the surfaces. The heater box was disassembled/cleaned/reassembled with new foam. Wiring harnesses have been cleaned/rewrapped/placed. A new tank to engine fuel line (the special cohline heat sealing variety) has been routed through the cabin. I’d better get my driveshaft measured/cut and get the cylinder head stripped/milled soon. Those are quickly becoming the “hold-ups” to taking a short test drive before the bodywork begins.
-
Chamonix ‘73 No pics so perhaps it didn’t happen... bled the brakes and clutch, installed the P clamps on the parking brake cables. I installed the new center link, new inner and outer tierod ends and blasted/painted/installed the old tie rod center sections. I put the front wheels on the car just because. I finally drilled the rivets on the heater box. What a mess of nut shells and maple seeds. After removing the seized fan motor I was able to free it up and get it running nicely again. Next time out I’ll focus more on the heater box so I can get it back in and then install the steering column.
-
‘73 Chamonix I finally got around to installing the new shift tower isolation bushings and a shortened tower brace. I made a custom mounting tab for the brace from a chunk of angle iron. It seems to have worked out dandy. I rewrapped the harness that runs from the firewall to the trunk and put it back in place. The fuel tube that runs through the cabin is now in place as well. I cleaned up/lubed the parking brake handle and reinstalled it. Once I finally got around to honing the clutch master cylinder in preparation to rebuild it I was disappointed to find that there are some very deep pits in the bore... of course they’re in the path of travel of one of the plunger seals... oh well. I’ll save it along with the rebuild kit. Perhaps I’ll have the body sleeved some day.
-
Chamonix ‘73 The pics are pretty bad, but I’ve managed to pick at the car here and there over the past few weeks. The pans are POR’d, scuffed, and kilmat added. The short brake lines from the “T” have been replaced and new soft lines are in place. The old seized parking brake cables were removed. The diff hanger has new bushings and got a lick of paint. The rear subframe has new mounts and then I installed it along w/ the 3.91 LSD. Next project will likely be new brake lines and brake parts on the trailing arms So I can finish reassembling the rear suspension. I need to get my driveshaft measured and sent off for shortening as well.
-
I’m running a pair of 6v yellow tops in series (so I have 6v for my gauges and 12v for everything else in my daily driver) that are almost 15yrs old. Good batteries by my account.
-
Sorry for the detour... FWIW the Caddy has a TBI fuel system as well. ?♂️
-
Here’s another Curious GM design. An aluminum block, O-ring’d steel liners and Cast iron heads. The service fix for those leaky bastards was literally “stop-leak”... every x,000 mi. I rebuilt one for the ‘86 Coupe Deville I owned for a while.
-
Actually the spray bottle on the bumper is POR marine clean. See that blue spot behind the rear fender. That’s what a scrub brush and some marine clean will do for the paint on this truck. I can’t decide if I want to do the whole thing or not.
-
Yep, Tunerpro 5. I have a separate wideband in the truck that is supposed to compatible, but I haven’t attempted the connection yet as my truck isn’t exactly built for speed. I just use it for “my own info” and make adjustments as needed.
-
I modified the original IH distributor to use a reluctor and a pick-up coil. The advance is completely locked out and set to TDC. My timing and fuel tables get me in the ballpark per rpm/load. There are a ton of other additional algorithms that fine tune it. The sampling rates are painfully slow compared to modern efi. It’s not perfect, but it does pretty well. You can change the target afrs among other things.
-
... Im using the 2bbl TBI system from an ‘89 Astro can on my ‘55 IH truck. As soon as I get my “sons” ‘73 Hotrod running I’ll grab the 1bbl parts from an 4cyl S10 and give it a try. I’m sure it’s flexible enough. I actually wouldn’t be surprised if I could get the 2bbl TB to work as well. You just gotta be smarter than the code (I’m not saying that I am, But I will stay at a Holiday Inn before turning so it should work out fine).
-
That won’t be any fun to repair. As long as the A sheet, wing sheets, and inner fender are still securely bound together I’d cut out a large enough section of firewall to make the repair from a donor and weld it in. After that’s at least stitched in I’d pull the fender off and remove the wing sheet to have a good long look/poke around. Patch anything else you find that’s thin (likely a lot) weld on a new wing sheet and probably an A panel as well, treat with your favorite flavor of rust converter/arrester/sealer, and repaint as needed. best to pull the engine/trans/front Suspension/firewall pad/wiring harness (at a minimum) before getting started on this. I thought about this same repair on tub 1664819 (‘69 ‘02). Instead it got chopped up into hundreds of pieces to help save my other two. -that’s my take. Take it for what you will
-
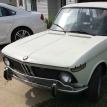
Calling all hubcap experts! Are these correct for a 68 2002?
VWJake replied to bluebmw's topic in BMW 2002 and other '02
Those look like VW to me -
My project finally blew the M10, sell, rebuild or swap?
VWJake replied to FLEMINGO's topic in BMW 2002 and other '02
I’ve pined for a nice notch for decades -
Chamonix ‘73 the LSD has fresh seals in it and a coat of paint. The trailing arms have been cleaned and painted. I would have mounted all of that mess on the car but I forgot to prep/paint the hardware that holds the subframe bushings to the subframe. Duh... Oh well, there’s always next time.
-
Outstanding work D.martjn!
-
Well that didn’t work... https://www.bmw2002faq.com/blogs/blog/354-from-the-ashes-breathing-new-life-into-a-neglected-73-02/ https://www.bmw2002faq.com/blogs/blog/246-resurrection-of-a-68-02/
-
I don’t know how to show you where to find them so here’s links for both of mine. There are tons of great blogs on this site about others restoration/repair adventures. Read as many as you can stand. There’s a wealth of info here.
-
It ain’t great, but I’m in the process of fixing worse. ? Check my blogs if you don’t believe me. ? The floor pans don’t look horrible. Could be some separation between the rocker and pan though. Get that drain plug flattened out, cleaned up, painted, seam sealed or cut it out and weld in a patch. I could go on and on, but let’s get to the basics... check the frame rails. If they’ve got holes in the bottoms you should fix them before piling the family in for joy rides. The shock towers are patchable, not a safety concern at that stage. The spare tire well/tire is part of the crash worthiness of the car. Keep em and fix em unless you’re building a track car. With the amount if rust in the aft portions of the rockers and the leading edges of the wheel wells you need to be concerned about the subframe pick up points. If they’re rotten don’t put your family in that car until it’s fixed properly. Replace the outer rockers and evaluate the inners once the outlets are off. Plan on A sheets too. With those things fixed you could enjoy it as a rough runner/driver safely. Order the outer nose skin and look at Jaymic for the inner parts too. I think you’ll need them as well. Possibly a whole nose. Your wallet could be pretty dusty inside after fixing this car. I’m not telling you not to do it, but I’d be lying to you if I said it was going to be cheap to fix up. I can see an easy 5-10k in a shop to repair all of that rust.
-
Pull it from the back. Pay attention to the orientation of the seal. You can put it in backwards. Then it’ll want to keep oil out not in if ya know what I mean.
-
Do yourself a favor and find either a new one or reman. VW’s parking brake mechanisms have a pretty short life. When they seize they cause the caliper to drag.
-
This is actually over 2 nights in the shop. After the 1st I didn’t feel like I had enough to comment on. ‘73 Chamonix Welded up some small remaining holes in the floor pans/tunnel. Replaced the front to back brake line using new copper nickel line. I cut down the shifter platform, rebuilt the shifter and shortened the shift rod. I installed some misc bits in the engine bay. The front struts are bolted in and the races have been pressed into the hubs. The rear subframe that I’ll be using for this car got a a clean up and cot of paint. Next go ‘round I’ll be working on the 3.91 LSD, trailing arms, and mounting the front brakes.
-
And a huge turbo to overcome that tiny now-intake valve.
-
Oh and I’m using PPG shopline for my ‘73. It’s single stage enamel. I have the option of a clear, but I haven’t decided yet. Devilbiss finishline 4 gun for color/clear


