


Tombonetoo
-
Posts
137 -
Joined
-
Last visited
-
Feedback
0%
Content Type
Profiles
Articles
BMW 2002 and BMW Neue Klasse Wheels
Colors
Steering Wheels
Production Years
Models
Registry
BMW 2002 Vendors and Shops
BMW 2002 Books
The Hack Mechanic
Forums
Blogs
Gallery
Events
Store
Books
Community Map
Videos Directory
Everything posted by Tombonetoo
-

From the album: Anthrazitgrau '76 2002
-

From the album: Anthrazitgrau '76 2002
-

From the album: Anthrazitgrau '76 2002
-

From the album: Anthrazitgrau '76 2002
-

From the album: Anthrazitgrau '76 2002
-
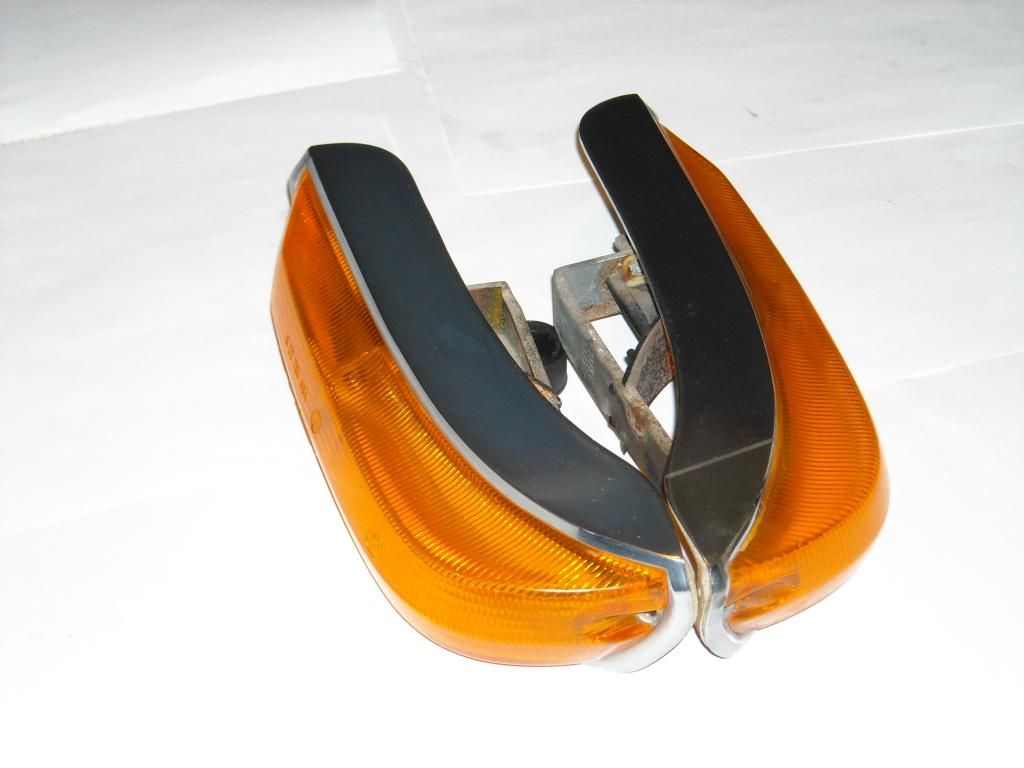
Hi all, I am looking for a standard stock throttle shaft (rod from firewall to carb) for a '76 2002. I do not need the knuckle/hex-bolt part that screws on to the carb throttle shaft (unless you have it already attached then I will take that too). I really just need rest the shaft/rod section. See rod at top of picture below - this is the one I need: Thanks, Tom
-

Sync-linkers... Some help please
Tombonetoo replied to Slightly Larger Roundies's topic in BMW 2002 and other '02
Hi - I had to preload the secondary armature with a spring so that it kept the secondary throttle plate closed at idle - see pick below. There was just a bit of play in the secondary sync-link slotted armature to allow the secondary throttle to ever so slightly stay open - and even that small amount will affect idle. This worked like a charm. Also, there is a set screw on the bottom side of the secondary armature that should just barely touch your new sync-link armature stop arm. The set screw could be holding your secondary open - check it. While a really liked the sync-link, I now run with a Weber 38 - which was a slight hit to MPG, but definitely an uptick in grin factor. Best - Tom -
Toby - I just checked what I programmed for the Curve 2 advance values, the values I quoted in the write up include the full centrifugal plus static advance. At my rev-limit set point of 6500 RPM, the most advance I would get is 37-38 deg centrifugal plus 6-7 deg static = 43-45 deg total. This car does not spend much time up there the way it's driven. On Curve 2, 3000 to 4000 RPM range is 34 to 38 deg total, with not much more from vacuum advance there. Would you consider this safe with a 15 AFR. Thanks,
-
Wow, thanks Pamola for this input and recommendation. Okay, I am definitely going for the nerd award. In fact I have a k-type thermocouple in the toolbox that's been begging me to be put to use.... What AFRs are you holding across the sweep points you suggested That I run on the Dyno? I am dialed in at 13 AFR during idle and under loading, leaner at 15 AFR at cruise speeds. Would you consider these values too lean? I too prefer durability, then performance, followed by optimizing economy as a tuning goal. Best,
-
 Email sent.
 -
Hi Bob - Question - are you running the Tune version or a unit with the preprogrammed curves? What is the configuration of your engine and what curve did you ultimately go with? Thanks,
-
Toby, I hear you - this is a bit too much advance at the upper end given the gasoline we get around here. I plan to tone it down. Do you have a timing curve recommendation for a stock '76 M10 you would use? Thanks,
-
Nick - Thanks for the comment. I did not look individually at the coil-over/crank trigger solution but I did look at a used Megasquirt system from that a board members was offering at one time as a total solution. One of my goals is to maintain a stock look with this car while improving serviceability and performance. For example, I retained the use of the stock air filter over the Weber 38, cast alum exhaust manifold shield with Tii manifold, the 123Ignition has a "Bosch" look to it, the Cromodora wheels were dealer accessories catalog items at the time, etc. Installing Megasqirt, MSD, Crane, etc would meant some noticeable changes to the stock look under the hood. Best,
-
Thanks C.D. To answer the inner engineer in me, I may go ahead a put the car on a dyno and optimize these curves one for power and the other for economy. What the hell, we can fiddle around a few other timing advance curves to suit various driving conditions and just save them for downloading as needed. Fully agreed with your prposed sequence of RPM and loading parameters - these should give visibilty for possible adjustments to both centrifugal and vacuum advance profiles. Let you all know what I find and report back. Stay Tuned...
-
This past month I upgraded the carburetor system to a Weber 38 DPS 100 and the distributor ignition systems on my stock, 156,000 mile, 1976 BMW 2002. In this General Discussion topic, I will address the ignition system upgrade which was an upgrade from the stock Bosch 0 231 170 164 JFU4 distributor to a fully electronic, programmable 123Ignition 123/Tune 4-R-V-B distributor. Information on this distributor and the company who manufactures it is found at www.123ignition.nl and www.123ignitionusa.com. Here is the car: I ordered the unit online via the 123Ignitionusa.com website. It arrived in two days. Easy transaction. The unit comes in a form-fitting plastic package with a multi-language instruction booklet. The instructions are fairly straight-forward, even for someone who has not made an electronic conversion before such as to a Pertronix, MSD or Crane. I spent some time researching these other systems. What it came down to for me was the fact that for the most part these other systems were replacing the breaker points with a highly upgraded technology like a Hall-Effect trigger, but was doing little to address wear and tear of an old distributor itself, especially the centrifugal and vacuum advance mechanisms. You could of course send the distributor out for rebuild and have these advance mechanisms replaced and re-set. But by the time you did all that, with adding the trigger, you are spending $250-300 anyway. A new distributor with vacuum advance according to Maximillian is $290-350. So why spend upwards of $500 for the 123Ignition unit? Good question - I had to convince my better half on this one as well. The added features compared to a trigger-converted stock unit include fully programmable centrifugal and vacuum advance curves which was the prime driver and individual cylinder spark balance technology. also included is the ability to set rev-limiters and set what RPM you want the vacuum advance to start thus simulating a ported-vacuum line from the carburetor or manifold. all these features give you tremendous control over the ignition system. While this approach is not quite to the level of control you get with a full EFI or Megasquirt system, it is enough to get a 37 year old well-maintained stock engine idling smoothly and pulling strongly through the gear changes like she has not done in decades. I should add that the car is well-maintained, driven regularly, compression within spec, and primary upgrades include Tii exhaust manifold/system; de-smogged; bored and ported intake manifold for Weber 38; Bosch Red coil; etc. The installation of the 123Ignition distributor was actually simple. I decided not to hard wire the four wires – the black wire to negative post on the coil, the red positive wire to a switched 12V+ source ahead of the resistor wire, the blue wire to ground on frame and the wire to a 12V+ positive source (I used the same as the red) – Instead I decided to install a small junction box with a switch and four-prong plug for easy installation and removal (i.e. keep the old reliable breaker-point distributor in the trunk as a spare....), The switch allows me to switch back and forth on the fly between two pre-programmed advance curves. The following sequence of photos shows how I did the installation: How is comes packaged: Four wire system and manual: Programming the unit - download application, need USB to mini-USB wire: Once inked up, I downloaded the “Tune” application from the 123Ignition website on to a PC with Windows 7. No problems at all – nice looking program dash-board. I programmed the unit with two advance curves. For inspiration on the values in these curves I read everything I could find in this forum – there is a lot to read and I settled on the curves from the Bosch 0 231 180 003 & 005 distributors. The 003 distributor’s advance curve is similar to the curve for the original distributor. This curve is steep – starting at 3.3 deg at 800 RPM Crank and scaling to 30 deg by 2,400 RPM Crank. After 2,400 RPM, I continued this curve on a slight incline to 33 deg at 8,000 RPM. I set the rev-limiter to 6,500 RPM. I called this Curve 2. For the 005 distributor’s curve, I began at 3.3 deg at 800 RPM Crank, then followed the curve up to 40 deg at 4,000 RPM Crank, then on a slight incline to 47 deg at 8,000 RPM. Also set the rev-limiter to 6,500 RPM. I called this one Curve 1. I used the same vacuum advance curve for both Curve 1 and 2. Basically, the advance starts at 4 in-Hg (87 kPA) and increases to 10 deg by 8.3 in-Hg (72 kPA). I kept it at 10 deg until 15 in-Hg and then started to ramp it back to 0 deg by 30 in-Hg. All the curves I have read about end at 11.8 in-Hg (300 mm-Hg), then nothing. However, the vacuum advance on my old distributor remains at full advance over 8.3 in-Hg (yep, I measured it with a vacuum pump gage). For Curve 1 I started the MAP at 1,500 RPM (simulate ported vacuum), and for Curve 2 I set the MAP start to 0 RPM. These two curves were programmed using the TUNE application and then I stored both curves in the distributor and in a file location on my computer. Pictures of the loaded curves are as follows: Curve 1: Curve 2: I followed usual process of installing a distributor – first finding TBC for cylinder no. 1 by removing valve cover, rotate crank until the camshaft gear marking is in line with oil tube at 12 o’clock and making sure both lobes for cylinder no. 1 pointing down. I installed the distributor in a position that gave me ease of access to the programming port and vacuum advance tube on the new distributor, which resulted in the rotor was pointing at the firewall. I followed the instructions for setting TBC location with the green LED light in the view port and then secured distributor. I installed the cap and plugged in cylinder no. 1 wire in the plug hole just above where the rotor was pointing to. Then I plugged in cylinder nos. 3, 4, 2 in the distributor cap’s holes going clockwise. I then put the valve cover back on and low and behold, turned the key and she fired right up. Once the engine was at operating temperature, I then followed the ignition timing procedure – 1,500 RPM, vacuum line disconnected and plugged – rotated the distributor to 24 deg BTDC by finding the steel ball in the bell-housing with a timing light. The steel-ball was dead steady! Not the usual “following the dancing ball” I used to get, where I had to estimate 24 deg BTDC by finding the mid-point of the steel-ball “blur”. This time it was standing right there like the flywheel was not even turning. I then secured the distributor nut. Setting the timing this way results in about 6 deg of static advance against my Curve 2 which has approx. 18 deg of centrifugal advance at 1,500 RPM (i.e. 24 deg BTDC – 18 deg centrifugal advance = 6 deg static). Just for grins, I measured dwell angle. The 123Ignition unit has variable dwell. I got readings ranging from approx 30 deg at idle to approx 60 deg at 3,000 RPM. Installation photos as follows: Mounted junction box with switch and plug ($16 parts from Radio Shack): 123Ignition installed: The 123Ignition program has a nice dashboard with Crank RPM, Total Advance in Degrees, Temperature , MAP vacuum and Coil Current. You can switch between Metric and Imperial units in the settings. While you are running the engine, you can adjust the advance or retard in “tuning” mode. This will adjust the whole advance curve in 0.5 deg increments. This is similar to rotating the distributor in a calibrated fashion. So, with you at wheel and a passenger at the computer, you can perform your hill climbs to refine the power output using this function. Of course, in this part of Texas there are few hills, so we have to resort to the Hi-5 fly-ways for this effort (or a dyno....). Curve 1 Dashboard at Idle - note lower total advance due to MAP vacuum not starting until 1,500 RPM (even though unit reads vacuum): Curve 2 Dashboard at Idle - note higher advance due to added MAP vacuum advance (centrifugal plus vacuum advance is 13 deg) I have clocked about 120 miles this past week on the unit – mostly running on Curve 2. I have been running a wide-band O2 sensor as well. I had previously dialed in the Weber 38 DPS 100 to give me 13 AFR at idle and under load to 15 AFR at cruise speeds of 60-80 MPH (more on that process in another General Discussion topic I will write). These AFR readings held the same values with the 123Ignition distributor, perhaps a touch leaner by 0.2-0.3 AFR. The car idles smoother, pulls stronger and appears quieter at cruise. Curve 1 appears to have more advance than I am comfortable with. I have not experienced pinging at idle or at cruise, but then I have not been pushing the car on this program curve all that much. Nonetheless, if I don’t like it, I can program a new one and upload it to the distributor in under 3 minutes! I am very pleased so far with this upgrade, and would happy to assist anyone else that may be considering this upgrade.
-
 Hi - email sent on the clock. Best, Tom
 -
engine and drivetrain Engine Install Time-lapse
Tombonetoo replied to Swiftus's topic in BMW 2002 and other '02
Wow - this was a great idea to film the install. Good music to boot. Do you have her running!? Tom -
FOUND: Lower Metal Steering Column Surround
Tombonetoo replied to Tombonetoo's topic in Parts Wanted
Thanks - email sent to your PM. -
Thanks 330g! Hi all, I am looking for the lower metal steering column surround with a hole on the left side for the manual choke cable. Converting a '76 to manual choke. Thanks,
-
Pictures Added: Weber 38 DPS 100 - what is it?
Tombonetoo replied to Tombonetoo's topic in BMW 2002 and other '02
One more for you CD ... Your info source dictates the car is a 1975 model year. While the window sticker is not specific on model year, all the other info I have on the car indicates model year 1976. The VIN table resource in the FAQ section on this site also indicates model year 1976. What is your info source? Tom -
 Hi again Denver Tii - also please email the consolidatedb parts list you mentioned in your ad to: tombonetoo at gmail dot com Thanks, TOm
 -
Hi Denver Tii I am looking for a manual choke cable and if available, the lower steering surround with the choke cable hole already drilled in it. Thanks, Tom
-
Pictures Added: Weber 38 DPS 100 - what is it?
Tombonetoo replied to Tombonetoo's topic in BMW 2002 and other '02
Hey thanks C.D. for this information on my car. Do you know what "Platform Engineering Series 114" stands for? Best, Tom -
Pictures Added: Weber 38 DPS 100 - what is it?
Tombonetoo replied to Tombonetoo's topic in BMW 2002 and other '02
Hey Nick, I am going to check around the various speed shops in the area and see about renting a wideband O2 meter. Agree, the tool would save a lot of time and avoid potential engine damage. It took me a few weeks to dial in the 32/36. Hope to see you at C&C this weekend. Tom -
Pictures Added: Weber 38 DPS 100 - what is it?
Tombonetoo replied to Tombonetoo's topic in BMW 2002 and other '02
Hi C.D. I always admired the Cromodoras - I found these last year and refurbished them. Campagnolo Electras would be mighty fine as well. The VIN is 2373562. Built in 10 / 1975. Below is the original window sticker. I am the second owner. She is a real time machine. I have had her 8 years. When I was 16 this is the car and color scheme I wanted. It took me 3 other Bimmers and another 30 years to find her. We lived in Portland OR at the time when I made the deal. I see you are have a soft spot for Anthrazitgrau Met as well. The dark wheels look awesome on your car. Regarding the bumper, I am not ready to shed 40 pounds off the front end just yet.... Best Tom


