
Hi All,
This is my first post to this forum and first up, I'd like to thank all those that have come before me and shared their tips and tricks for everyone.
After recently completing the Girling Caliper/ Vented Rotor front brake upgrade to my 74' 2002, I decided to tackle the rear brakes as the shoes were pretty worn and I was at maximum adjustment. I'd read about the fun and games with getting that lower "M" shaped spring back on without losing an eye in the process and was a bit sceptical about tackling it myself! I scoured the internet (including this forum) and couldn't really find a super clear explanation so I set about trying to figure one out. I think I've come up with a pretty safe and easy way to get those springs on and I wanted to share what I learned on here. I actually took a lot of video of the job which I'll turn into a YouTube clip when I get a chance but until then, here is the basic explanation of what I did.
Tools required:
Large flat blade screw driver
3 x G clamps
Needle (long nose) Vice Grip pliers
40cm long piece of wood (about 4-5cm wide)
small block of wood (3 x 3cm) See pic.
Once you've removed the old shoes and cleaned up the drum backing plate, wheel cylinder, hub etc. Check everything is in good shape and the cylinder moves freely and the rubber seals are intact. Release both 10mm nuts on the handbrake cables at handbrake inside car. Turn the 17mm adjusting nuts on rear of backing plate to allow for shoes to be as close to the centre hub as possible.
Install new shoes by connecting the top spring between the shoes, attach the handbrake cable and position ends of shoes in the vertical slots in the wheel cylinder. Its a good idea to take a photo of the brake layout BEFORE removing the old shoes! Once the shoes and top spring are all in position, clamp the long piece of wood across the top of the brakes (covering the wheel cylinder) to the backing plate. This will hold the shoes in position while you're trying to manhandle the bottom spring on.
Here comes the tricky bit....
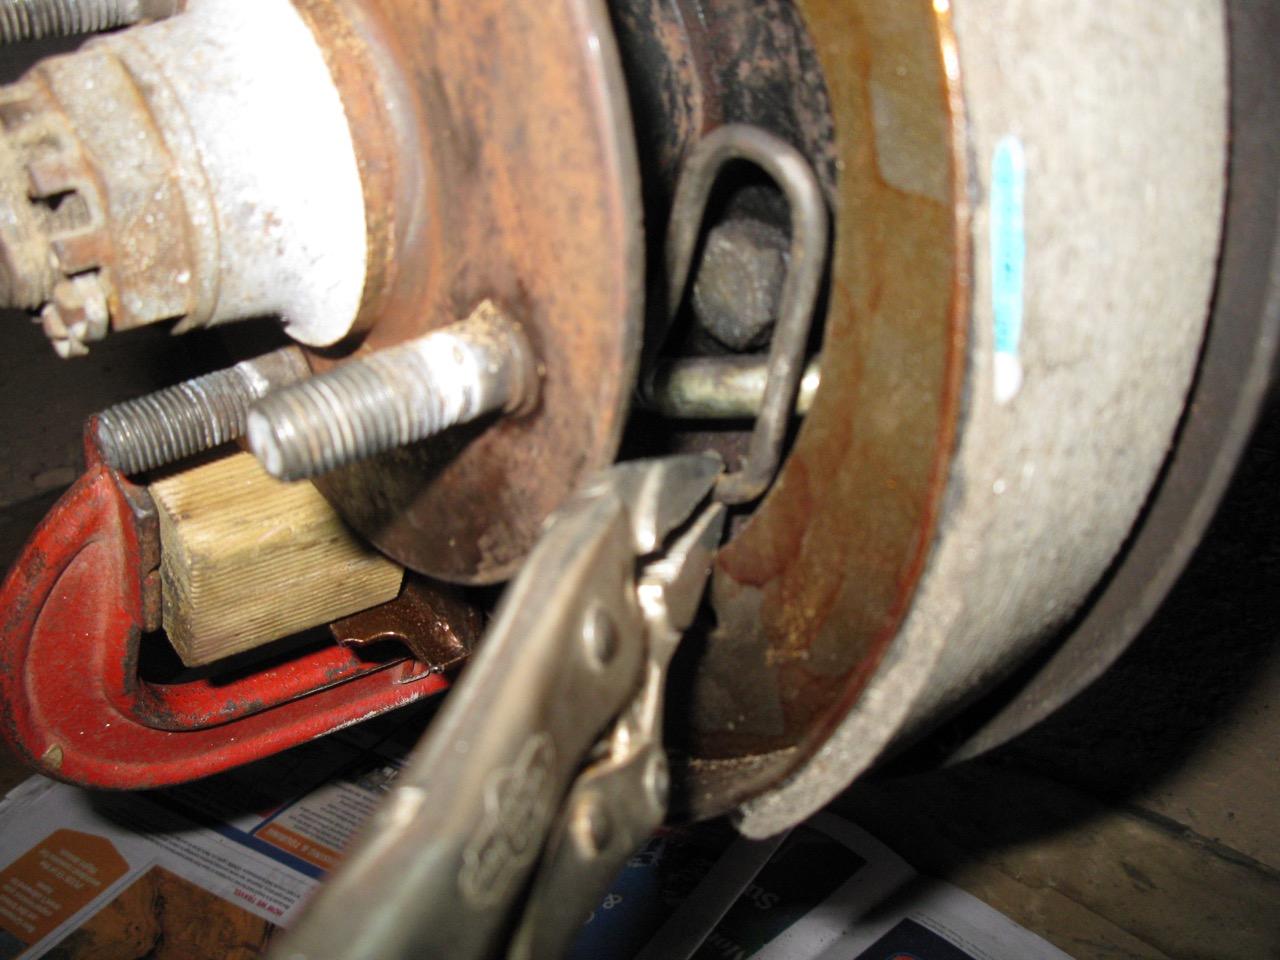
Take the big spring and position the LEFT hand end into the hole on the lower left shoe and position the middle of the spring in BEHIND the small central plate. Hold this in position while you clamp the small block of wood over the left hand end of the spring to secure this end in the shoe (see pic). Once the spring is firmly clamped in place, take the screwdriver in your left hand and poke it up behind the hub and onto the top of the small central plate and rest it on the spring. The idea is to apply upward pressure on the screwdriver to firmly hold the middle of the spring from jumping out from behind the central plate. (I used my foot to hold the screwdriver which then freed up both hands to work the Vice Grips)
Be strong...!
Set the Vice Grips as tight as you can get them on the RH end of the spring which is kind of tucked in behind the right shoe at this point. You should be able to get a grip on the lower "U" part of the spring and then gently (and carefully) pull the spring out over the shoe and downwards until it drops into the hole. BINGO! Wasn't that hard was it!
Remove all the clamps and wood etc and check if everything seems to be in position. Slip drums back on and adjust the 17mm nuts on the back of the backing plate until drag is felt, then back it off a bit.
Road test the car and repeat the brake adjustment. Don't forget to do the handbrake!
I hope this info has helped and here is a link to the YouTube video.
Cheers
Evan


Recommended Comments