
Whipping out the Por15 ...again

Entry posted by MildSeven in Restoration
1,889 views
Day ~30-34 (about 4 day of work), More Grinding and prepping + Por15, September 12th, 2015 - November 3rd, 2015
I was hoping to have the grinding + the Por15 finished before leaving on Vacation to Florida (September 25th), unfortunately, there was way more grinding (in tough places + under the car) than I had anticipated. "More work than anticipated," is really the story of this project.
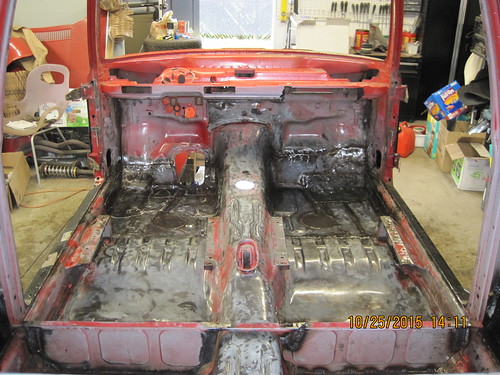
Grinding complete, shot of the floor pan.
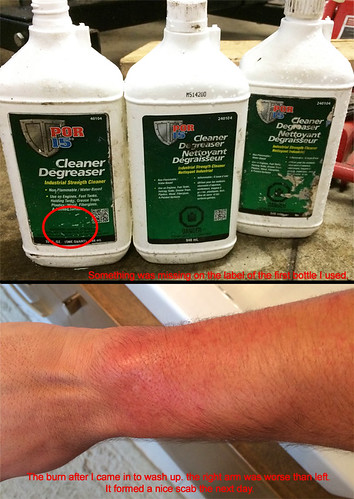
Then on to the degreasing... Since I would be working upside down under the car, in addition to the usual latex gloves and long sleeves, I used a dust mask (respirator) and a full face guard. I was using the spritz spray nozzle (included with the original kit i purchased) After a short time, the cuffs of my sleeves were pretty wet, while I was under the car I looked at the bottle in my hand to see if there was that "skeleton hand logo," or something.
After about 10 minutes my wrists were burning, I got out from under the car and read the label where it was written in uppercase "CAUSES BURNS," awesome.
I was having supper at Ernest's that night so I got to show off my burns to the boys.
Under carriage degreased

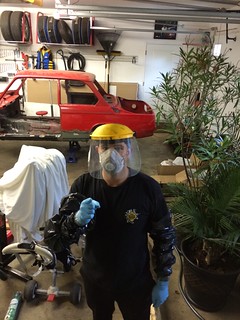
The next day for the Por15 - Metal Ready, which is a much stronger chemical... I put my latex gloves over some garbage bags which I made in to sleeves and taped them together. With the Metal Ready, I didn't need to do any scrubbing, you just need to keep the surface wet for a period of time (25 mins if memory serves me right).
Poor man's hazmat suit.
Rinse down. Those drain plugs, I removed and welded up could have come in handy.

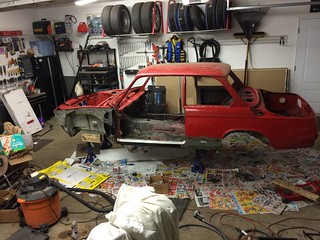
Paper laid out for the painting process.
The rust prevention rundown (shown on the driver inner fender).
Grinded down, Degreased, Metal Prep, Por15, Sanding, Seam-sealer, Matte Topcoat.
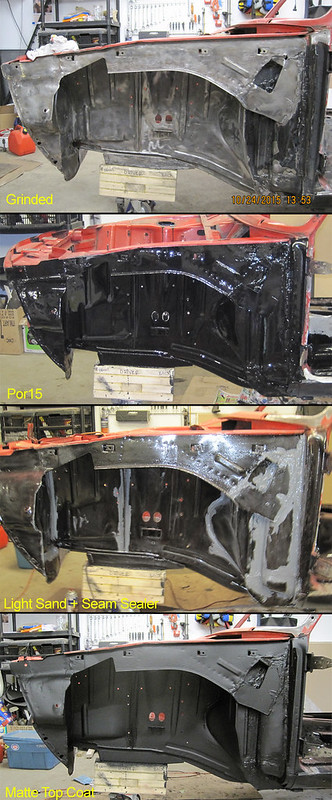
A few more shots of the Por15. I just love that glossy finish, it's a shame i needed to sand it and topcoat... which I'm doing everywhere except the floor pan.
Floor pan

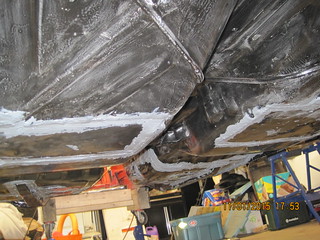
Under carriage

Rear tire well

... you get the picture
Floor pan, light sand + seam sealer
Floor pan, topcoated in matte black
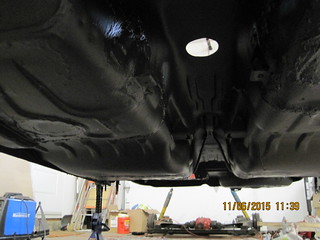
After the matte black topcoat, i still need to put the rubberized undercoating... hopefully by the end of this weekend so I can take this thing off the jack stands.
Side note: I had taken a photo of the car before doing the Por15 and posted it on twitter writing "ready for #por15" or something. This week i got a tweet from Por15 saying they put a photo of it up at their SEMA both, because of some contest, I didn't win anything though.
I can't wait to get this piece of crap out to a paint shop. i hate it.
Edited by MildSeven
2 Comments
Recommended Comments
Create an account or sign in to comment
You need to be a member in order to leave a comment
Create an account
Sign up for a new account in our community. It's easy!
Register a new accountSign in
Already have an account? Sign in here.
Sign In Now