

-
entries
6 -
comments
9 -
views
3,224
About this blog

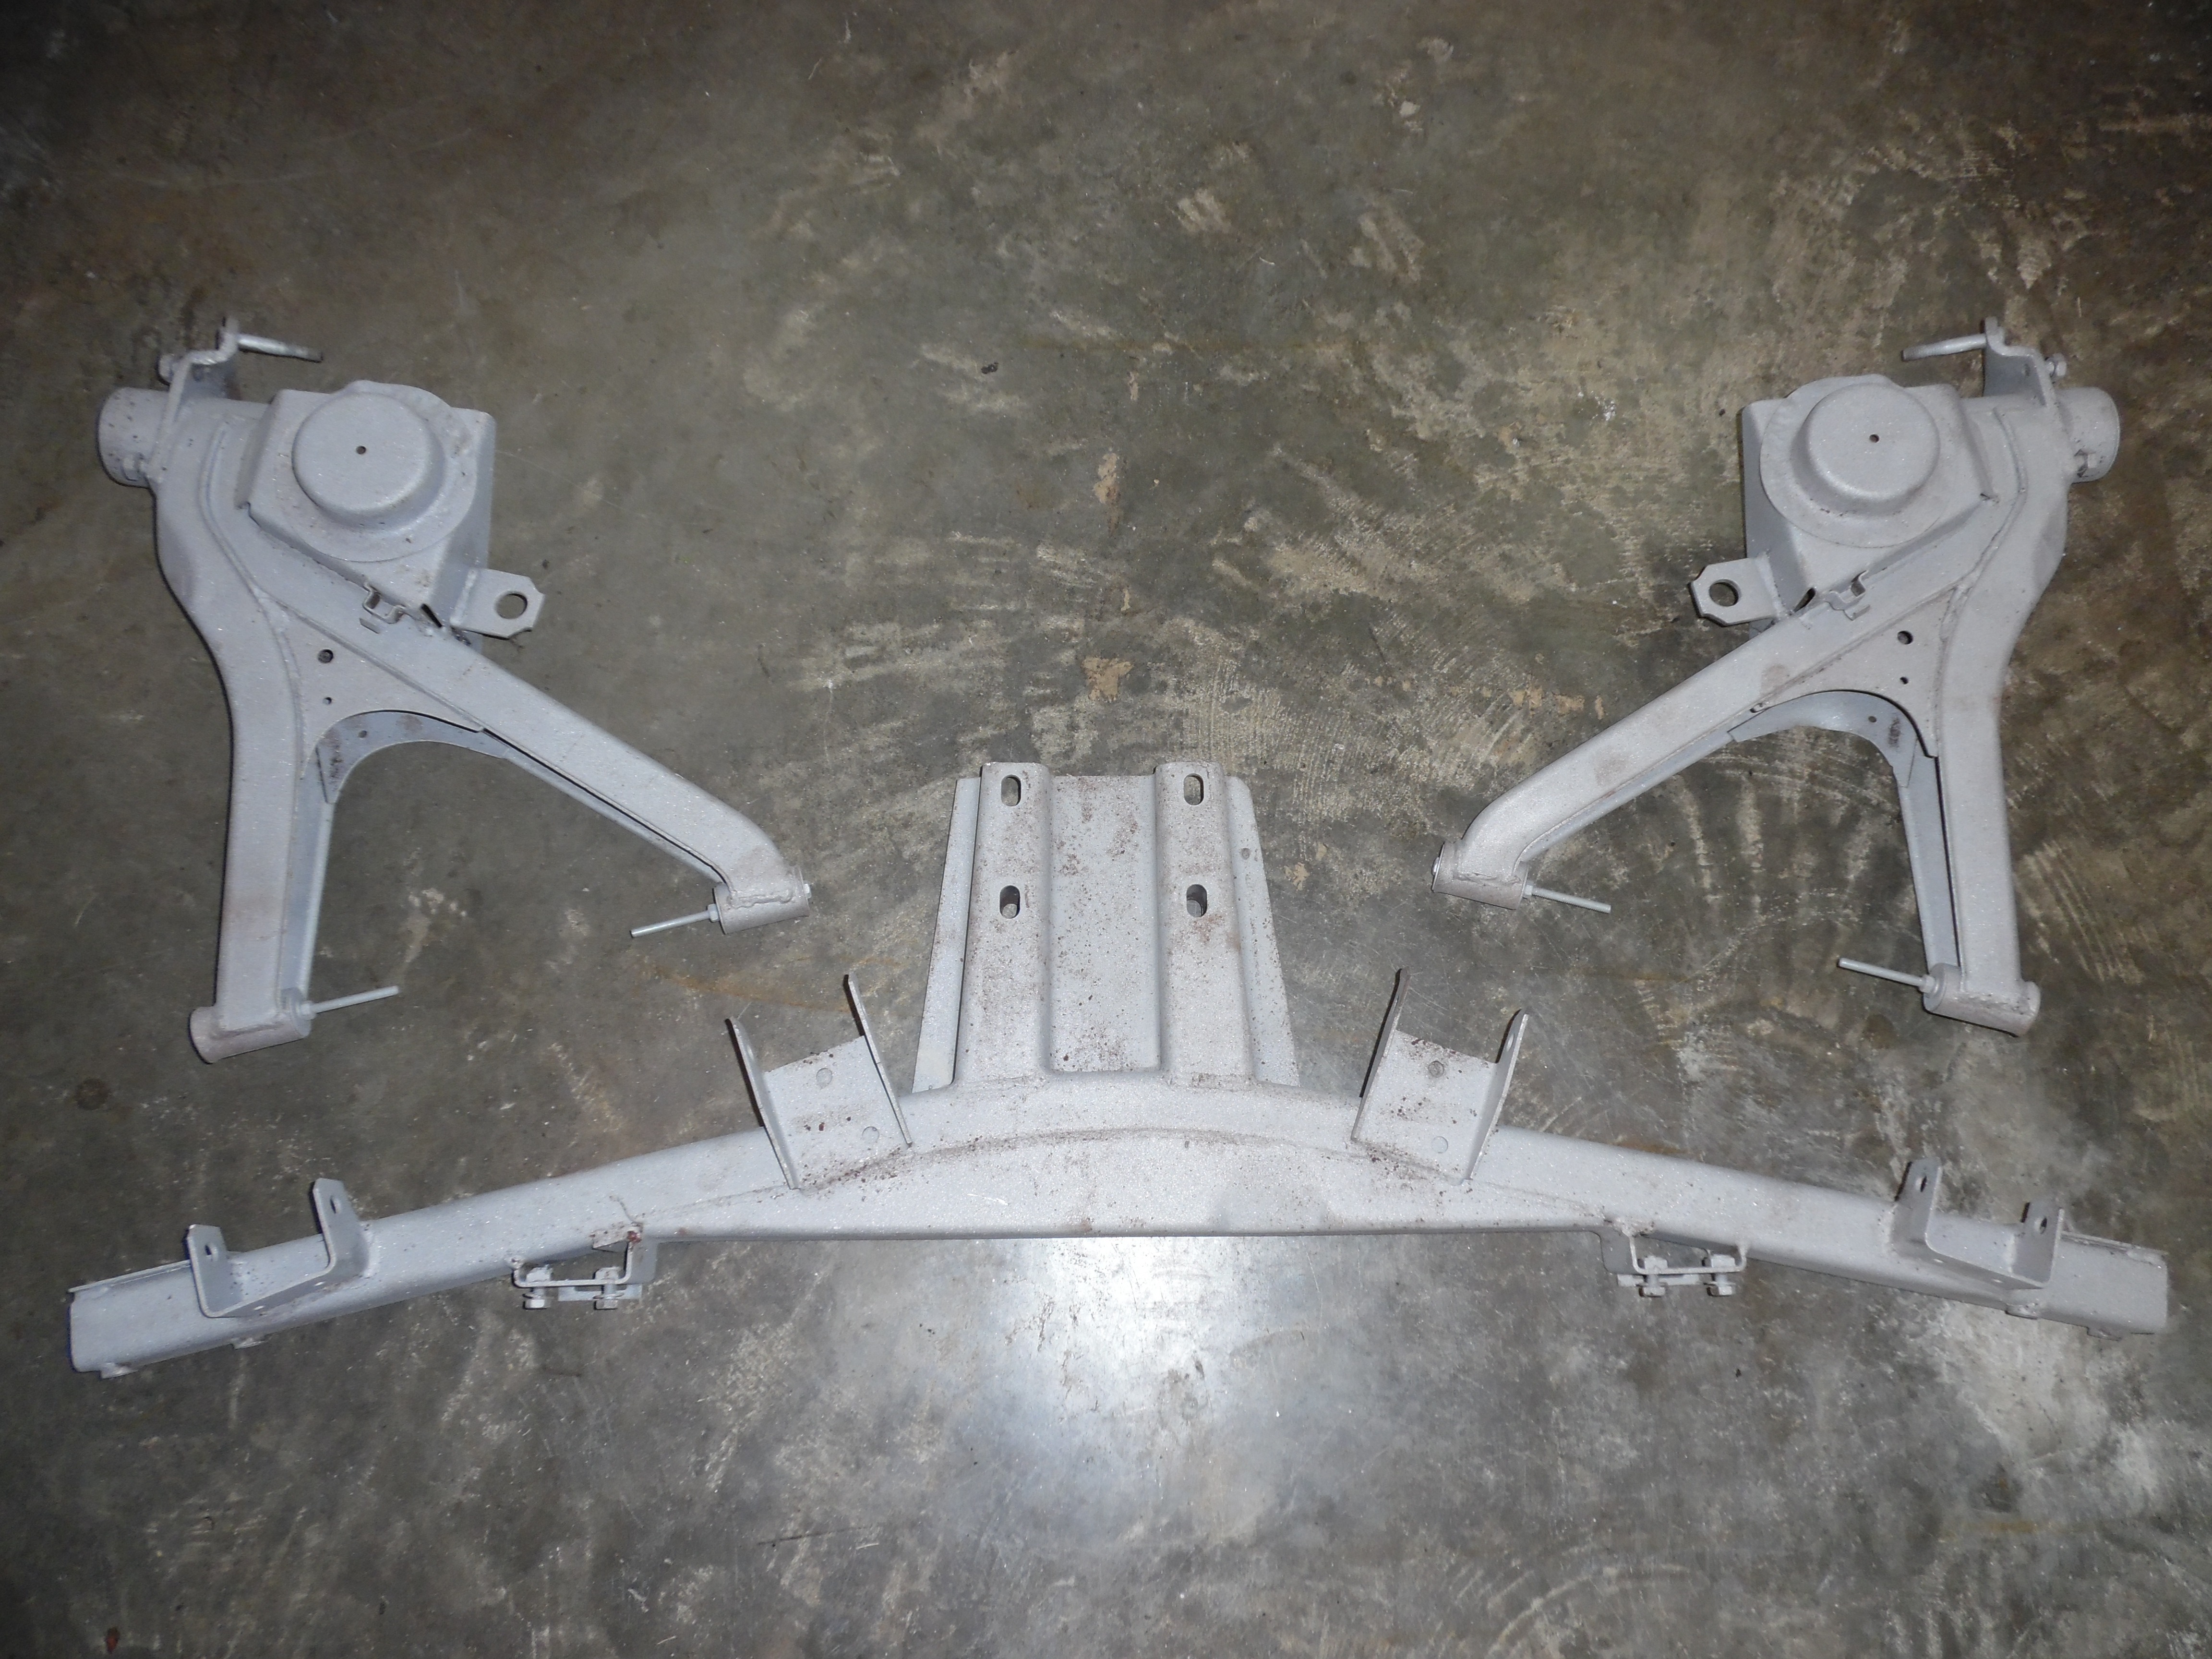
This is my first blog. Last May (believe it or not) I decided to drop my rear subframe and rehab everything. I didn't fully understand the scope of the project or what a rite of passage it would be. I used cyclopticgaze's series of articles as a reference. Right away I realized there were a couple of rust problems that had to be overcome.


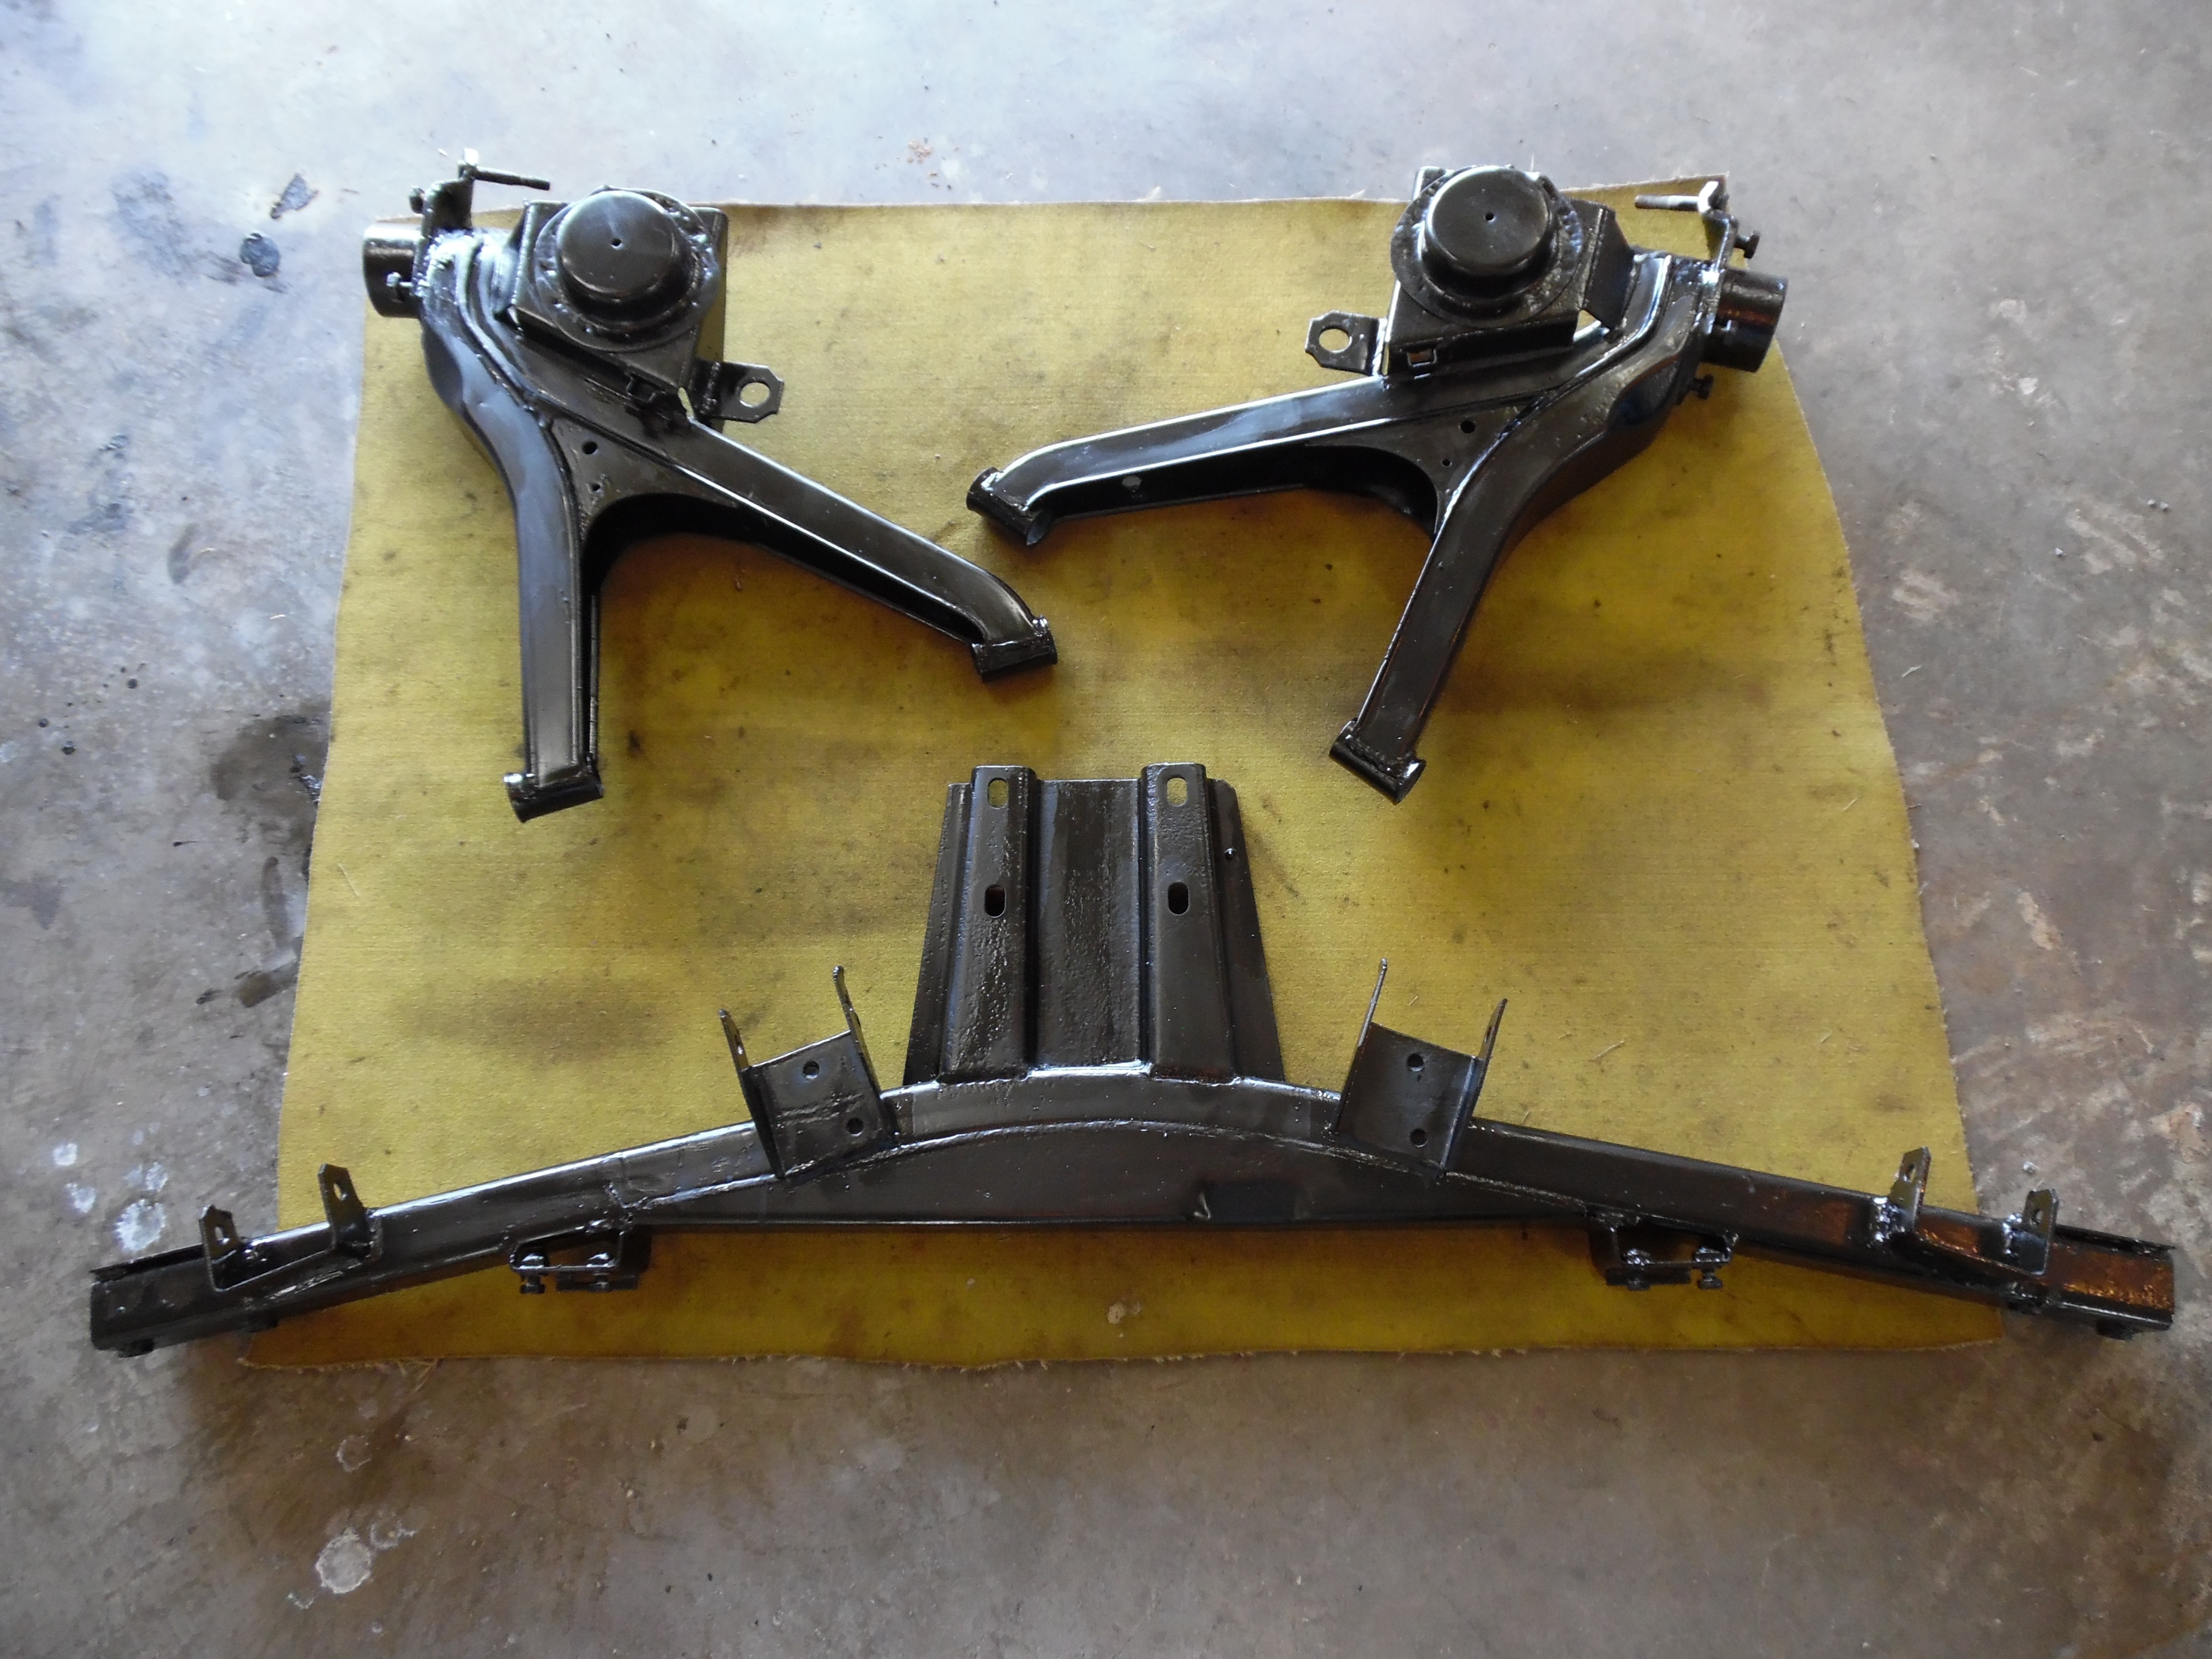
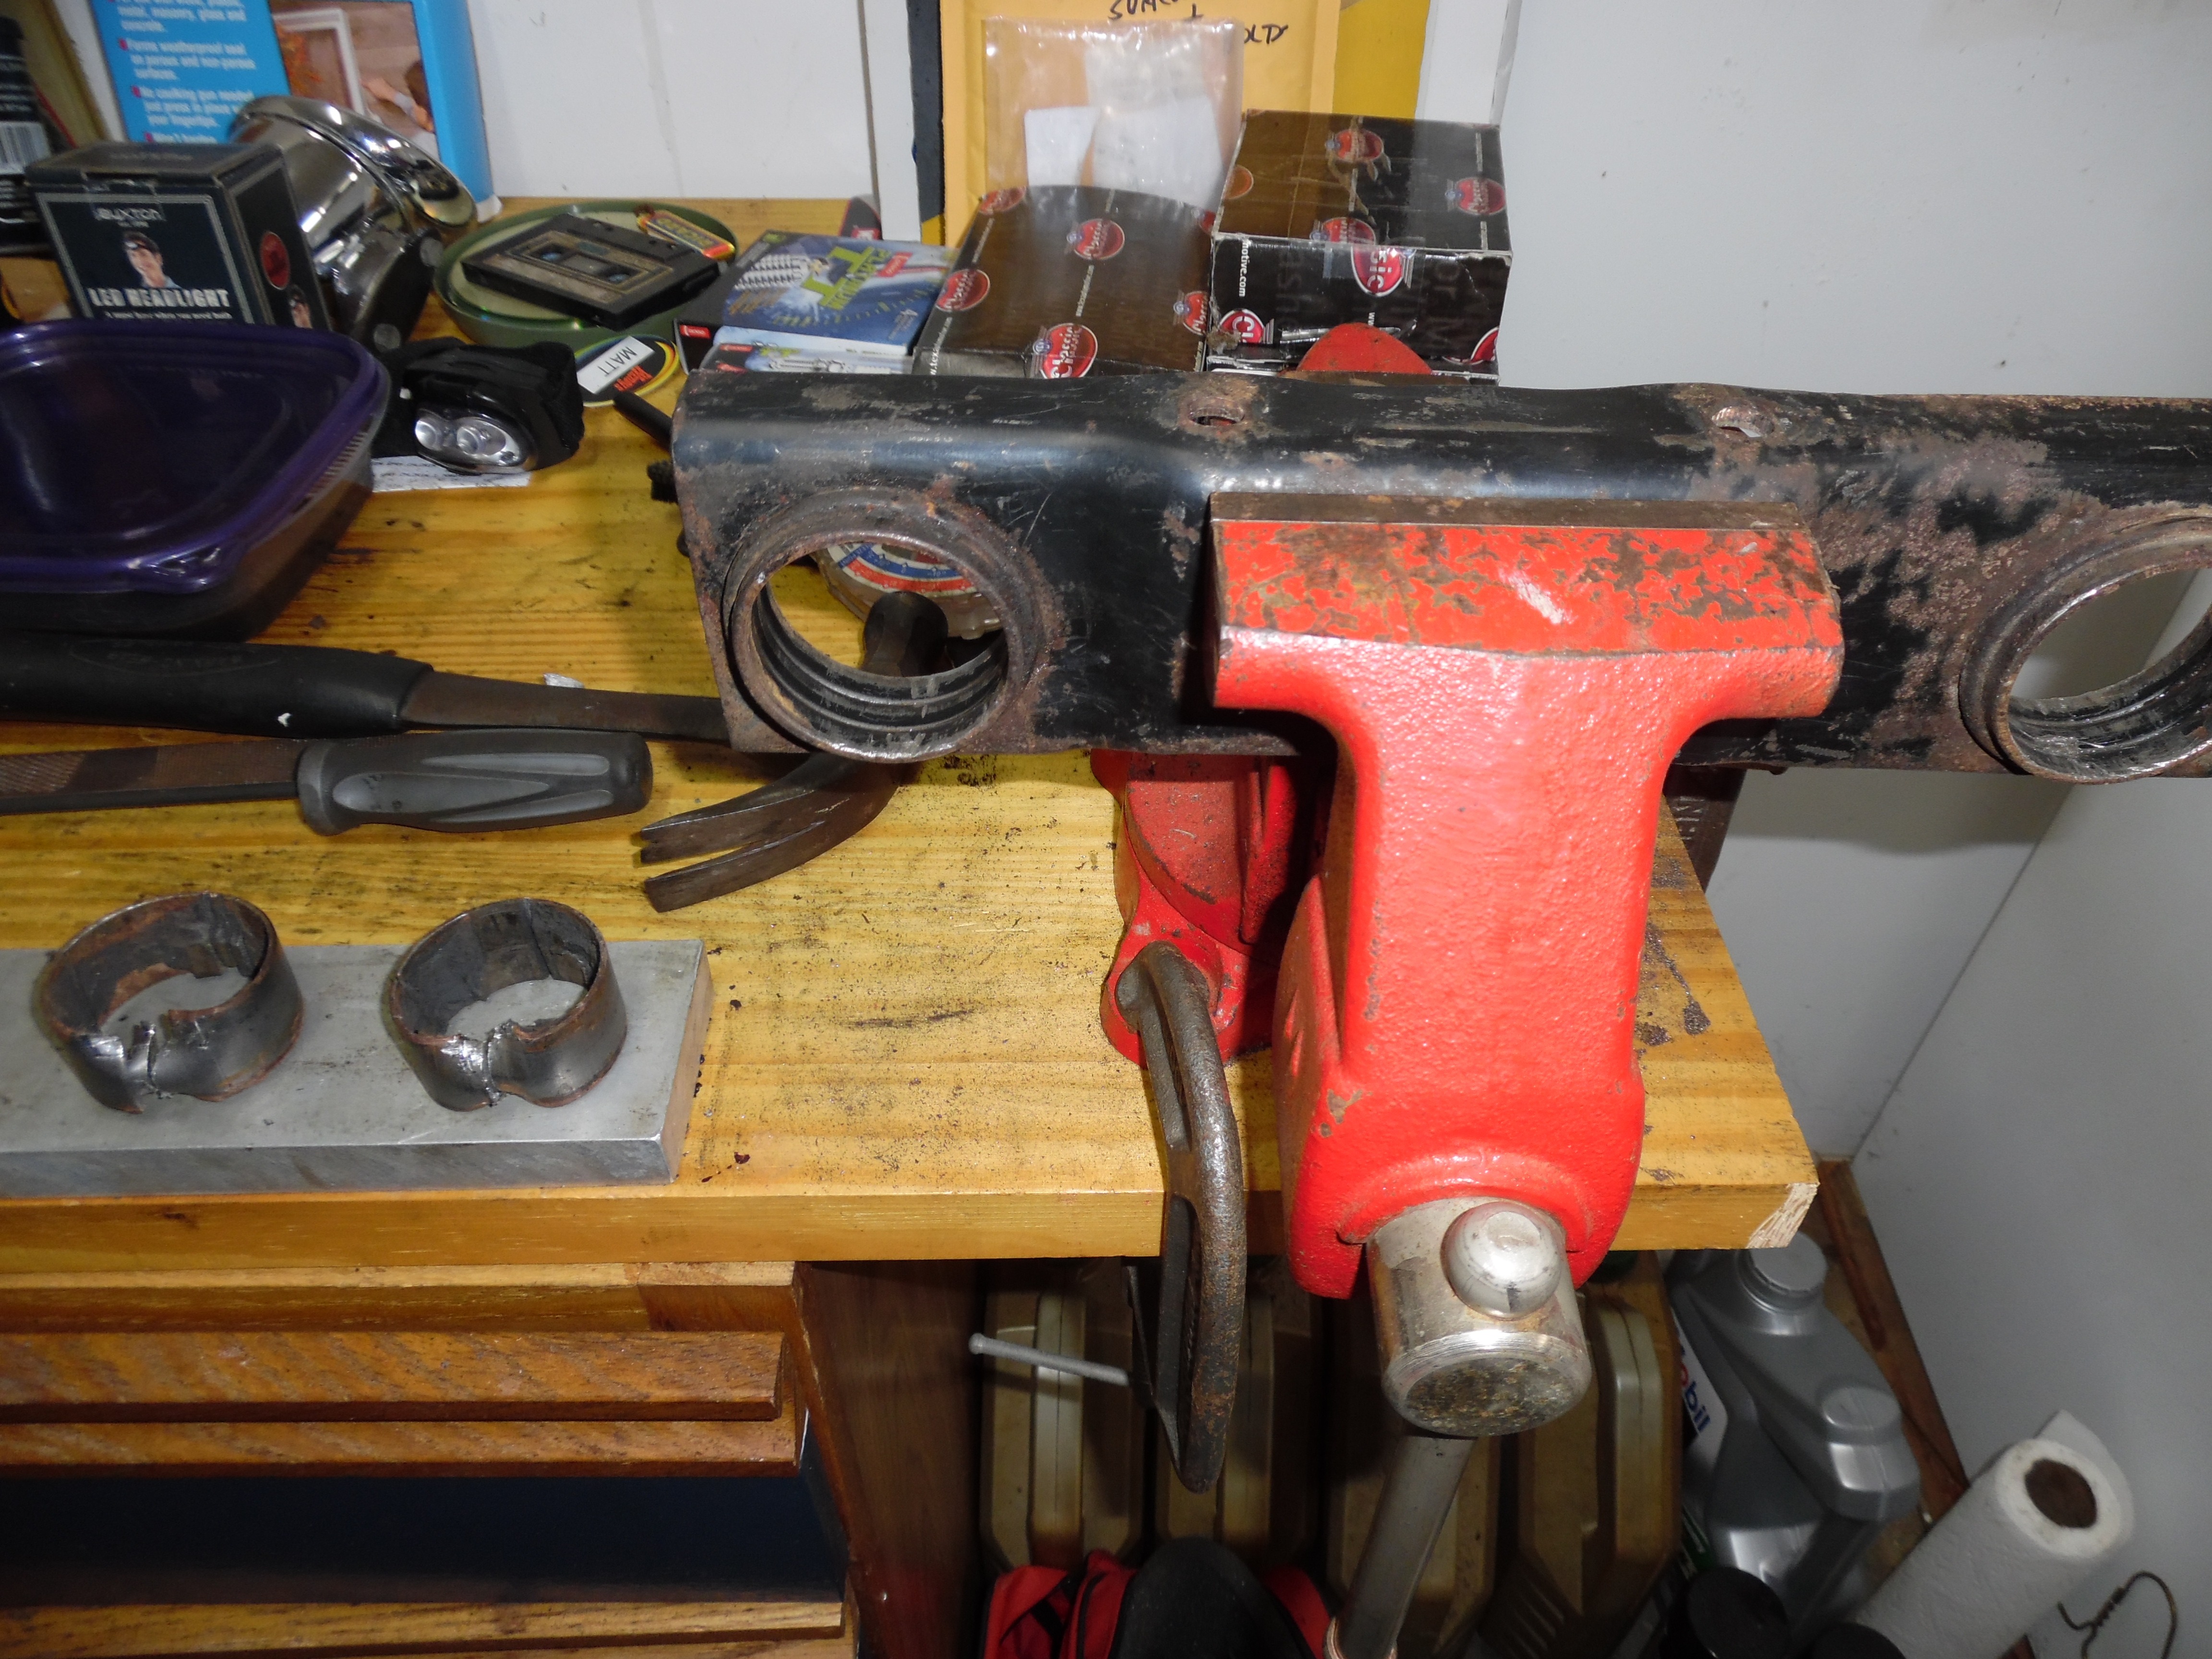
Peterman here on the FAQ helped me out by welding in new upper spring perches while Steve at Blunt hooked me up with a used pair of trailing arms with sound lower spring perches.


I had the rear subframe and trailing arms media blasted and then used POR15 on them.
The first project was new rear wheel bearings. For some reason my hubs were extremely tight on the stub axles. I had to take one to a machine shop because I couldn't pull it. Even after they were off, they were very difficult to get back on the axles. I bought a bearing driver set and a 4 pound hammer to get the old wheel bearings out and the new ones in. My 16 oz. craftsman claw hammer wasn't going to cut it. The bearing drivers are aluminum so you don't damage the bearings while hammering them in. The bearings are then greased. The spacers go between the two bearings in each trailing arm. New seals cover the bearings.


Next up were the 4 CV joints. Like most aspects of this project, I had no previous experience with CV joints, but managed to clean them out with brake cleaner, pack new grease in, and fit them back on the repainted axles. The boot clamps I had required a special pair of pliers (called boot clamp pliers, appropriately enough) to cinch the metal bands down tight. (Cyclopticgaze's rear subframe article has a link to a great piece on redoing CV joints.)


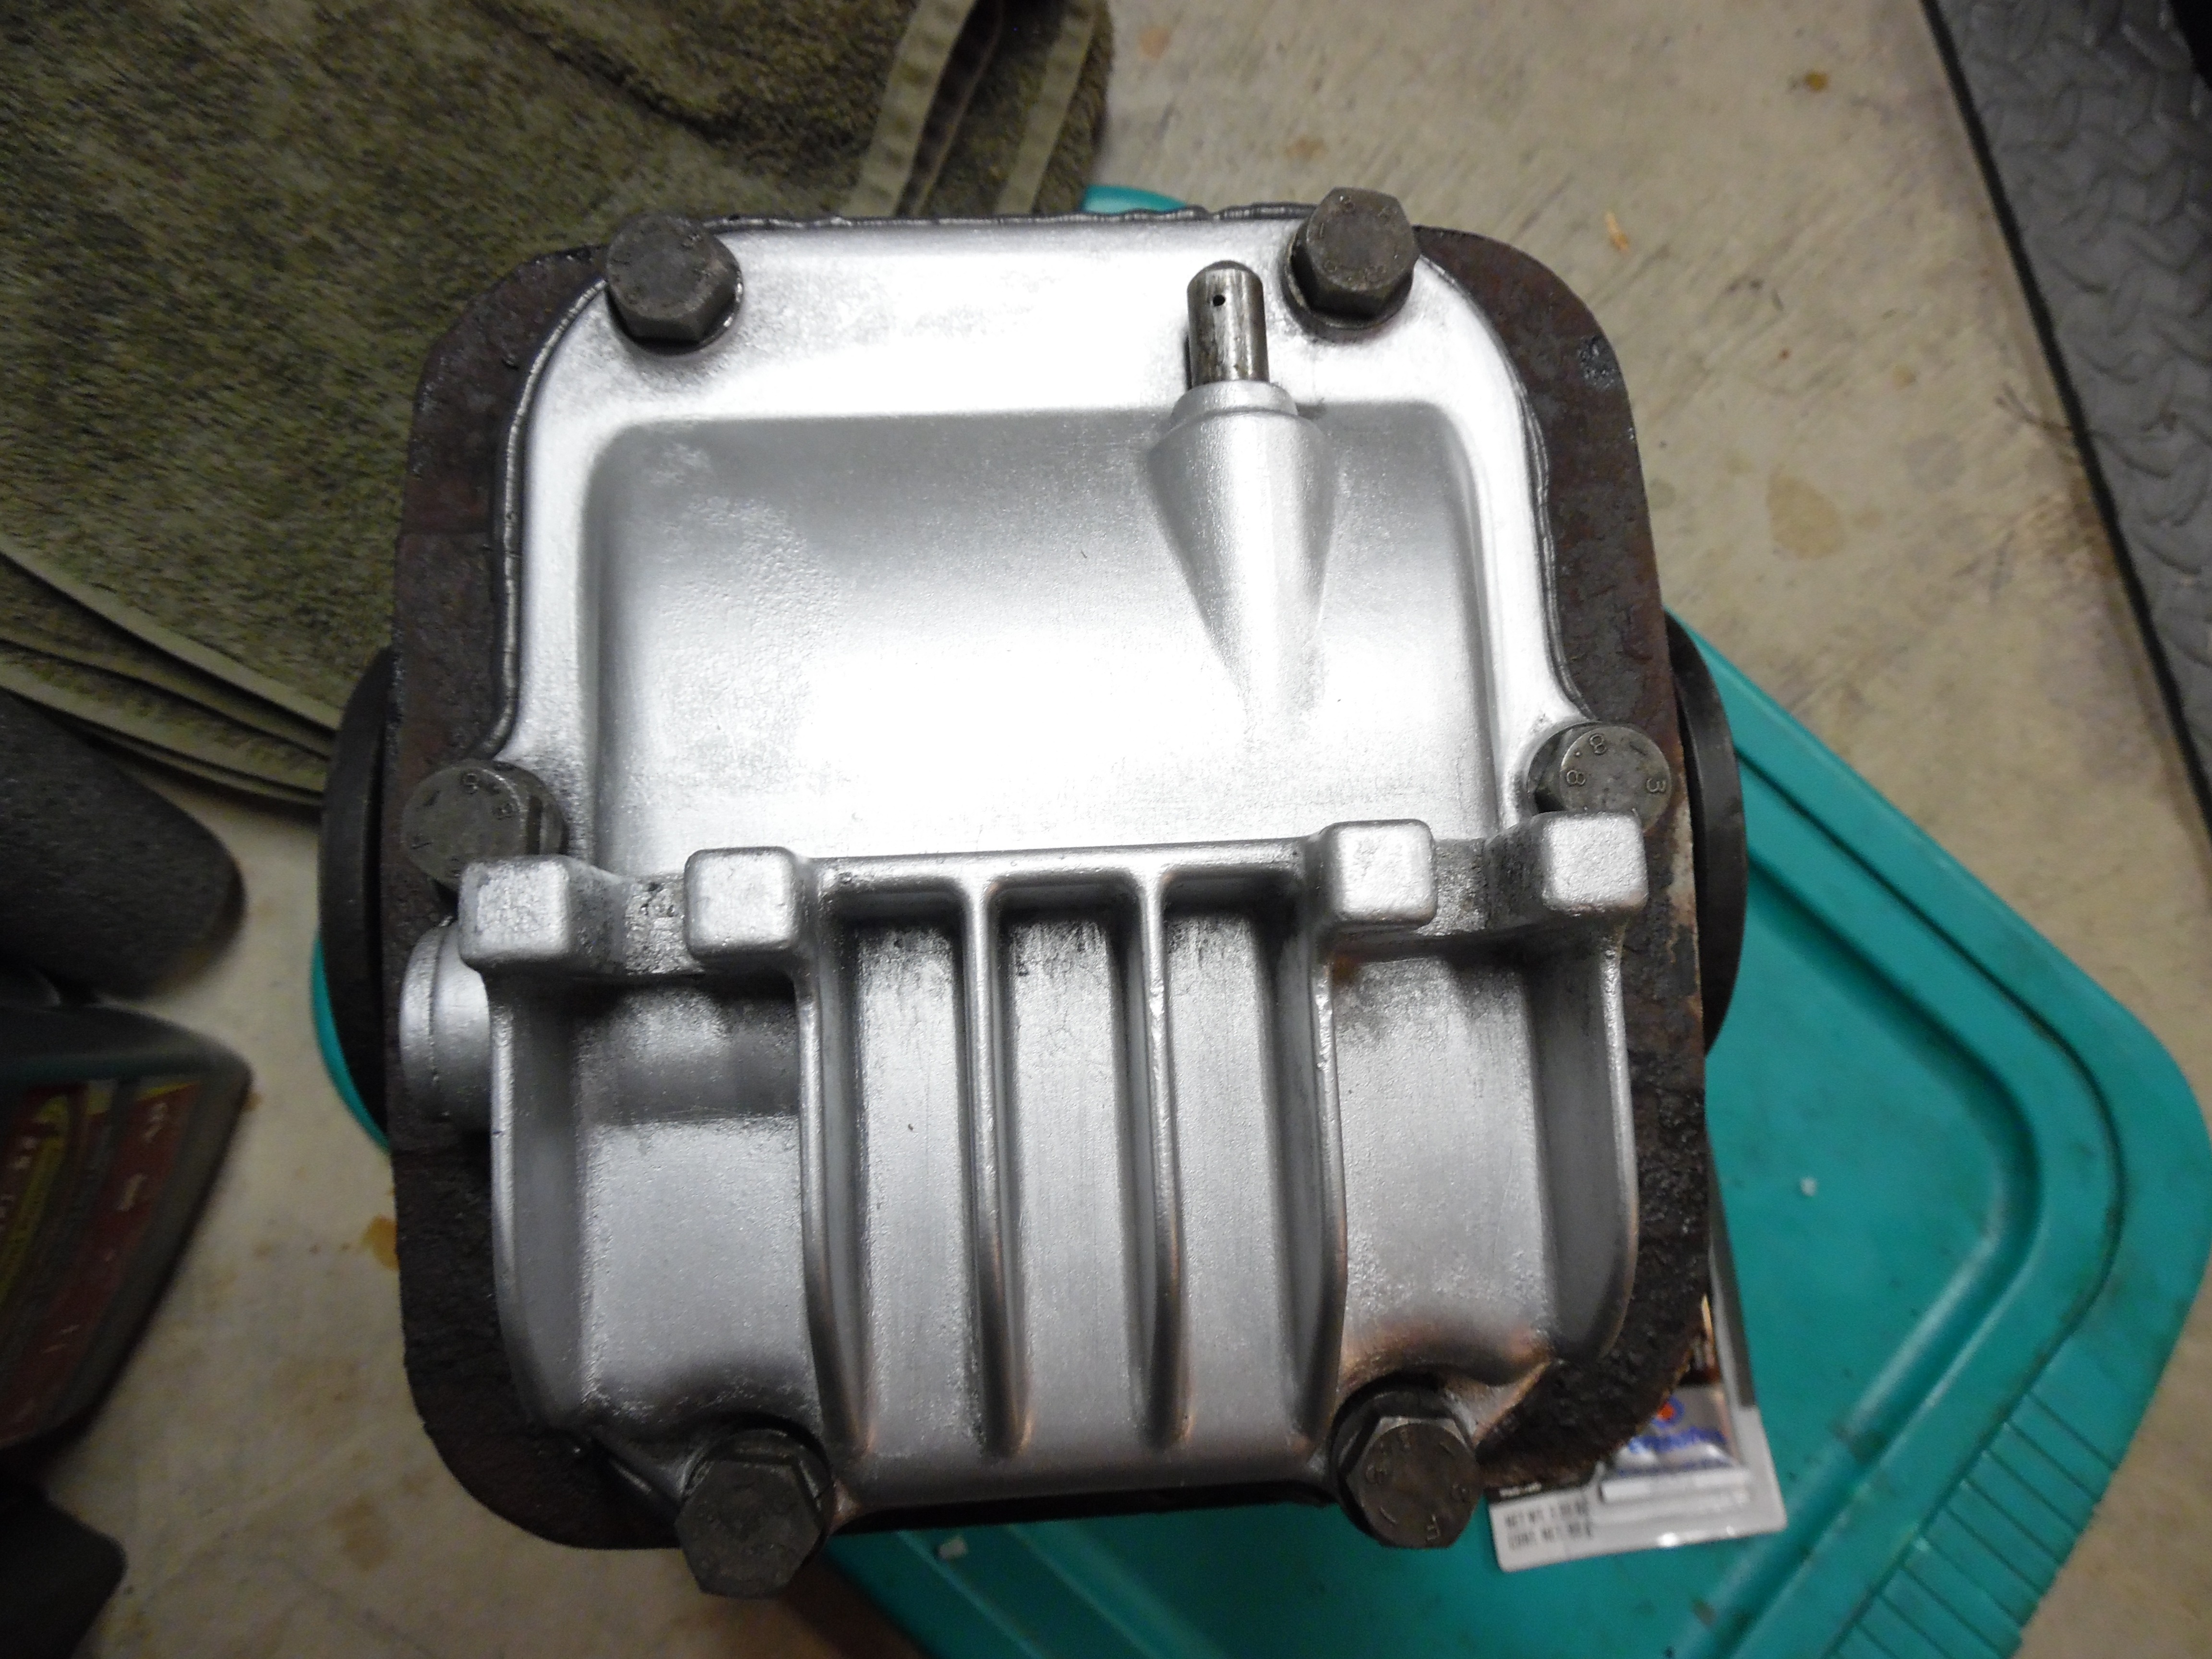
Next I had to show my stock differential some love. I cleaned it up, installed new side oil seals, and used RTV for the cover gasket per mlytle's excellent rear diff article on the FAQ. I also gave it a quick paint job (with very little prep.) New Red Line lube too.


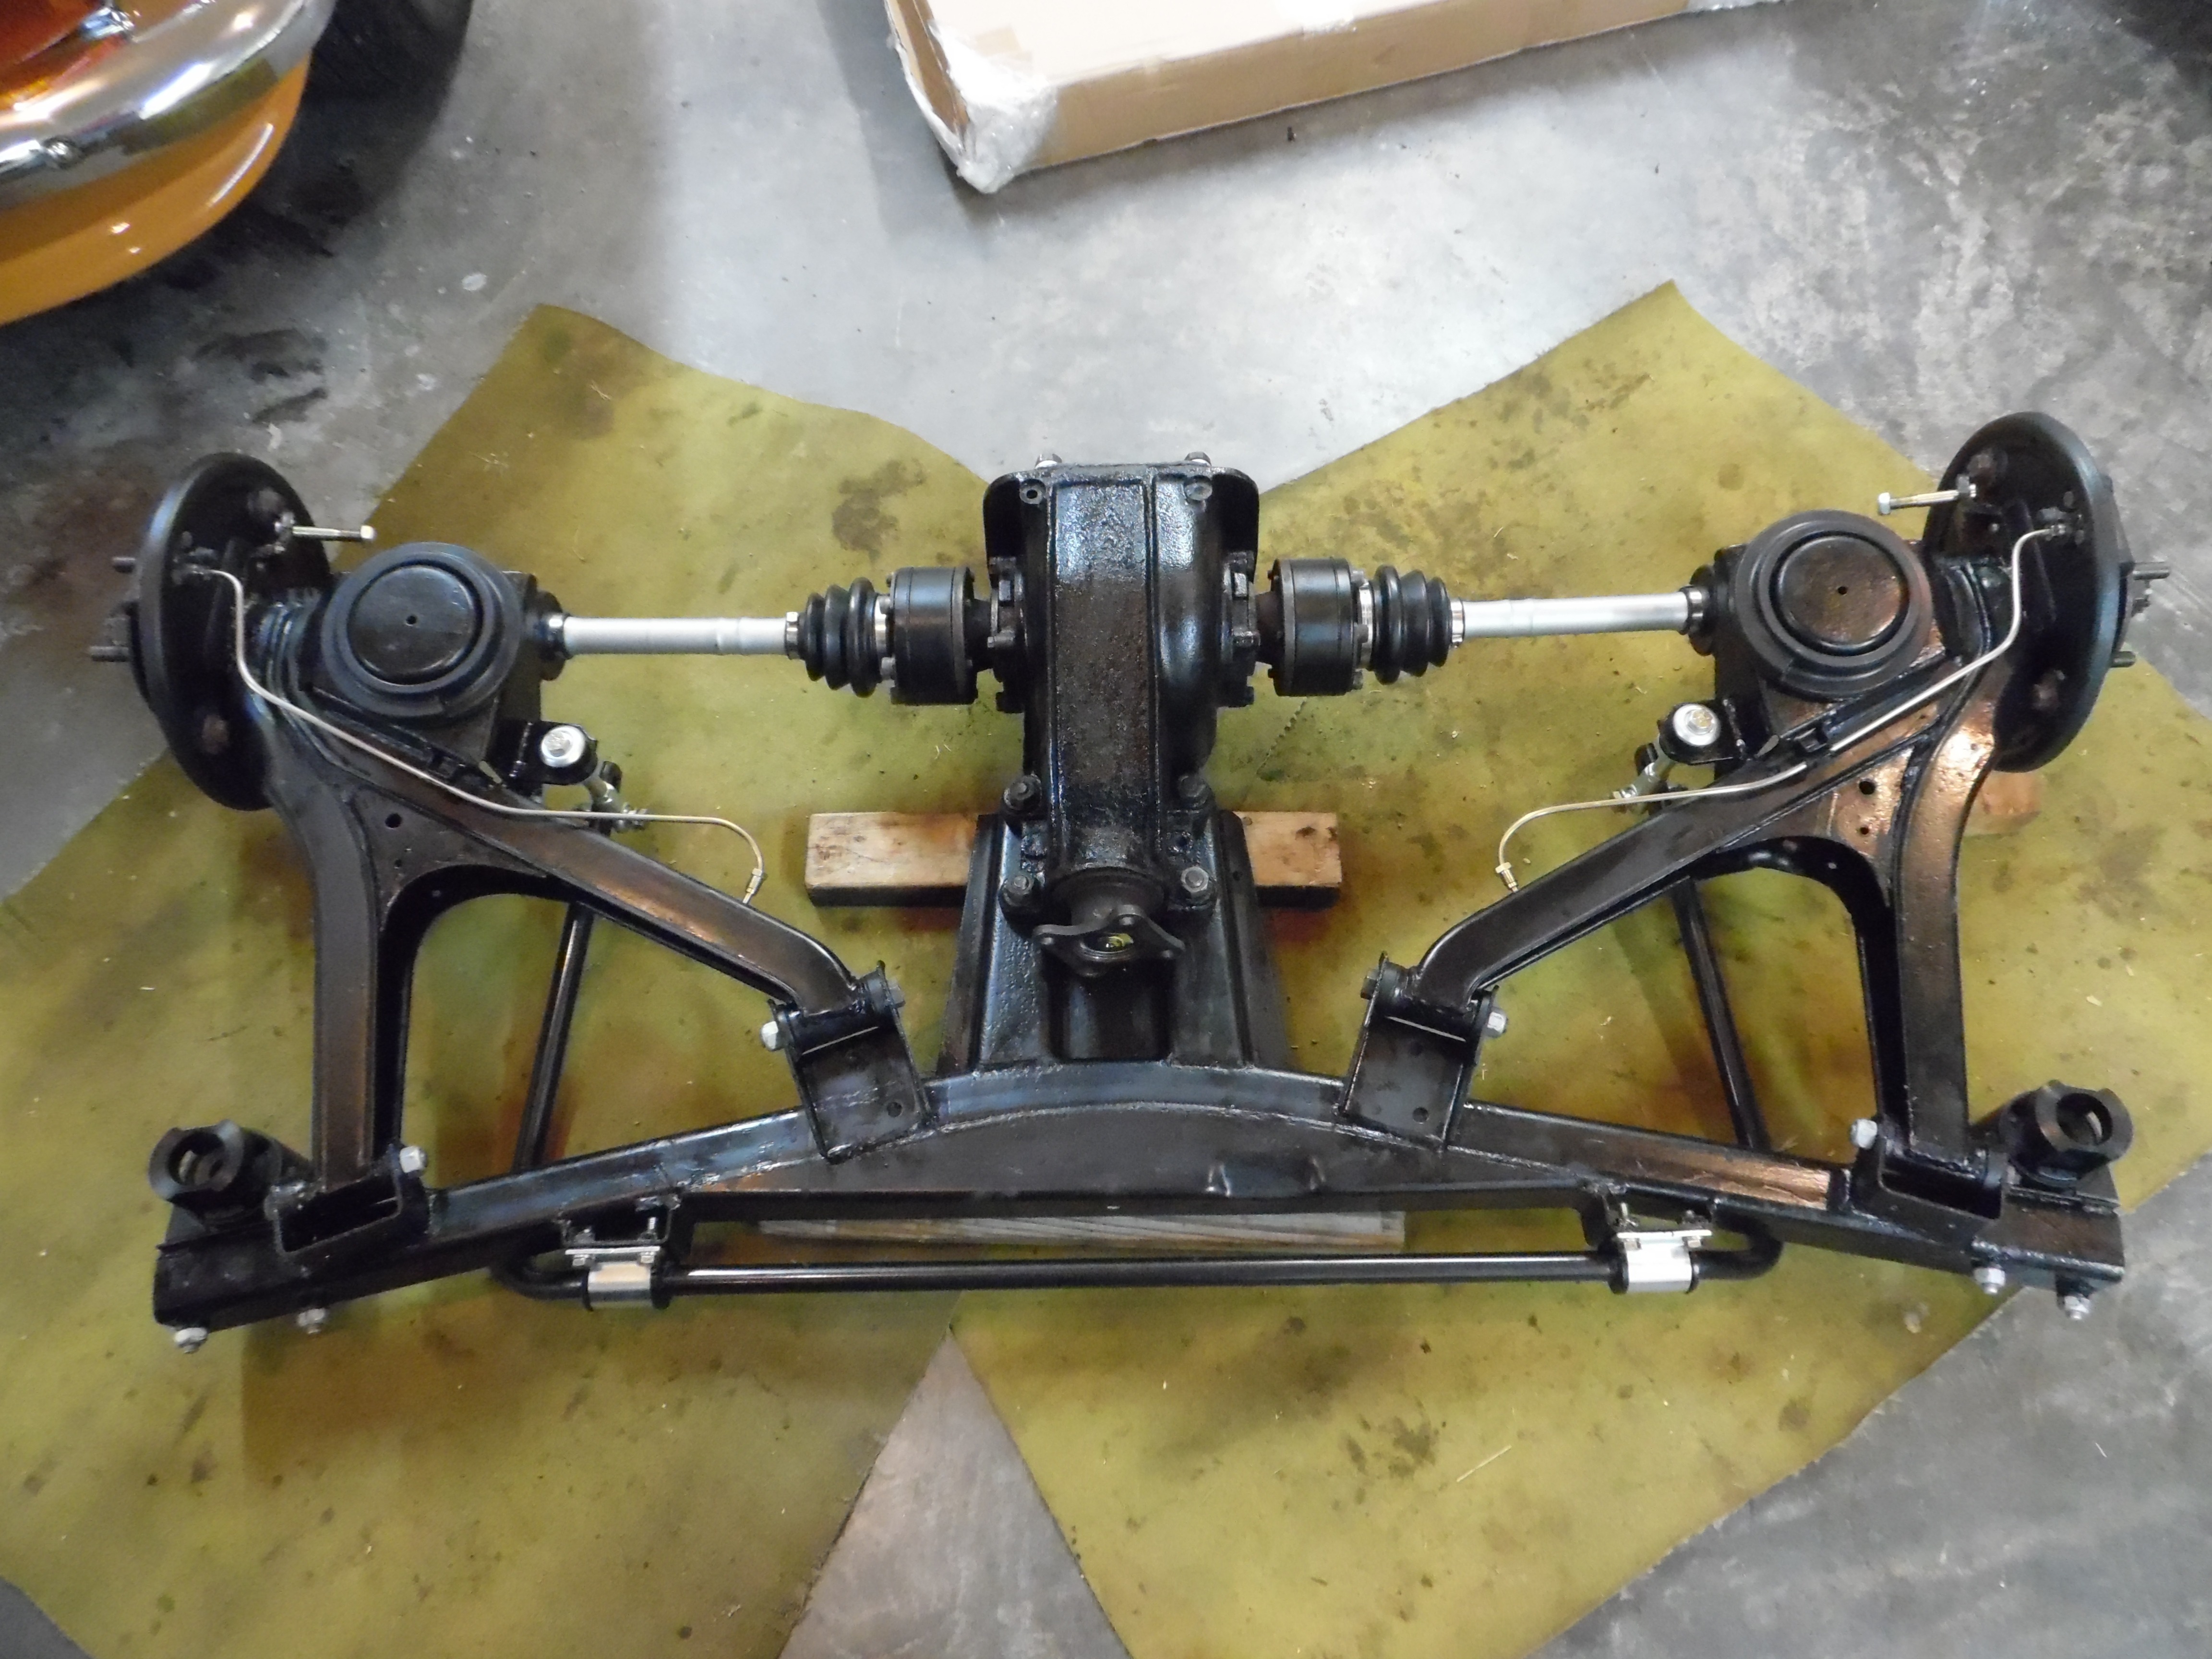
Getting there. S&T Sway Bar. Cunifer brake lines from AceAndrew. Polyurethane trailing arm bushings and rear mount bushings. New rubber subframe bushings from Blunt with polyurethane inserts. Most hardware new from Blunt although some of the original bolts, etc cleaned up really well with EvapoRust. The rear subframe mounts have metal inserts that must be cut out before you can put the new bushings in. I rented a transmission jack from Sunbelt rentals. $35 per day and I only needed one day. I would highly recommend the transmission jack rental for lifting the subframe back into place.
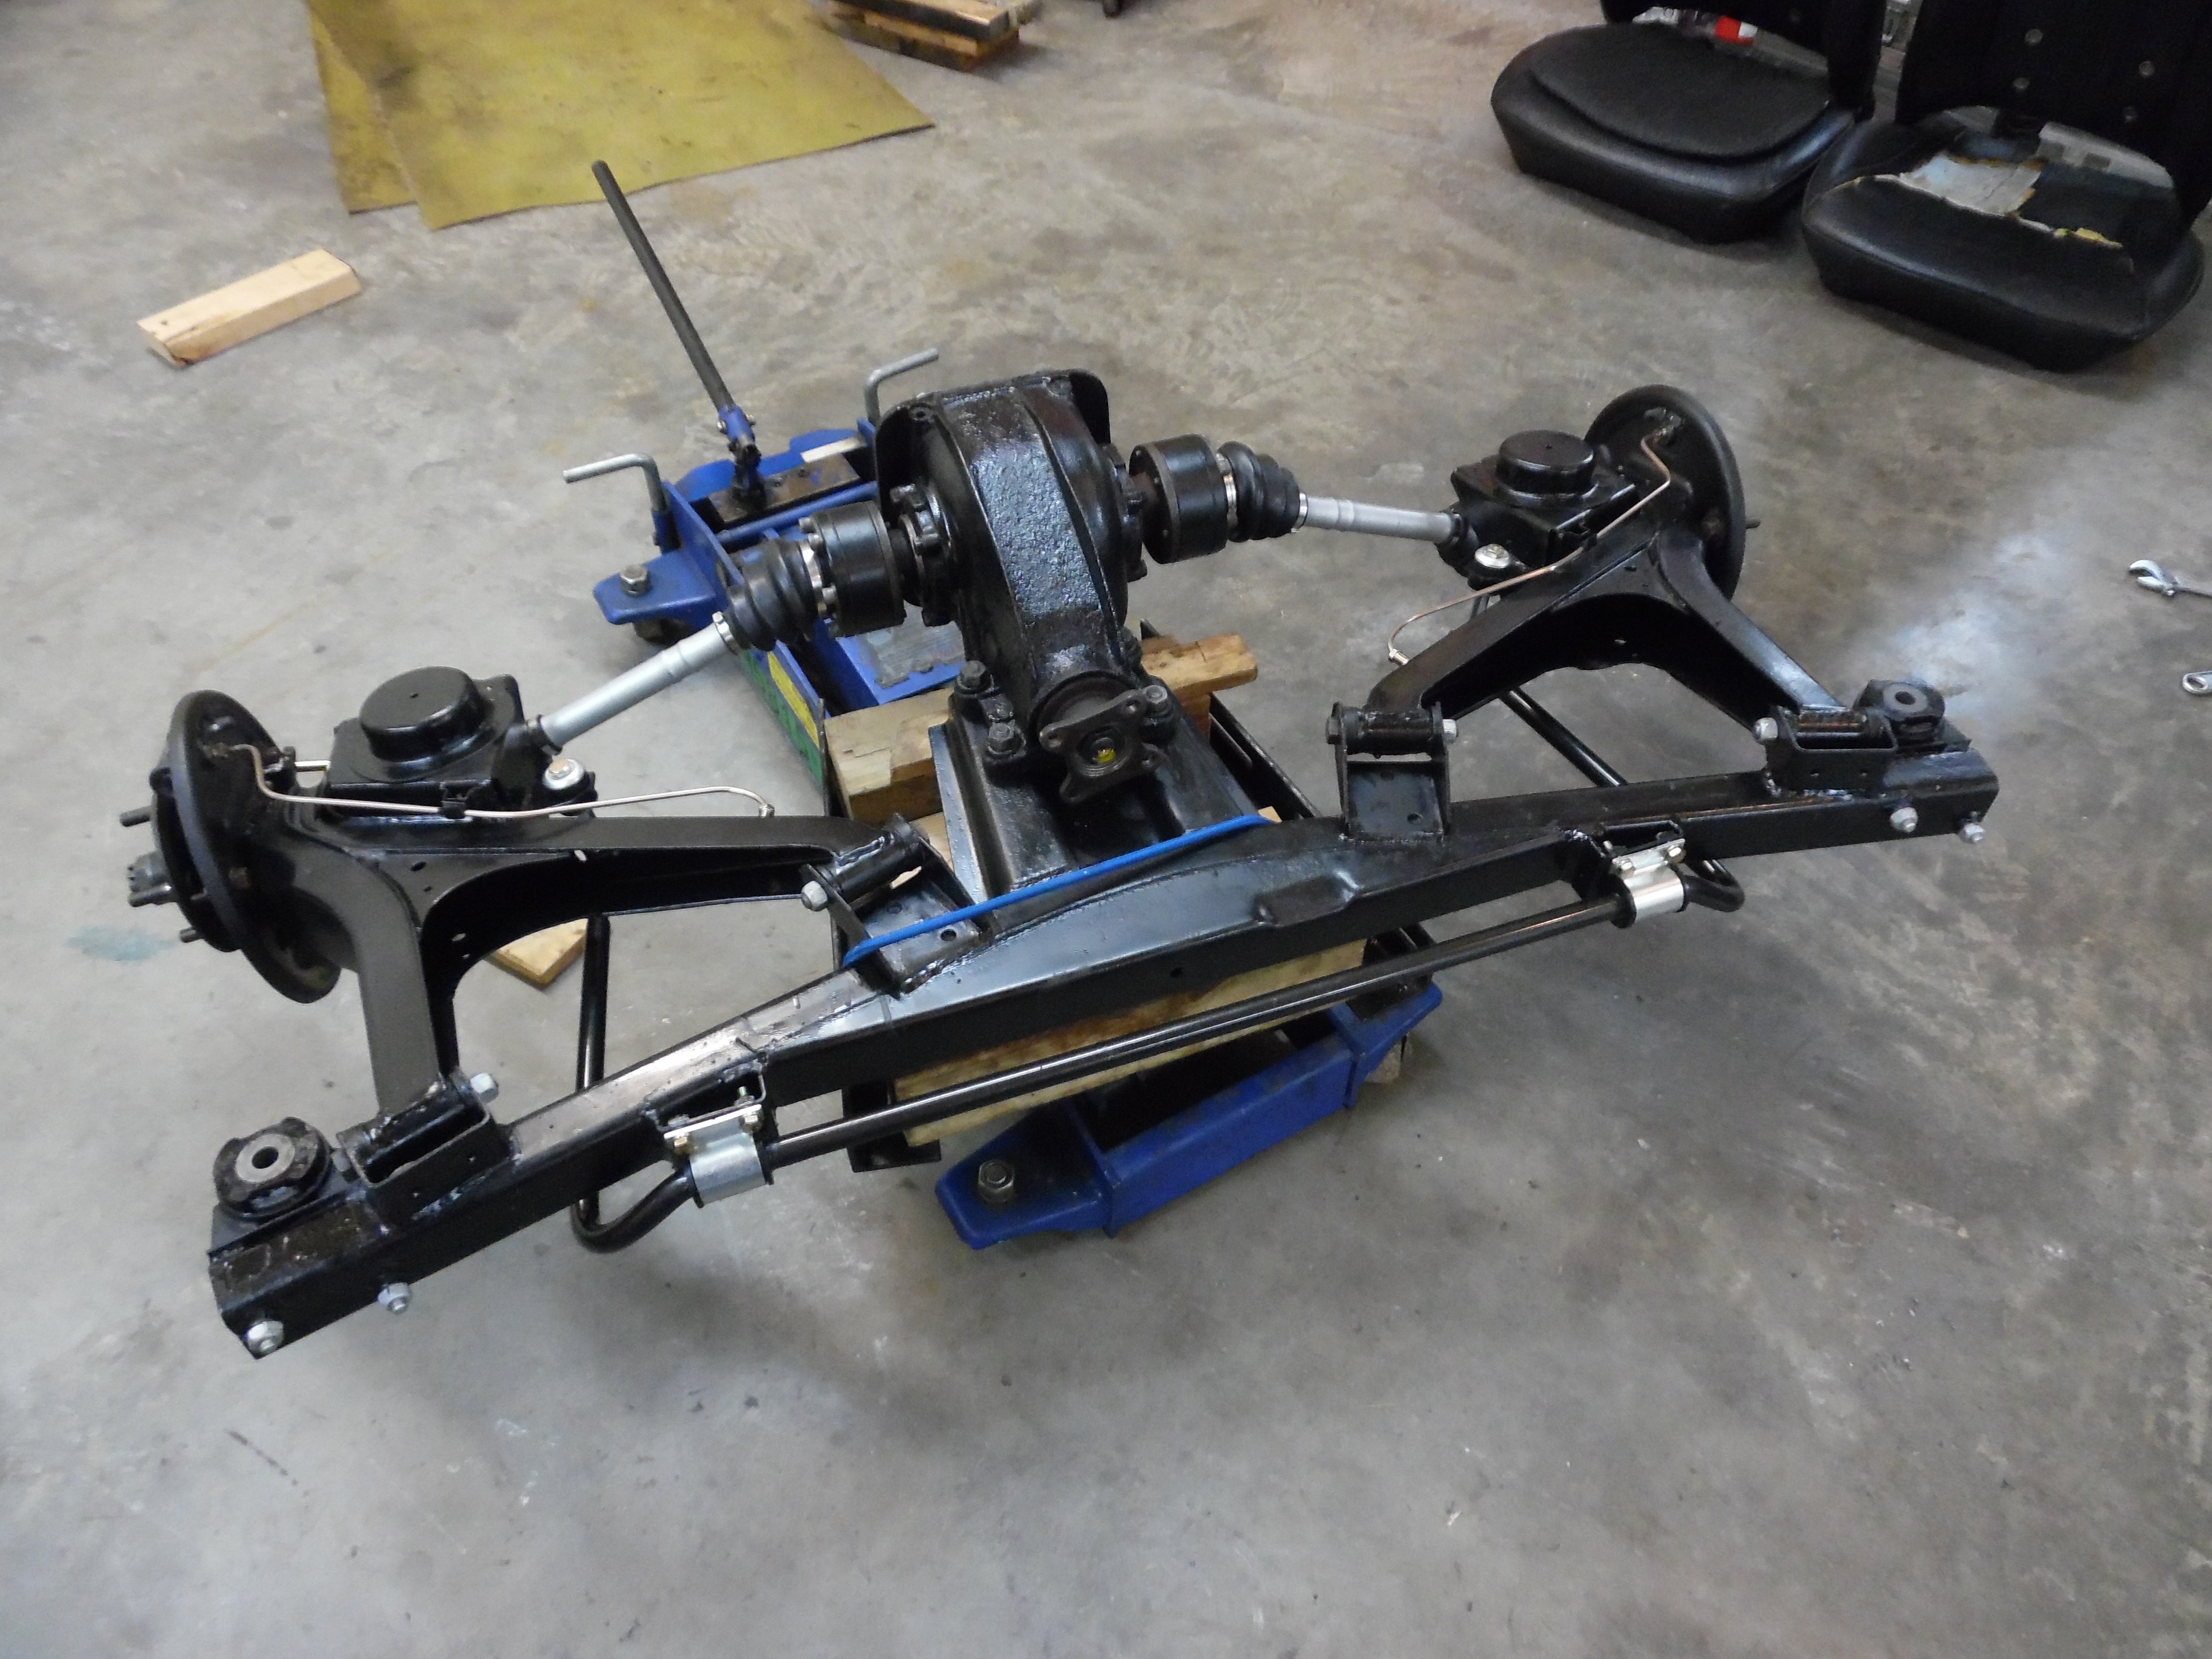
Bilstein HD shocks. H&R Springs.


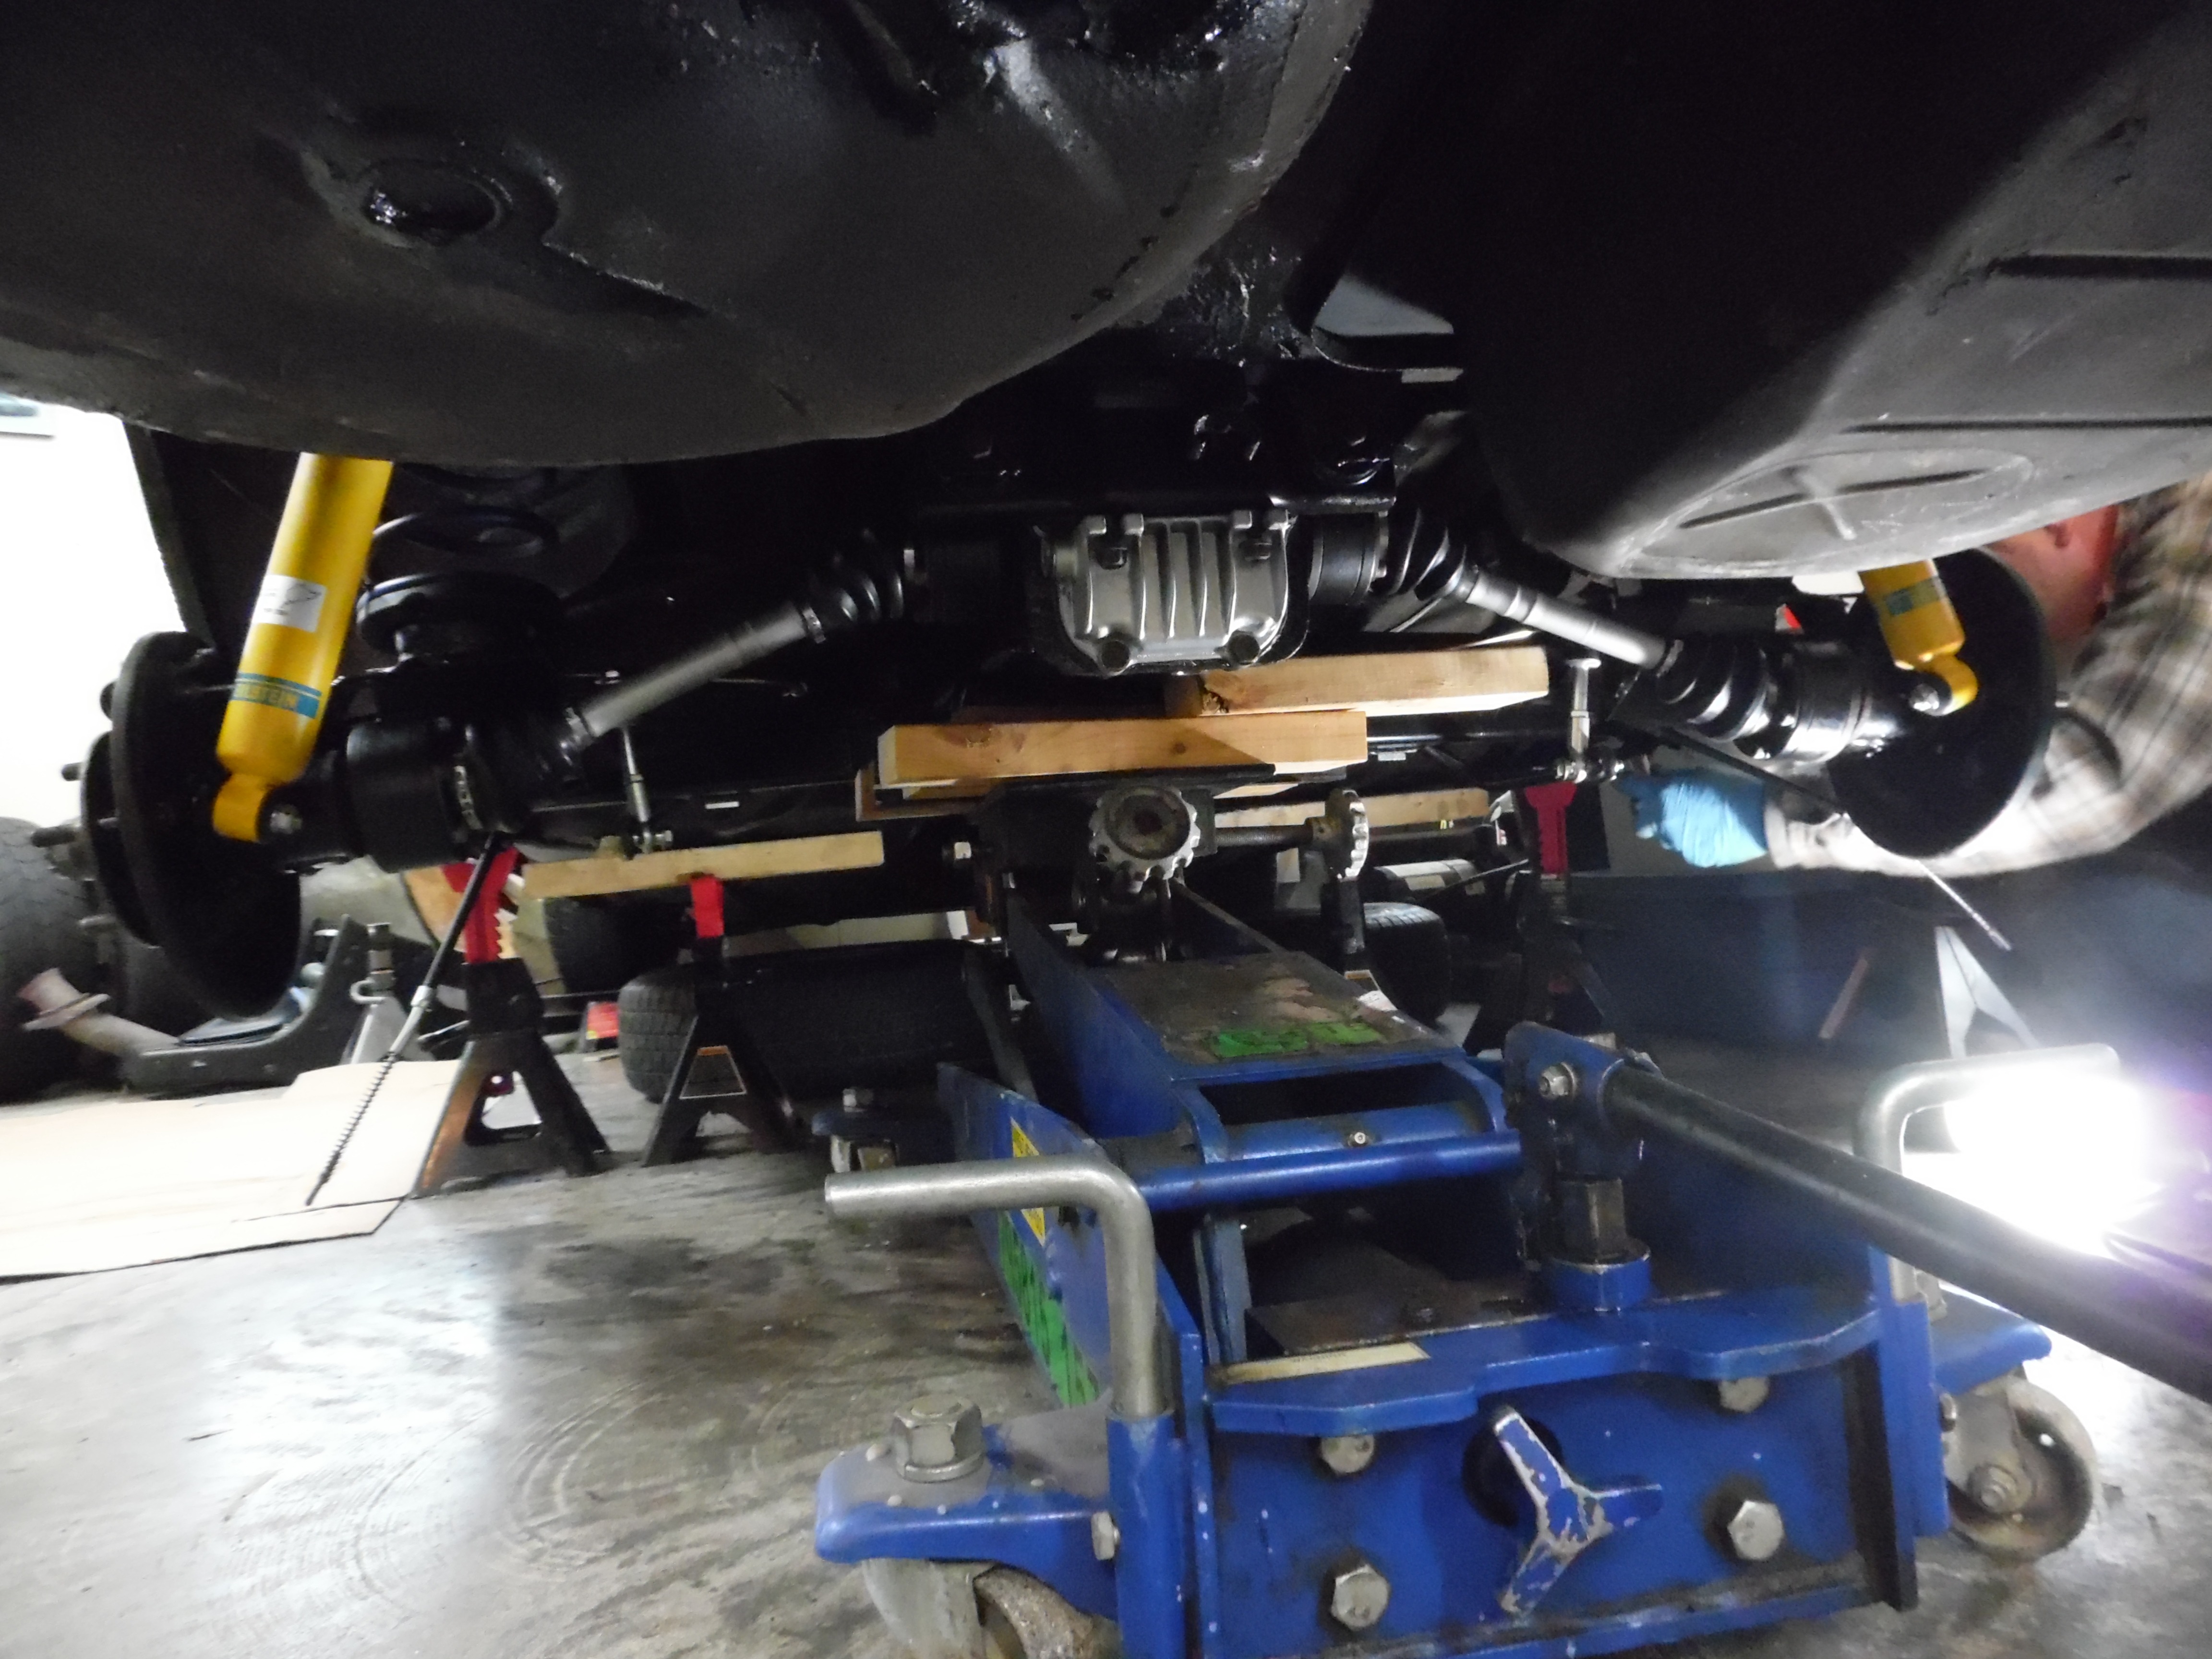
I'm experimenting with an aluminum strut spacer in the rear to increase rear ride height. I may end up removing it if I don't like it . The zipties to hold the spring rubbers on is an idea from cyclopticgaze that seems to work well. (The shiny black paint is POR15 covering rust repair sections welded in.)


New wheel cylinders and brake shoes. My first exposure to the W-shaped spring was today. They are IN!

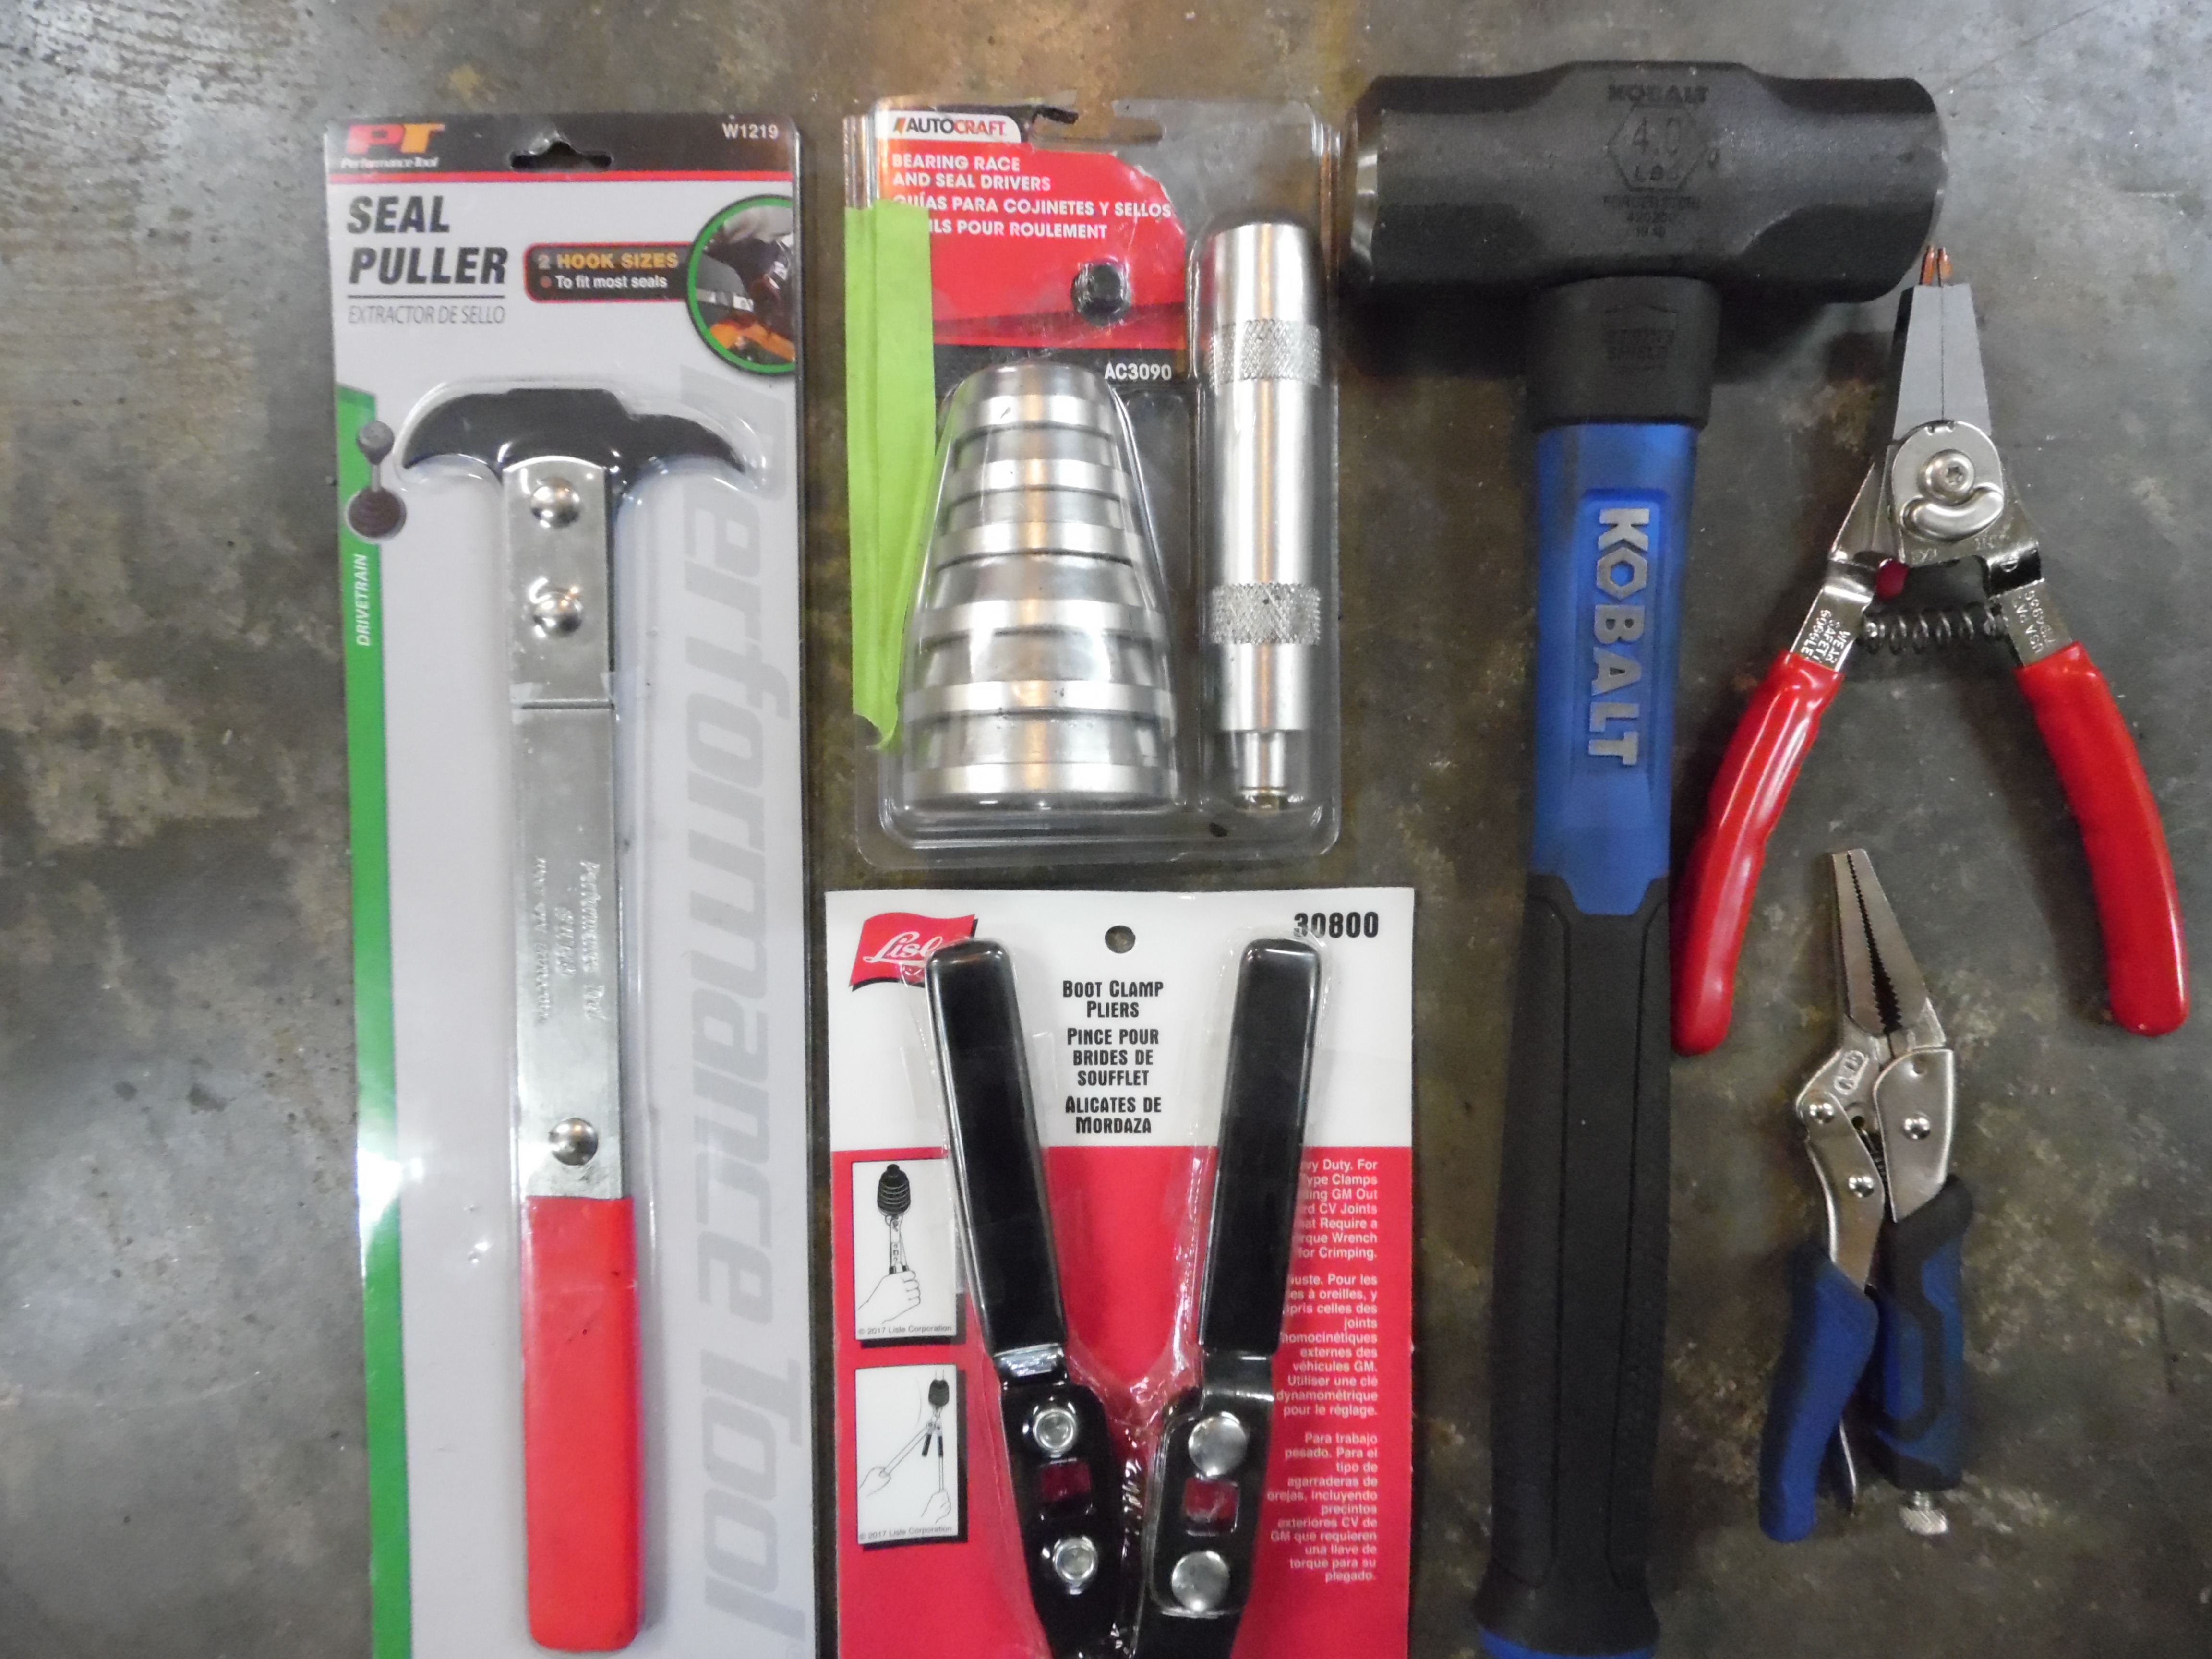
Here are some tools I recently bought that I never felt I needed in over 40 years of working on cars. I highly recommend you find these tools if you're redoing your rear subframe. The previously-mentioned 4 pound hammer and bearing driver set, a seal puller, and the boot clamp pliers (middle bottom). The needle nose vice-grips are great for brake springs.
Thanks for reading!

