Jump to content
  • entries
    8
  • comments
    48
  • views
    5,008

metallurgic surgery, part 3 of 4


localhuman

2,694 views

ok, photo heavy post coming up! i'm trying to catch up on documenting the body work/welding that occurred on the old 1602, so this should bring it mostly up to speed.  lets get down to business.


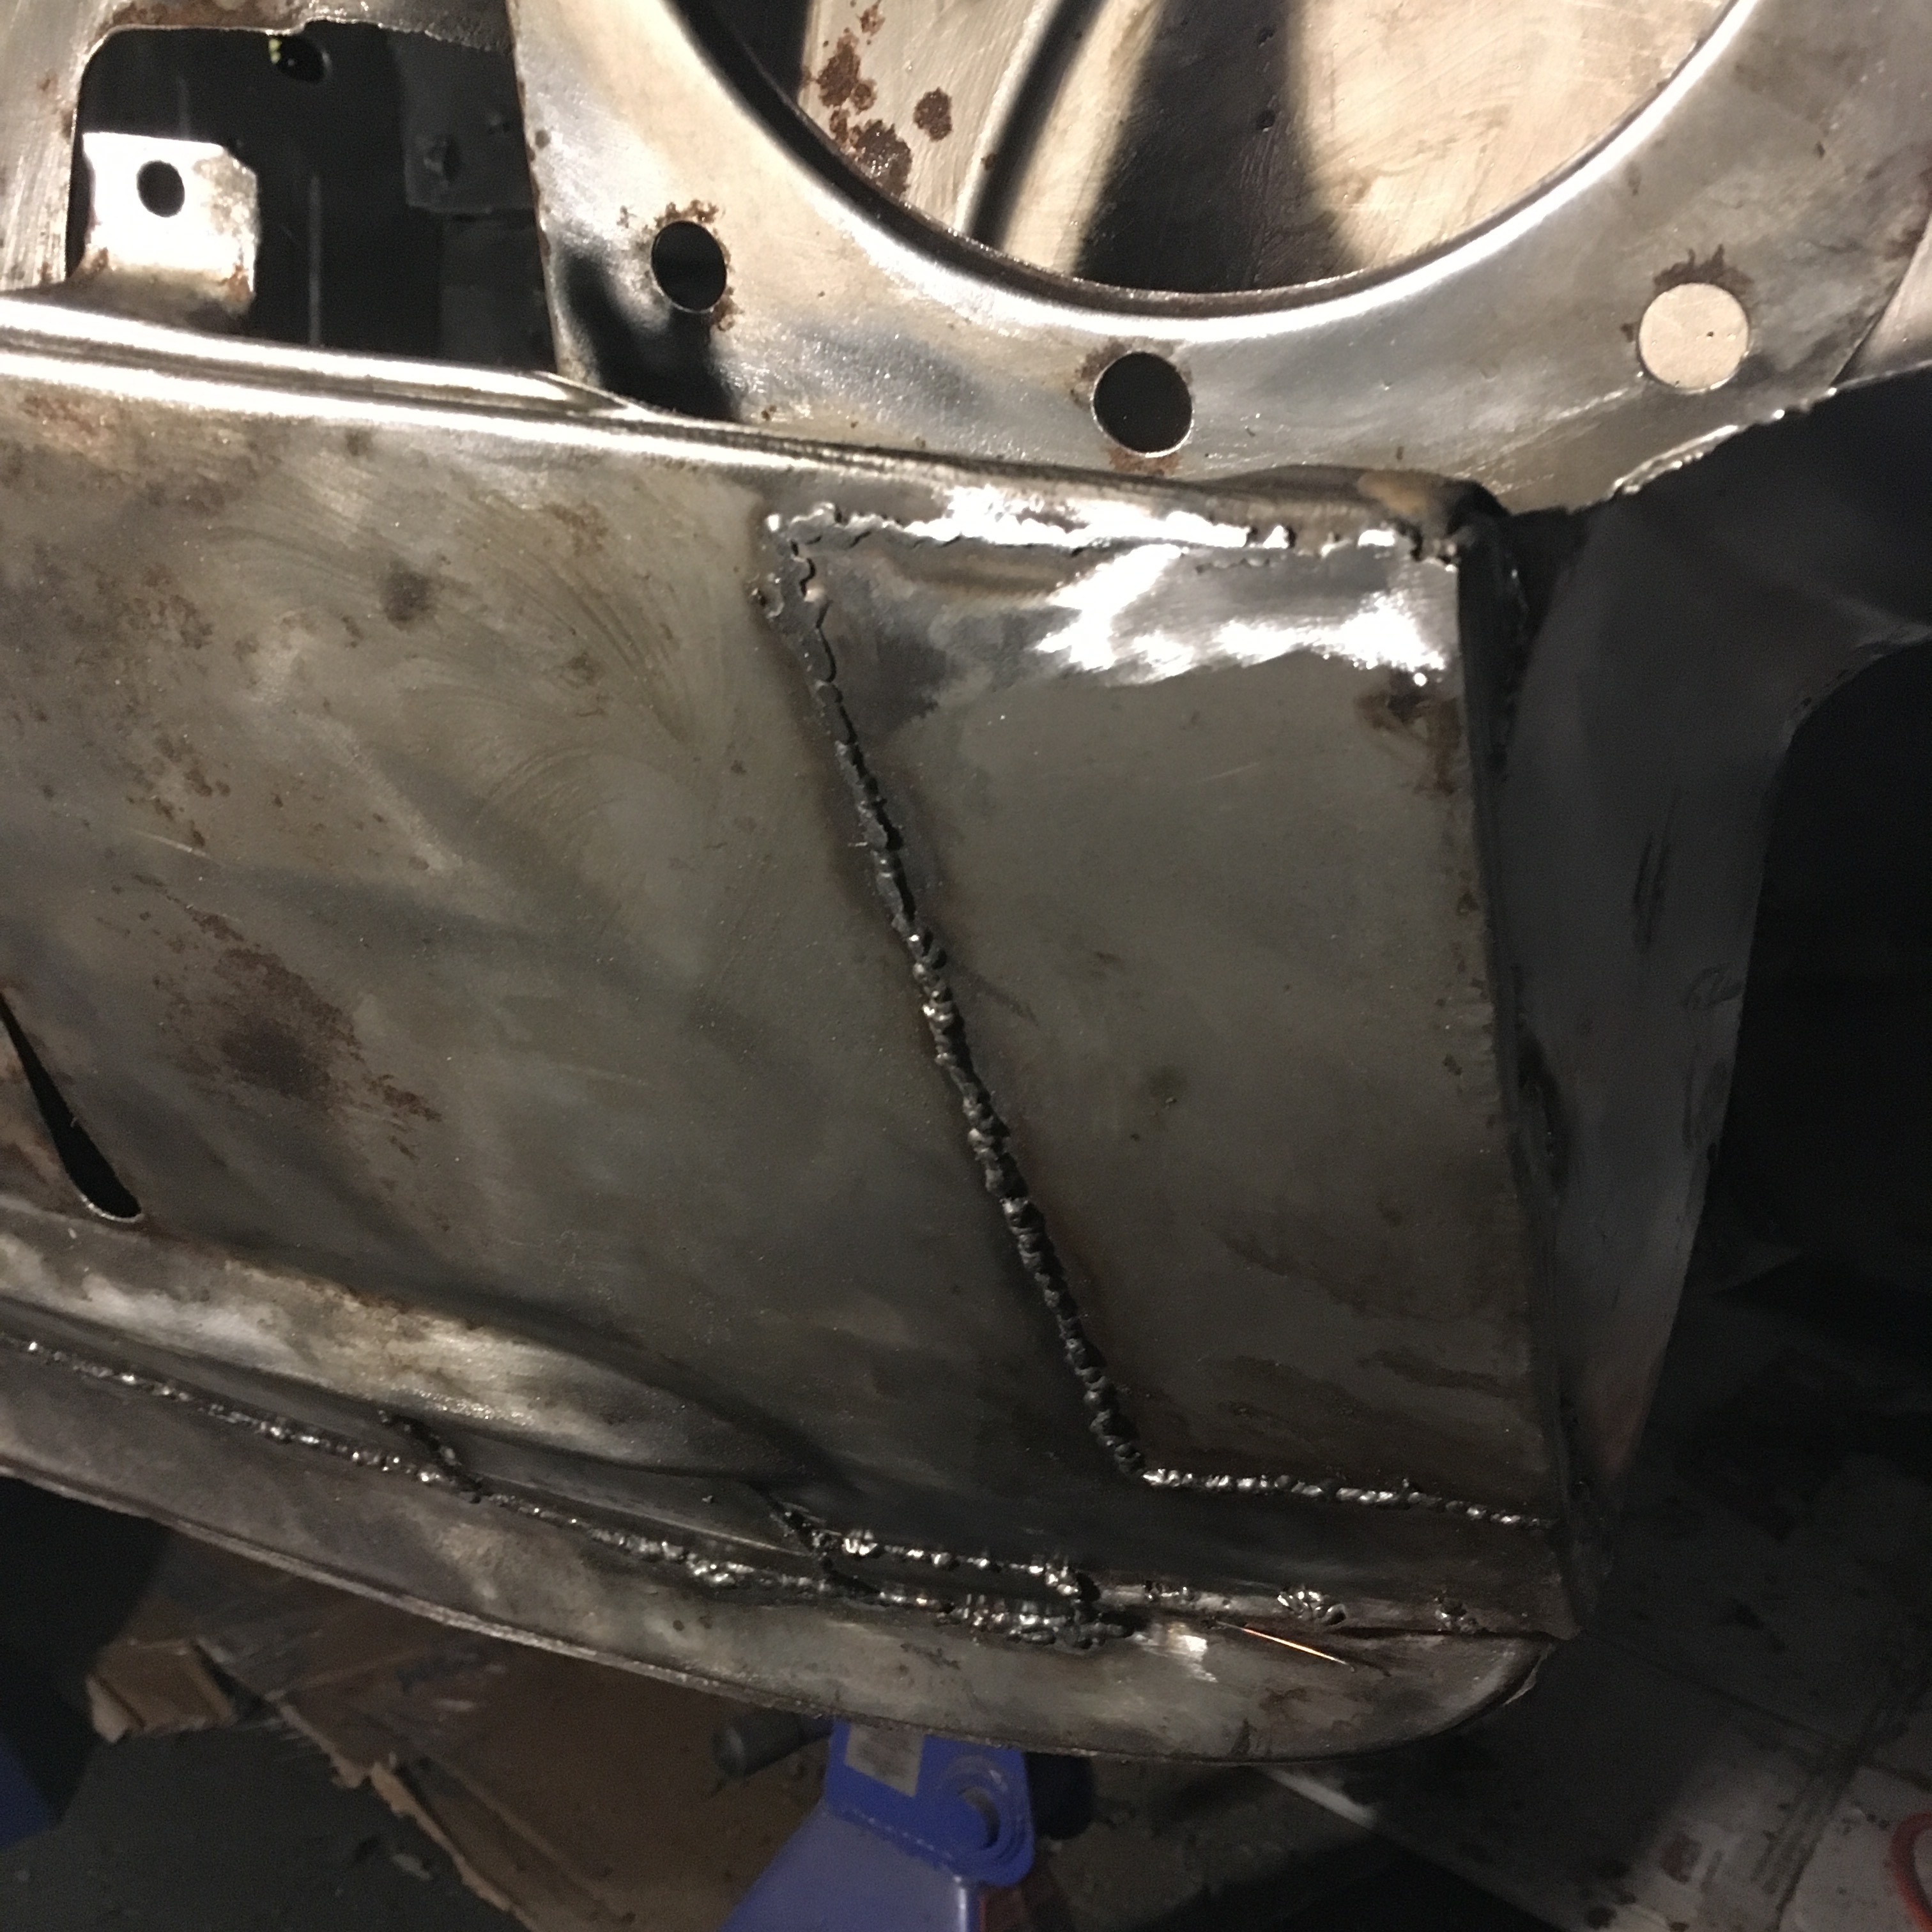
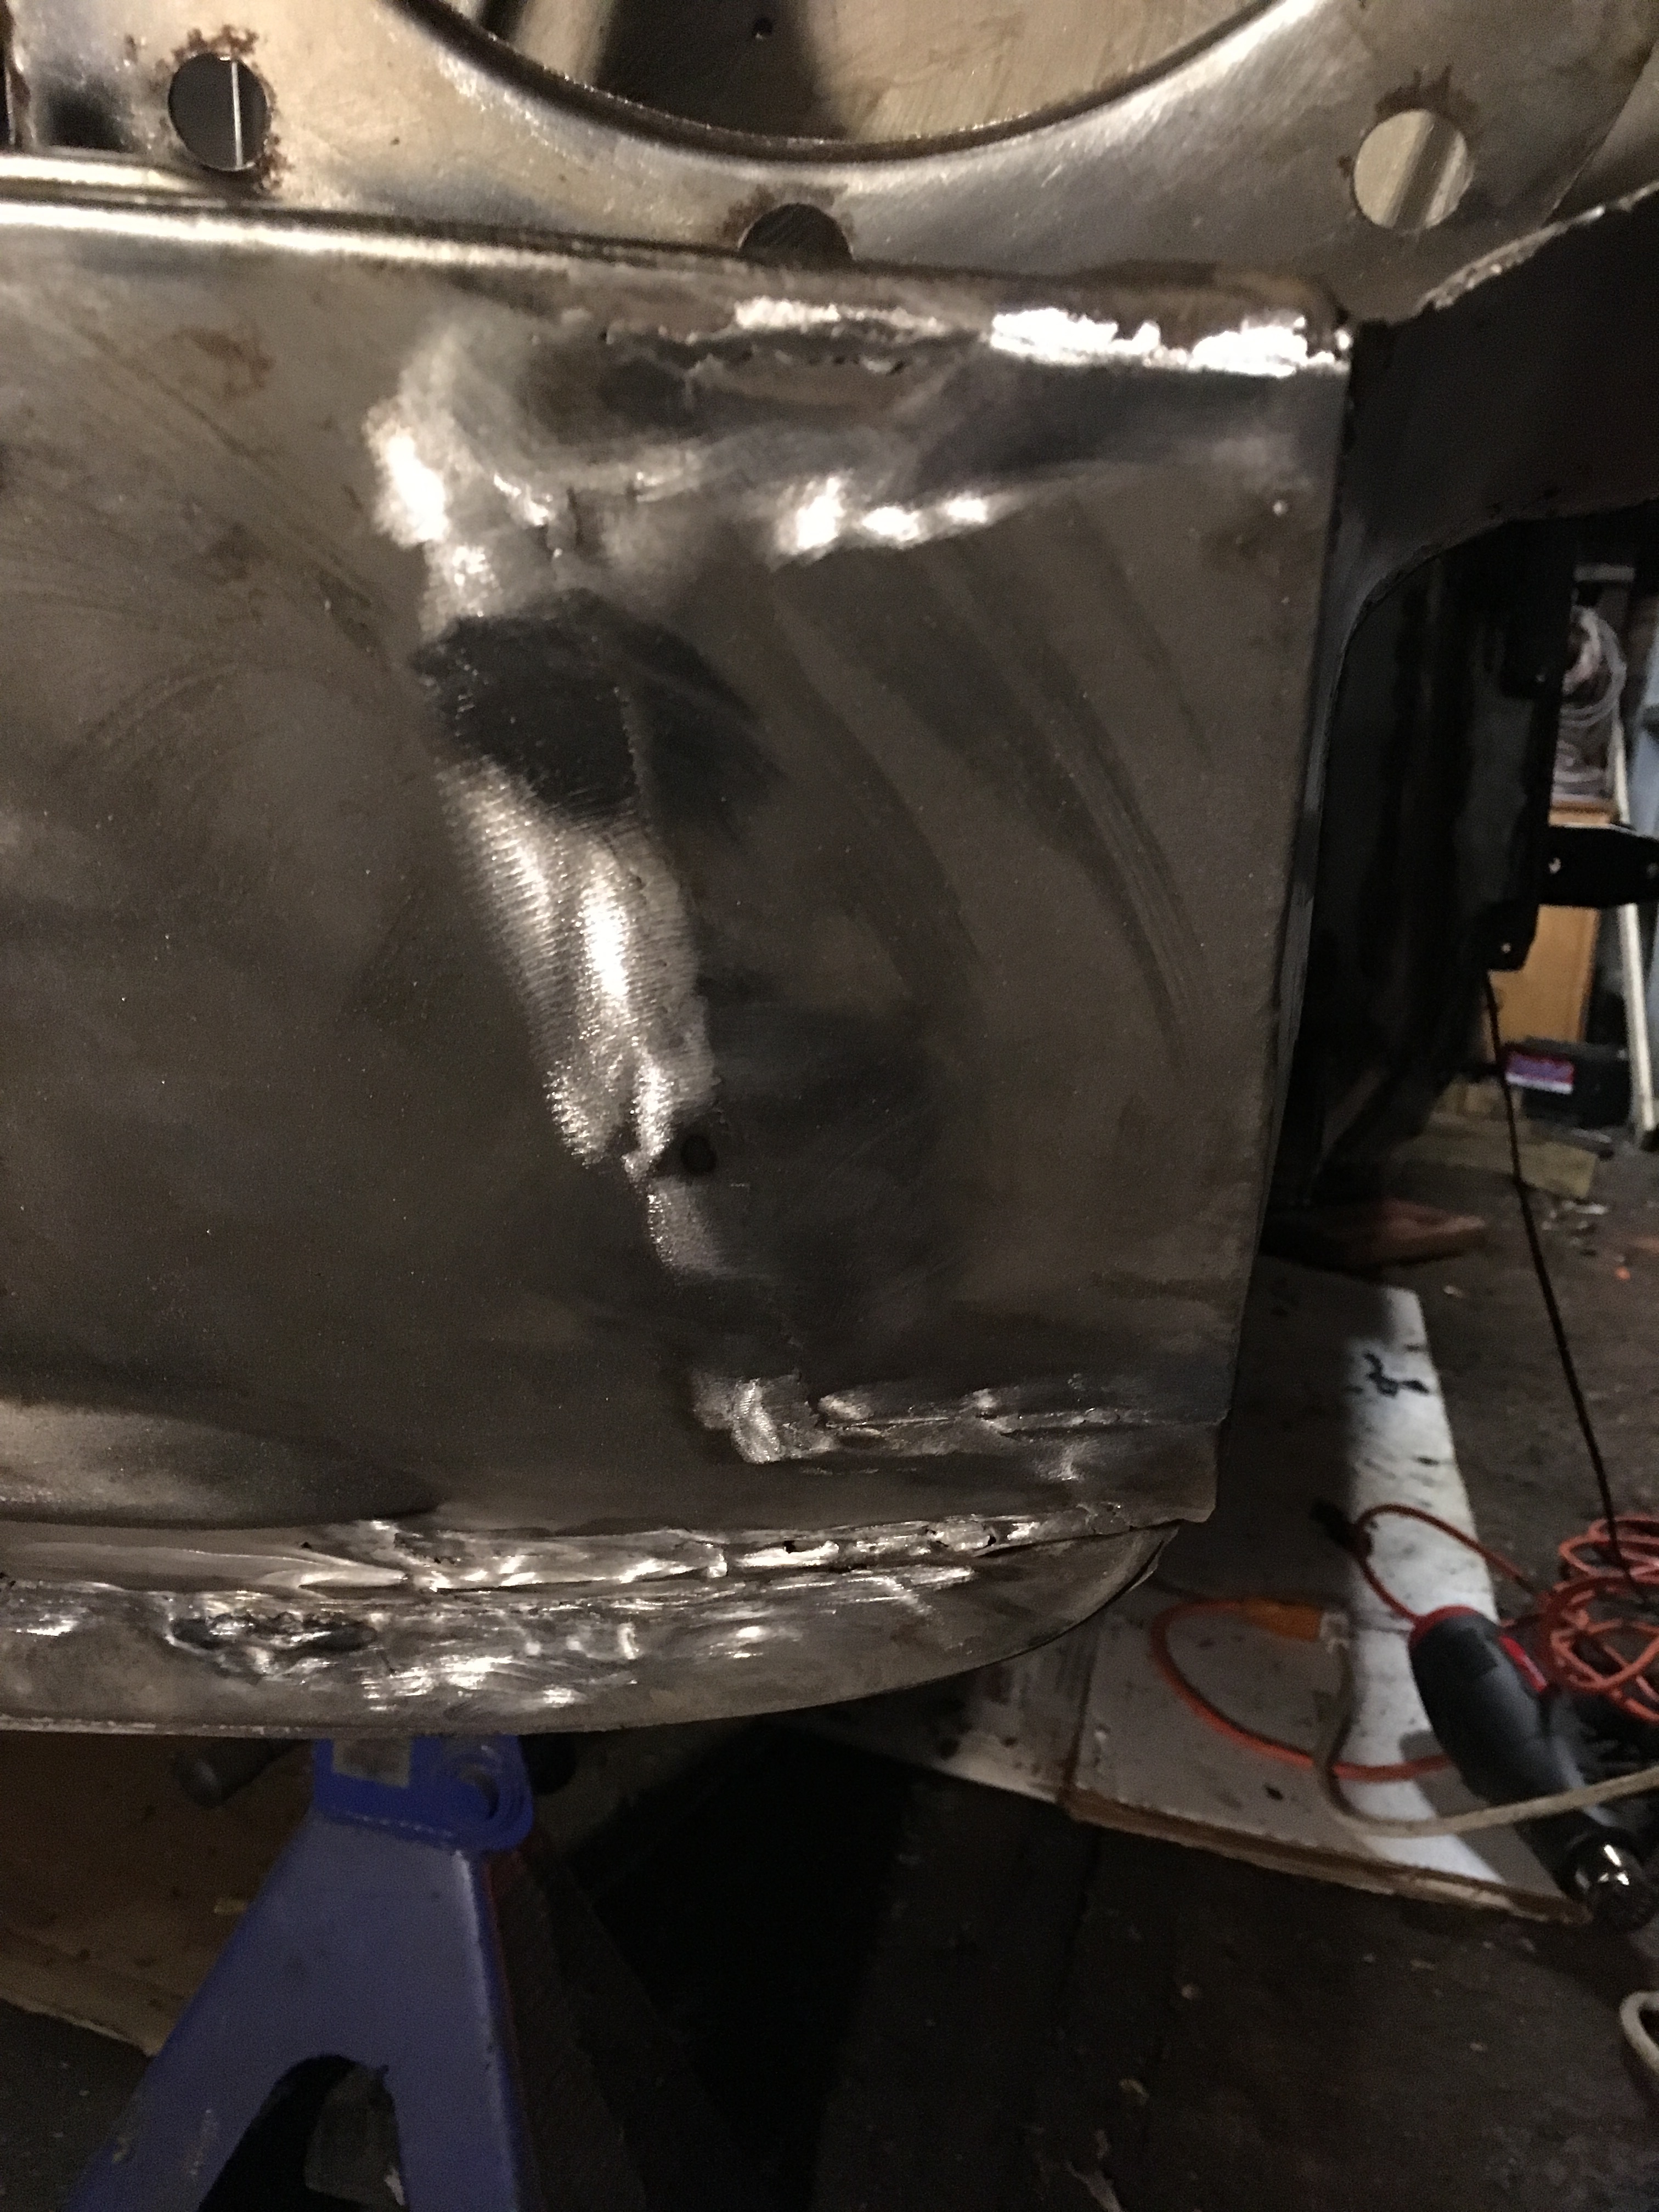
the nose needed a lot of work, particularly towards the bottom. here's the drivers side after the welds and then after grinding:

IMG_2841.thumb.JPG.fa3a3e0a4cc8ae1e867d80344554dc3b.JPGIMG_2842.thumb.JPG.1f4ef5fab31f18ded87297ea879f696d.JPG


and heres the passenger side:

IMG_2881.thumb.JPG.f5982e3fef2063d08997eacc3f4ac25a.JPGIMG_2883.thumb.JPG.c167ab74b4c2b06dc9c22ec623f574fa.JPG


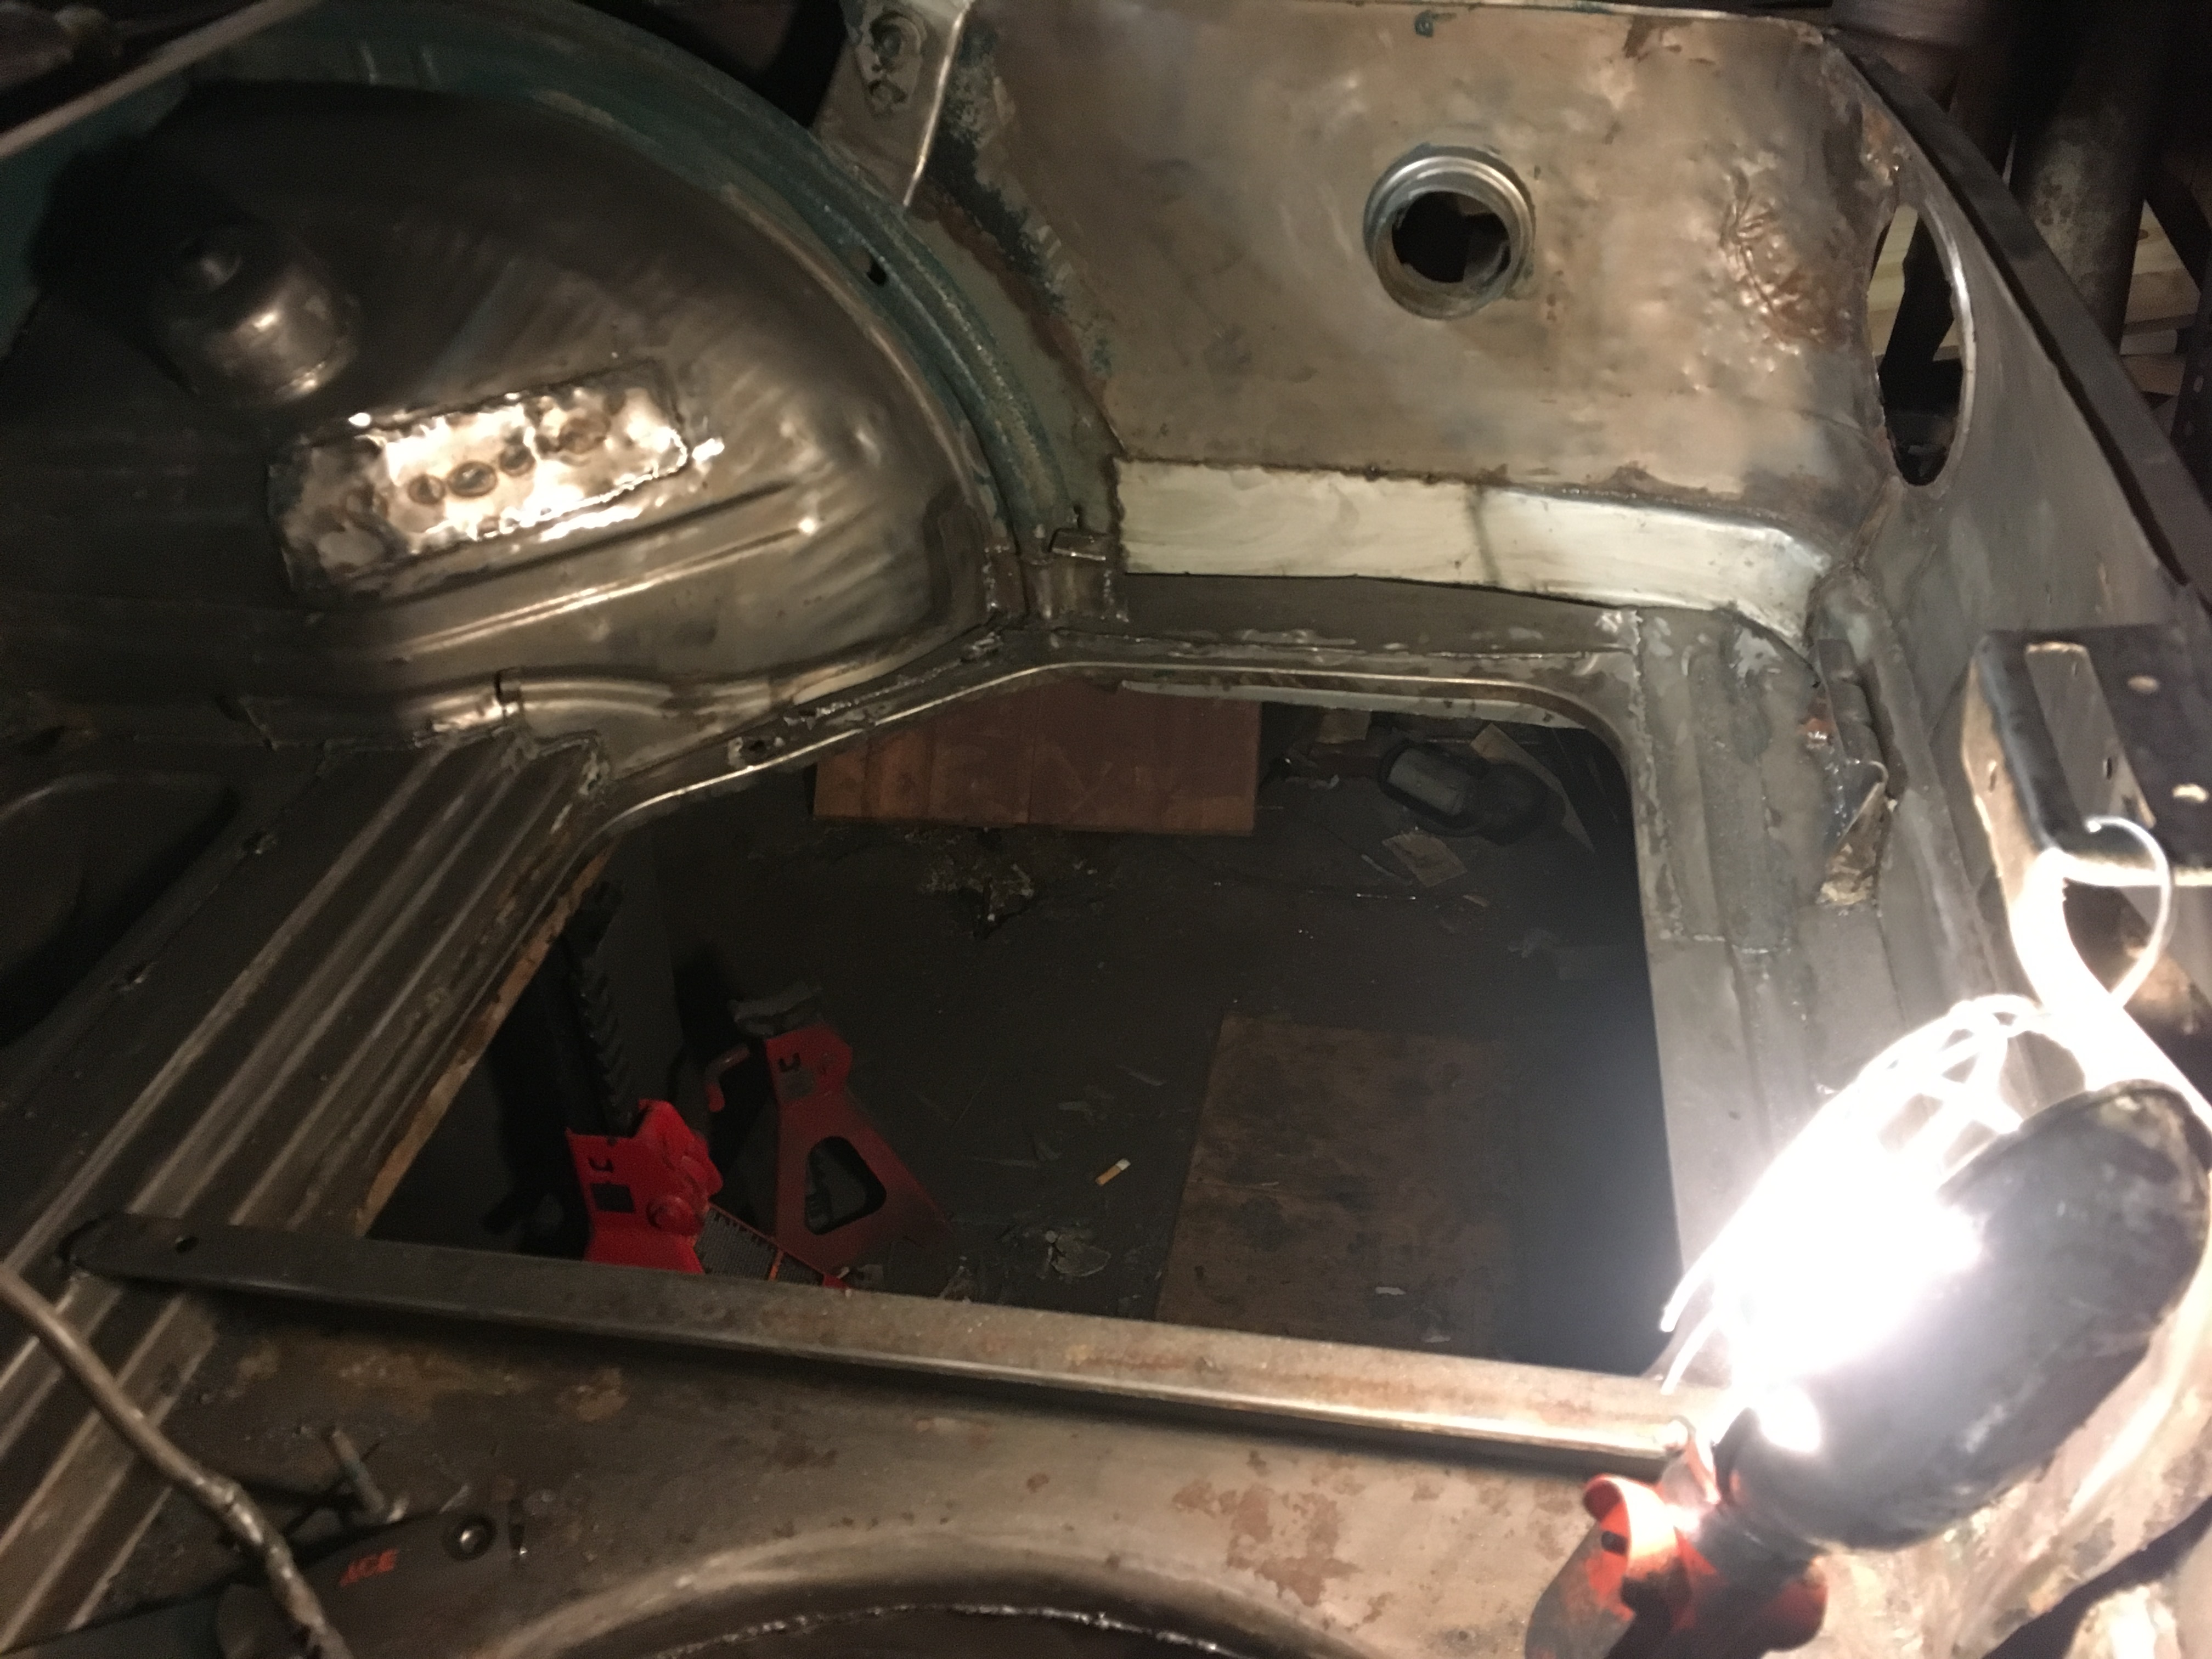
ok, lets move on to the trunk!  it was bad.  I did my best.  I think I preserved at least 15% of the original spare tire well, but it is all solid steel now! that stupid thing took me like 40 hours.  You'll notice in this photo too there is a patch in the rear of the drivers side rear wheel well, and I kind of remade the bottom of the arch that goes over the wheel well.  not my best work, but structurally sound and rust free! 

IMG_2876.thumb.JPG.a5c58bf572850b197568910adb9c692d.JPG


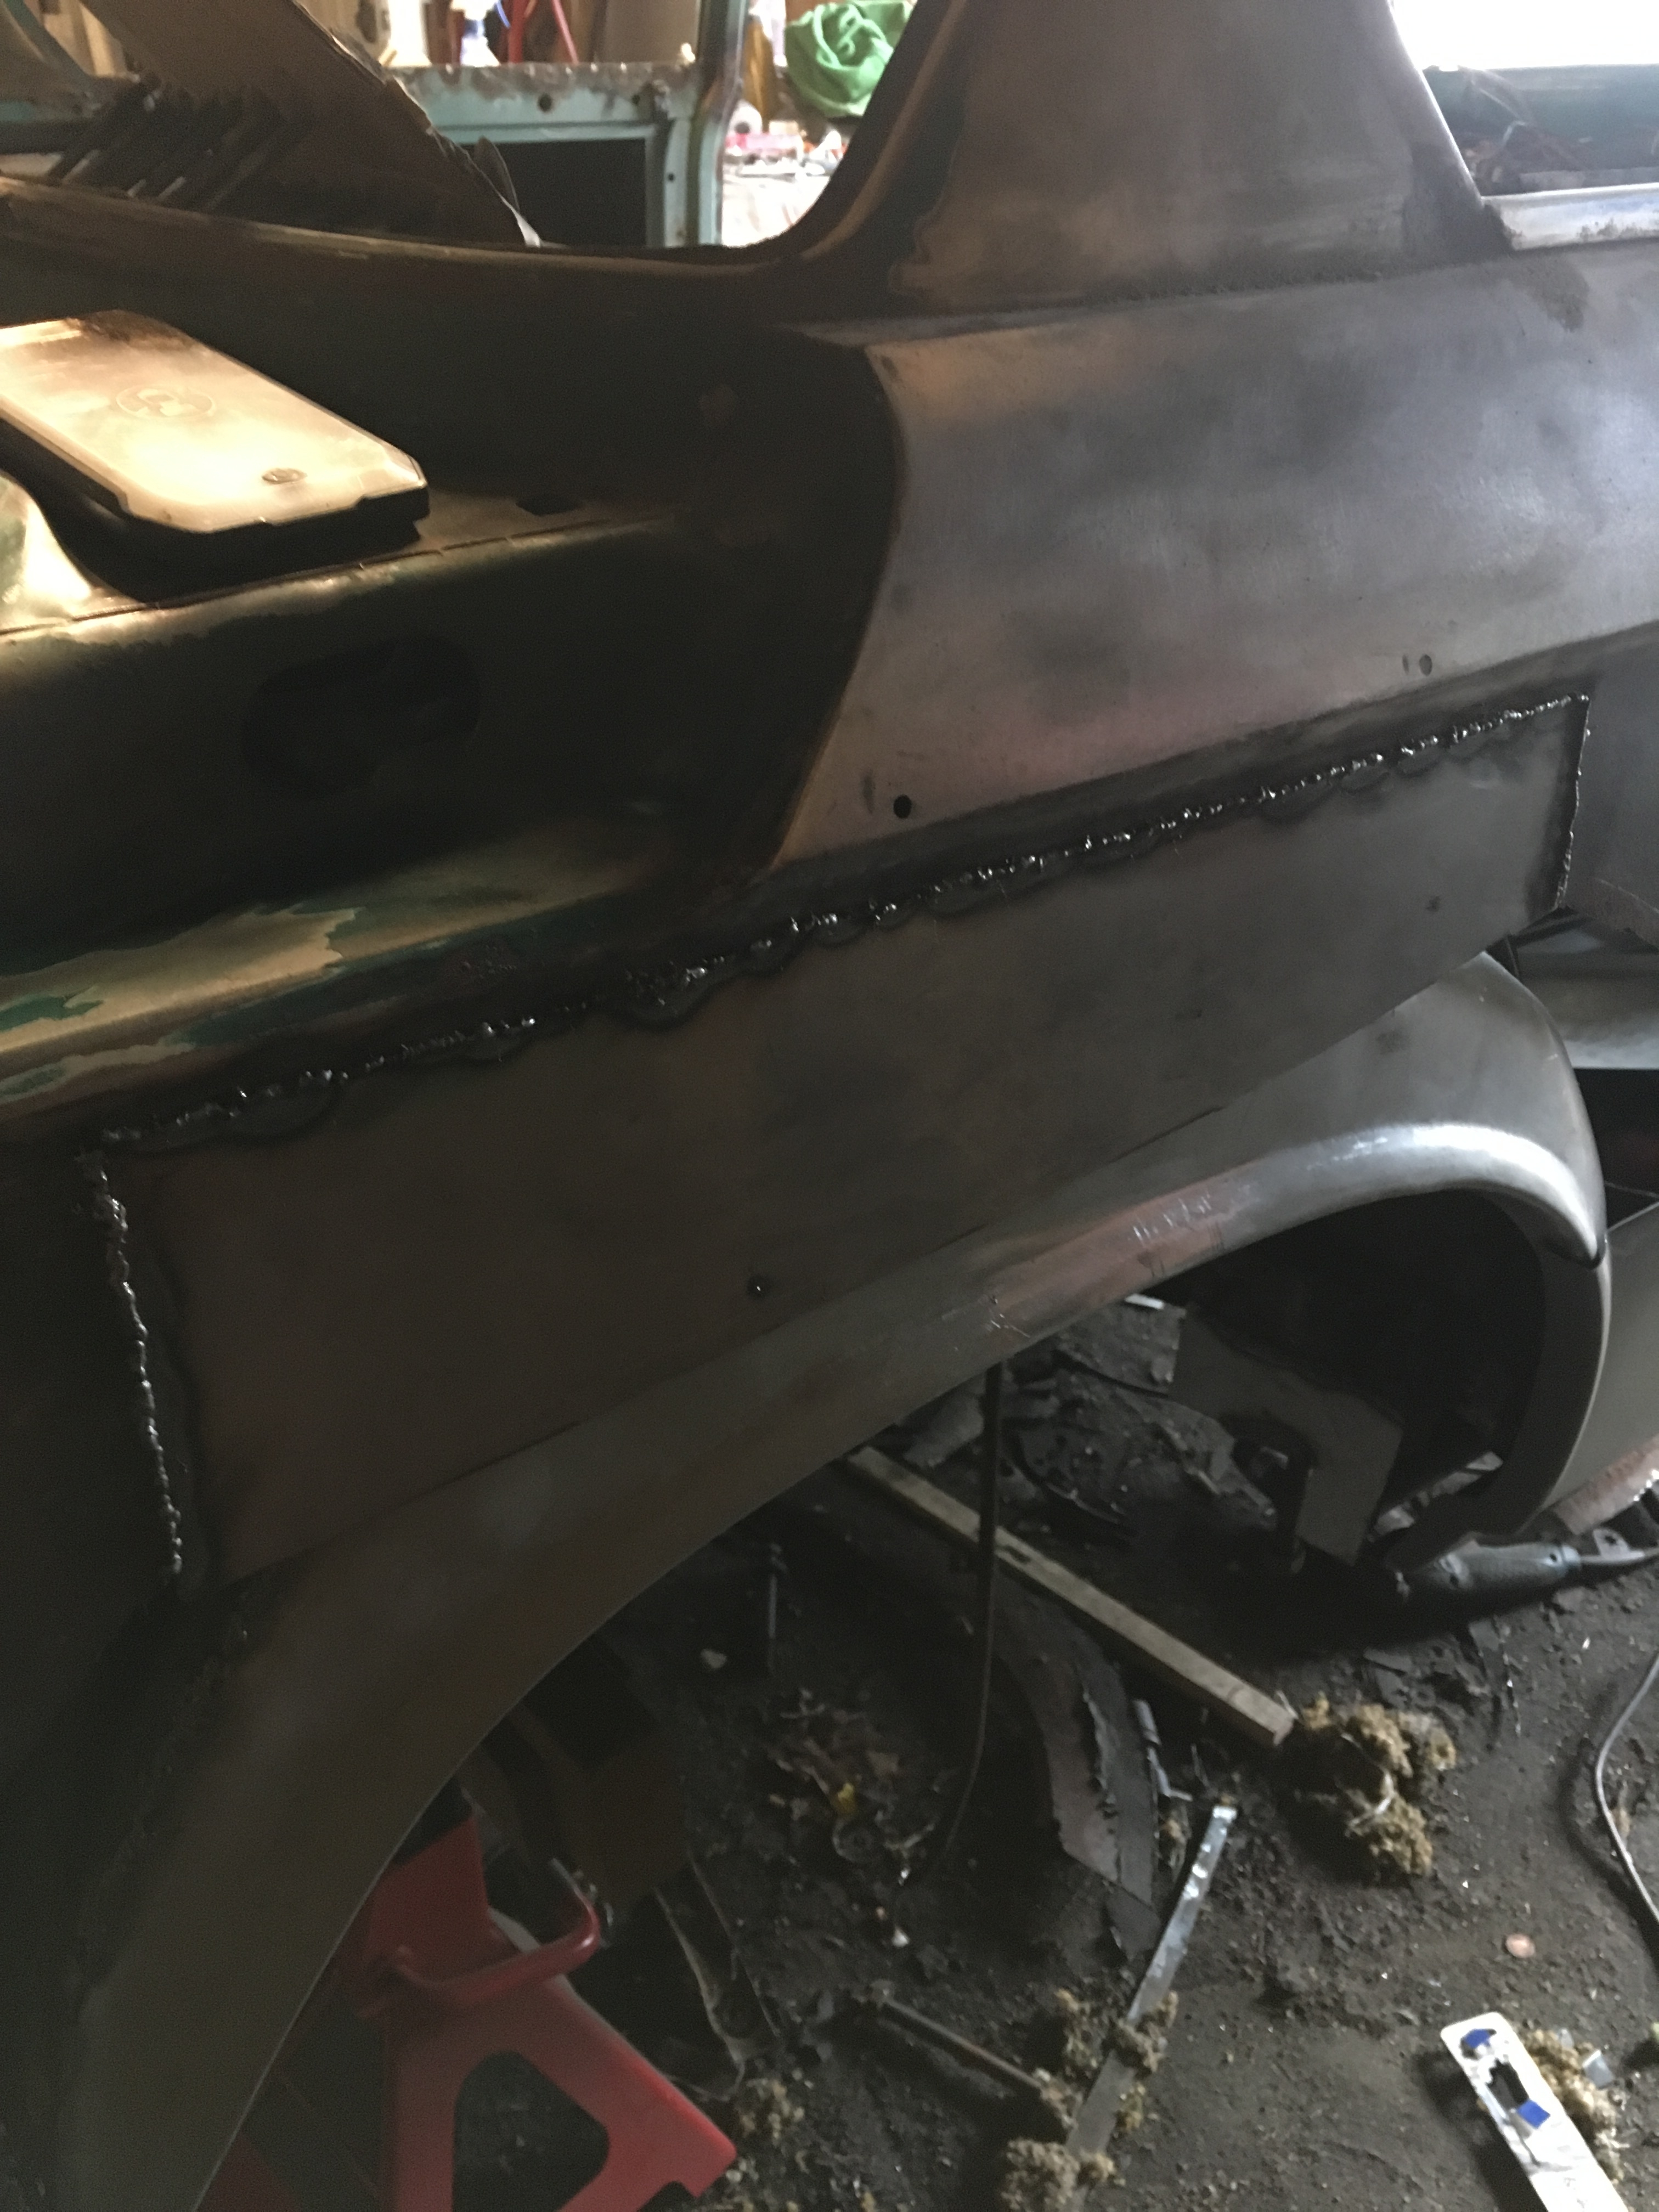
I had to do the same thing for the passenger side rear wheel well.  there was also a patch I needed to do towards the middle of the shock tower, which you can see in this photo:

IMG_2874.thumb.JPG.5769b4ff619b5a37cb516d71a3cef5b0.JPG


and the surround of the gas tank was pretty much gone, so I ended up replacing most of that with by mad fabrication skillz as well.  you can also see where the new lower rear fender has been welded in.  what you cant see is where a new lower rear bumper skirt thingy has been welded in too!


IMG_2875.thumb.JPG.62faa98c6c9ade686947d590caddfcfc.JPG


ok, so this is a lot of work.  make sure to take a drive in another classic vehicle that you've finished rehabilitating, if you have one.  this will help to remind you of why you're doing all this:

IMG_2820.thumb.JPG.1204ee3f182c0f17869f79a82cb9b6e1.JPG


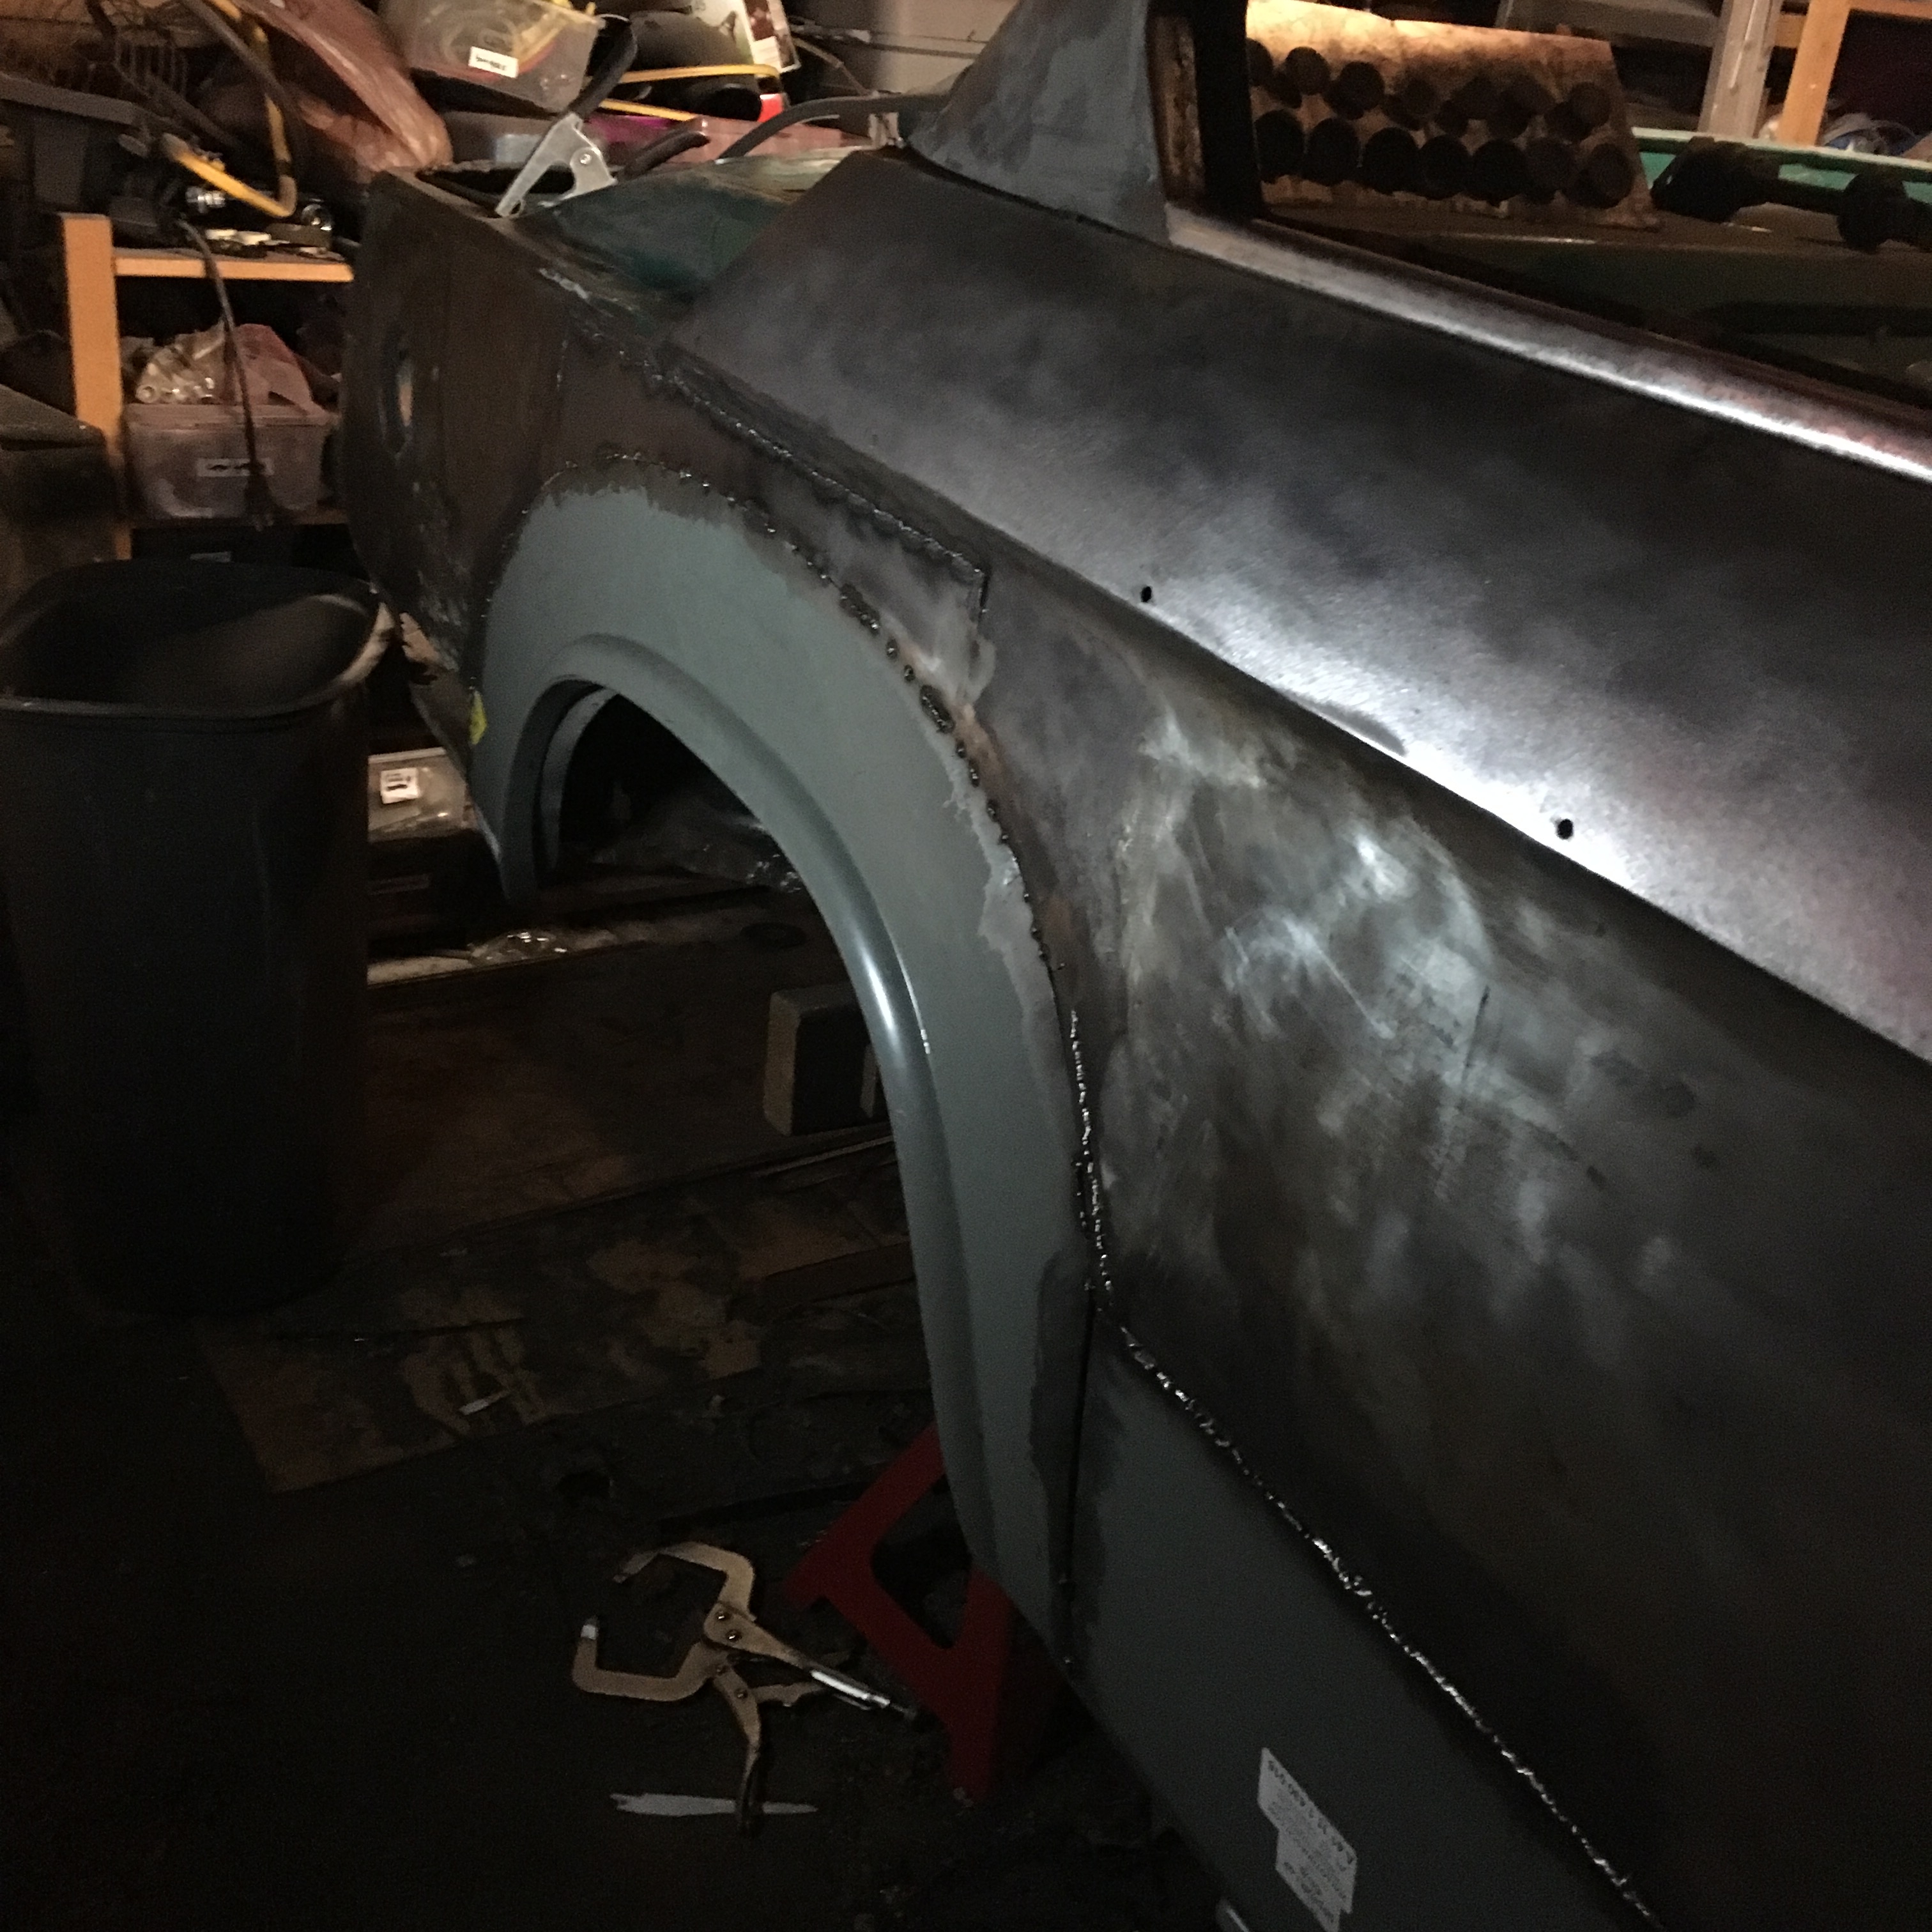
and then get back to work.  the rear left fender was very bad, and the wheel patch you get from wallontesch wasn't going to cover it!  this photo also shows the new inner wheel fender welded in place:


IMG_2754.thumb.JPG.ca055bf92268644ac785d819df06259c.JPG


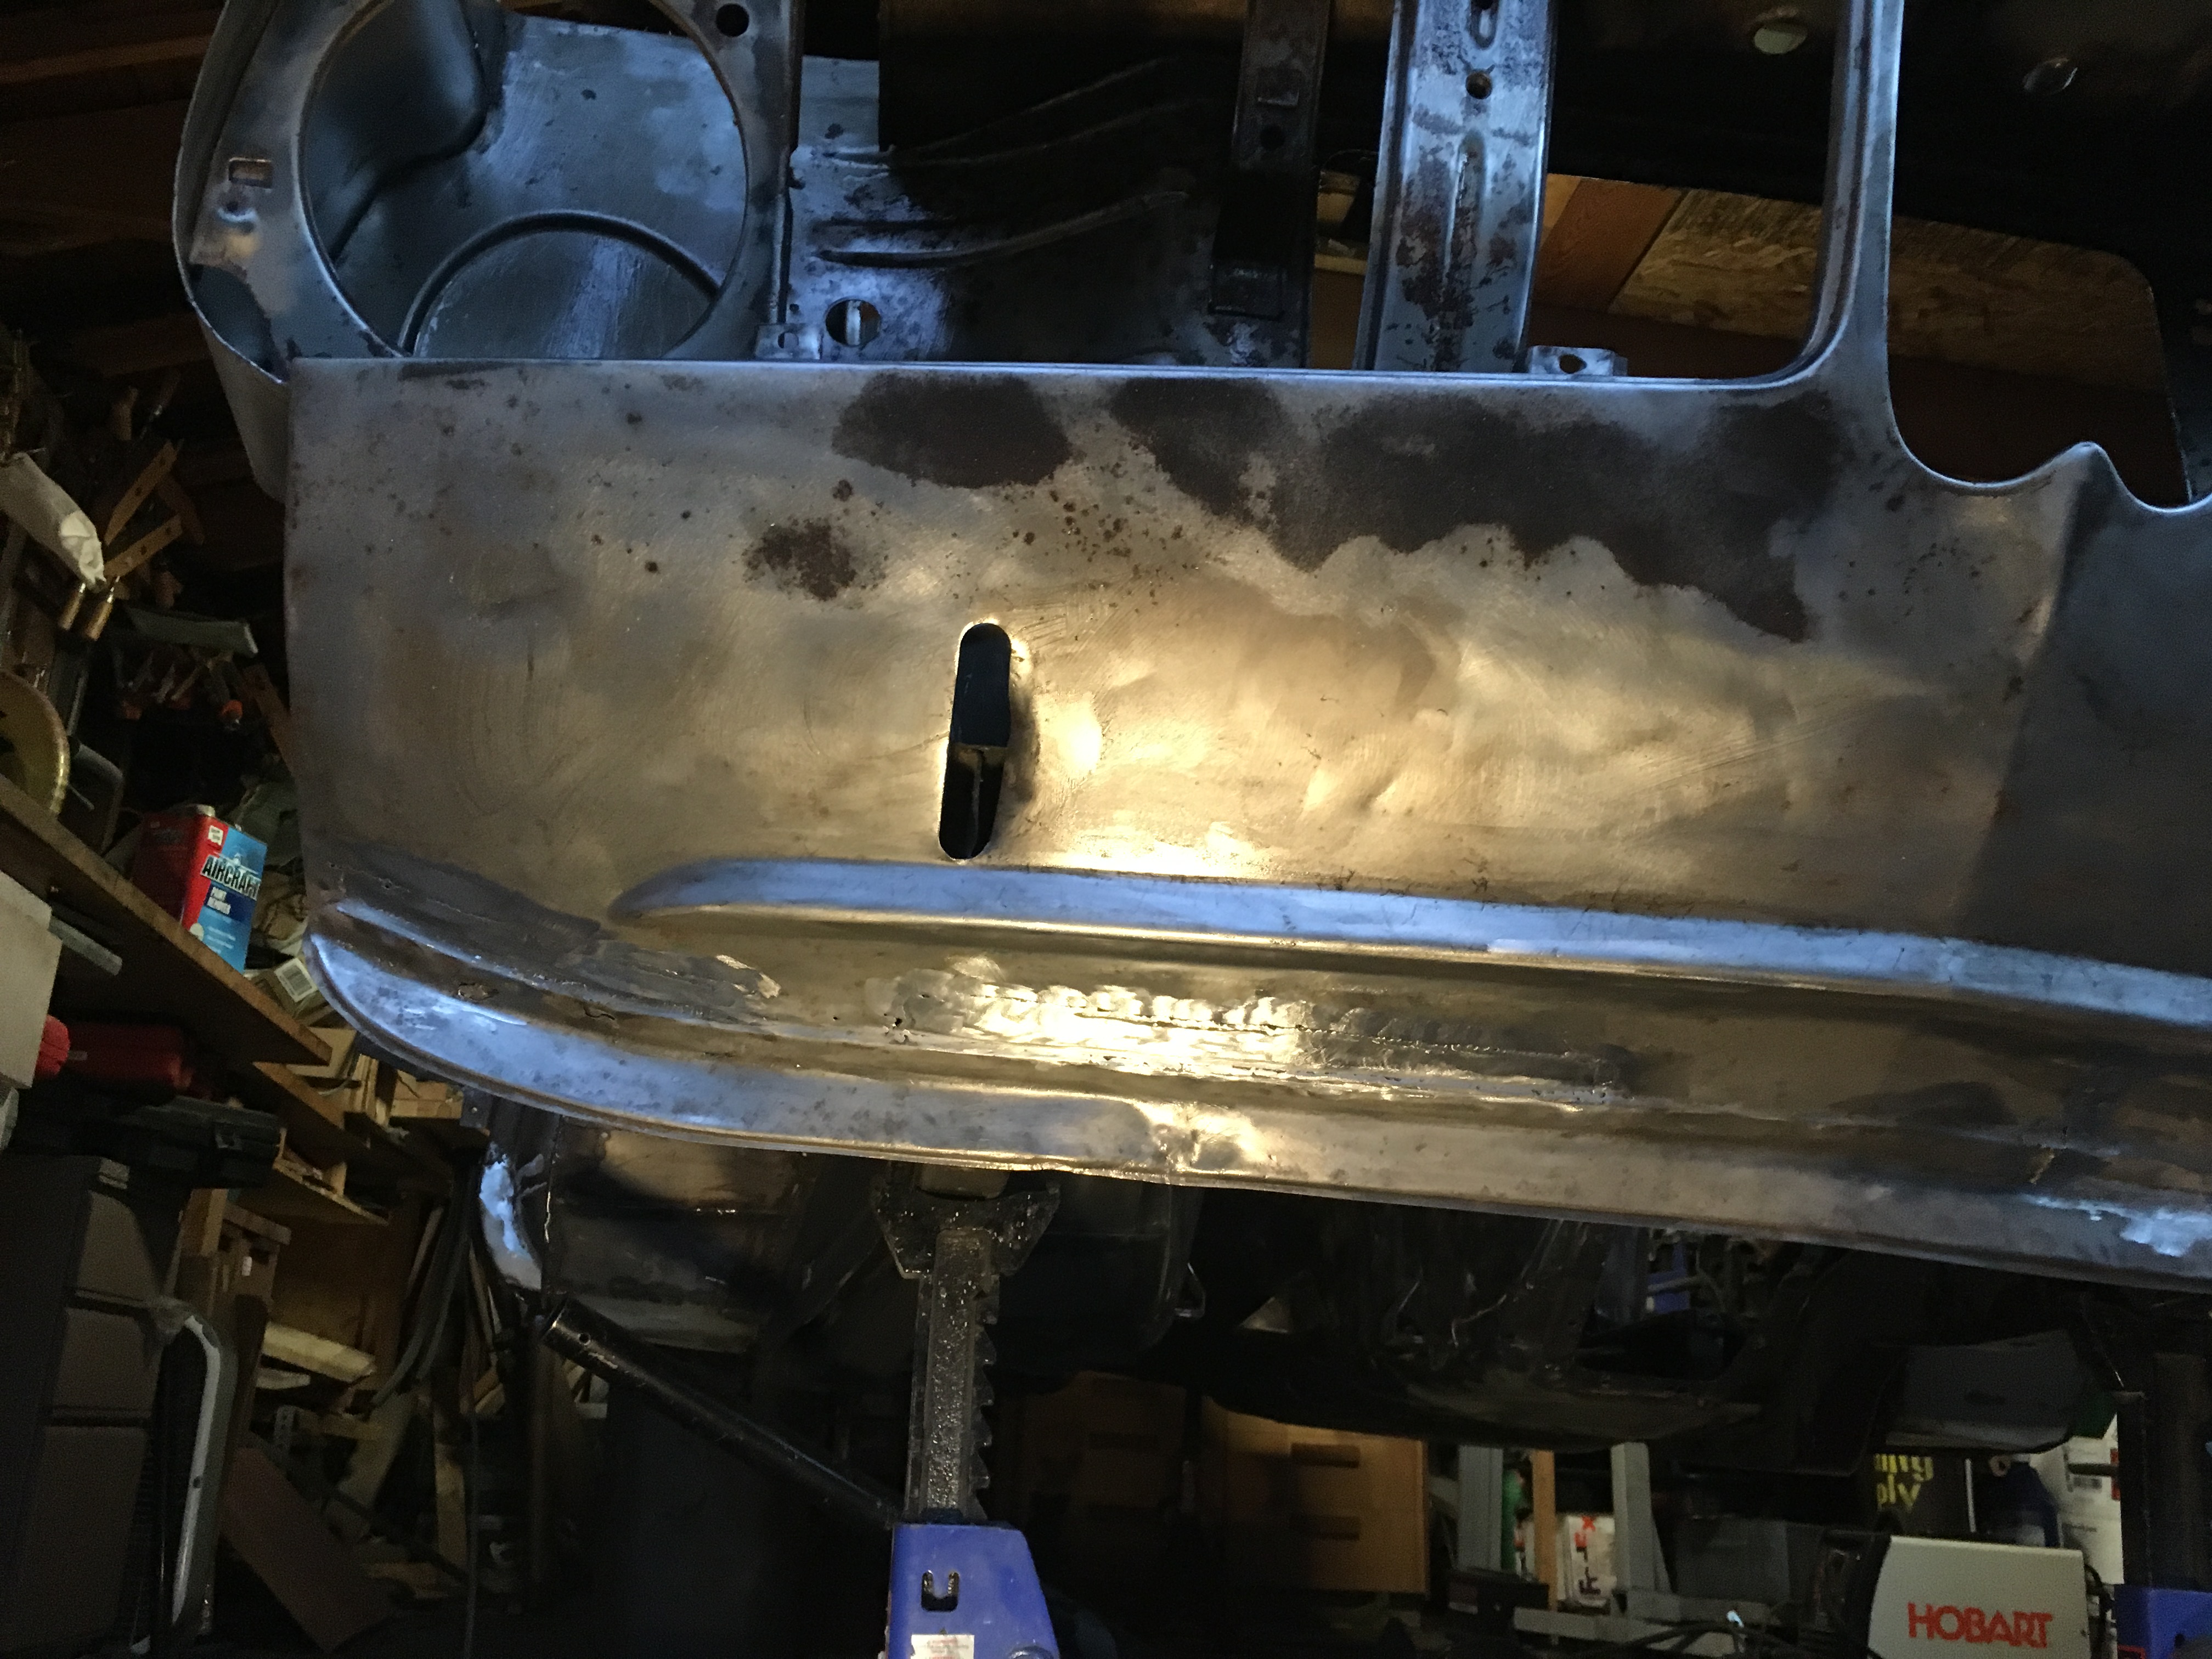
and here's the whole bottom side of the passenger side fender from the door back all welded back together:


IMG_2755.thumb.JPG.1dd797c6b339af2548eba11605673d96.JPG


now do the same thing, but on the driver side!

IMG_2745.thumb.JPG.e2e2d30820ee3959894381f95ea3485c.JPGIMG_2748.thumb.JPG.9d0c1f3c4a264b9c73b783e11158f99b.JPG


and heres the final result of the drivers side fender replacement:

IMG_2899.thumb.JPG.43ce3bc3ad75ef418b4fe03bb9799fd2.JPG


and with that, we'll call the welding mostly complete for now.  sheesh


9 Comments


Recommended Comments

i've honestly thought about that since a bare metal car would look super cool!  not sure if theres any good clear finish for that though :/


main reason i'm trying to document the project here is so i don't forget or lose the photos of the restoration

Link to comment

Seeing these blogs always amazes me, makes me feel better about mine and gives me hope that mine will someday be finished. Kudos. How much time do you think you have into the metal work total.

Link to comment

It would be hard to guess... started in December and finished in June. A couple hundred hours?  Of course I'm not very good at it so it took me a lot longer than someone who was more skilled-

Link to comment

Nice work. How do you prevent the rust from coming back while you are still working on the body?

Link to comment

i used something called Fluid Film, which is a wax/lanolin based spray that works very well. the only thing to be concerned about is to make sure it all gets taken off before painting.

Link to comment
19 hours ago, localhuman said:

i used something called Fluid Film, which is a wax/lanolin based spray that works very well. the only thing to be concerned about is to make sure it all gets taken off before painting.


Thanks. Any ideas how to remove this stuff before paint? 

Link to comment

I used the wax and grease remover recommended for the epoxy primer I'm using, but I'm guessing any solvent based wax and grease remover will do.


One note is that if I were to do it again, I would probably prime everything right after i finished stripping it or finishing up the welding and grinding.  In my case I couldn't do that since it was too cold in Minnesota to use epoxy primer in the garage in the winter.  

Link to comment
19 hours ago, localhuman said:

I used the wax and grease remover recommended for the epoxy primer I'm using, but I'm guessing any solvent based wax and grease remover will do.


One note is that if I were to do it again, I would probably prime everything right after i finished stripping it or finishing up the welding and grinding.  In my case I couldn't do that since it was too cold in Minnesota to use epoxy primer in the garage in the winter.  


Thanks for the tip, I will take that into acount with my restauration. I am thinking of Ferpox Epoxy primer

Link to comment

Create an account or sign in to comment

You need to be a member in order to leave a comment

Create an account

Sign up for a new account in our community. It's easy!

Register a new account

Sign in

Already have an account? Sign in here.

Sign In Now
  • Upcoming Events

×
×
  • Create New...