
Contributed by felix_666 Saturday, 07 March 2009 I have written this article because I live in Australia and you cannot simply trade calipers for $50 a pop at your local BMW specialist centre – no such thing for 02’s. For that money you will get them rebuilt excluding the kits and providing the calipers are a straightforward job. I reckon if you paid someone to do the lot it would cost over $250, easily. If I took the mentality of: “its going to save your life!”, then I wouldn’t be nearly as close as I am to being finished because I would have spent every hour at work tying to pay for everything – boring.
PLEASE READ EVERYTHING, OR AT LEAST THE SECTION BEFORE COMMENCING WORK!
The usual disclaimer applies; I’m simply reporting some of my findings and this is by no means a bible for rebuilding brakes. You are accountable for your own work

Parts that i used
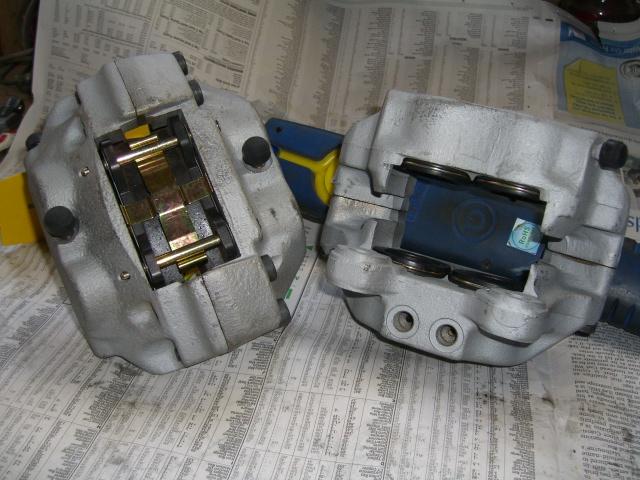
I will start with the calipers off the car and ready to work on, if you need assistance with this part of the DYI you are probably not up to rebuilding the brakes. You should be confident with the tools you are using and have no trouble getting the calipers off. Work on ONE caliper at a time, you’ll see why later.
There are two ways of rebuilding brakes, pulling them apart or leaving them together.[/b] I have pulled calipers apart to rebuild them in the past and continued to do so despite the idea being taboo. I can’t imagine rebuilding the brakes without splitting them, you simply cannot do the same job, especially if the brakes are 35 years old there is almost certainly going to be marks on the bores, cylinders etc. The reason people believe splitting the calipers is bad is because you supposedly can’t buy the “expandable/stretch” bolts or the small flat O-rings.
I bought both, the bolts from my local nut and bolt shop – they are allen screw cap bolts with a tensile rating of 12.9. The bloke from the store had a lot to say about these types of bolts but I’ll leave this for another time. And the flat O-rings from a brake service joint, the bloke there explained that these O-rings are used on old BMW’s, Merc’s and some other cars. Anyway, point is I bought them.
Prepare the calipers
Remove the pads.
Using a plastic/wooden something-a-rather pry off the rubber seals. If you insist on using a screwdriver be careful, you will easily scratch the pistons and need to replace them.

removing the old seals without scratching things
Removing the cylinders
This can be done via compressed air – compressed air with blocking plates and possibly using a flat edge and a hammer (the latter is for the more experienced and not recommended).
Before staring give the calipers are rough clean with break cleaner and compressed air.
Compressed air:
There are two holes where the brake fluid enters; the holes correlate to the closest opposing cylinders. When ejecting pistons by air, cover the opposing one with something as they leave with considerable force. Don’t forget to make a note of where each piston comes from.
The key to this is making a good blocking plate. It needs to cover the cylinder and have a soft backing to provide a good seal, I used blue tack but something more rubbery like rubber tape adhesive might work well.

removing the pistons and protecting with wood
By applying air to one of these holes you will eject one piston and hopefully move the other. The manuals suggest clamping one piston while using the air to remove the other, but I find it better to remove both as far as possible, making it easier to remove the one that isn’t shot out by the air – you’ll see what I mean.
Once you have removed one piston you will need to apply your blocking plate to the opposing cylinder and fasten it with a clamp.
By applying air to the same inlet you will pop the other piston, but your plate has to be well fitted to prevent air from leaking out.
To remove the other two pistons carry out the same process as above.

Clamp with blocking plate

taking note


same thing
You can use a small compressor to supply the air, but it needs to be above 8 bar for seized pistons, and even still you will struggle. If possible take it to your local mechanic and get them to supply the air.
Positively tapping
If your pistons refuse to move you can use the following VERY carefully to get them started.
This method is for the experienced only. If you have not used tools in this way you need to be really careful.
Positively tap the pistons swapping sides constantly making sure you don’t cock the piston – giving them a couple of taps on each side will be enough. This will loosen them to allow you to use air again – gentle is the key.

flat head screw driver that could ruin your day if you don't take car
Put them back on the car
If your still stuck, a last resort is to put the calipers back on the car and push out the pistons by pumping the peddle, this is a fool proof method and the reason why you should work on one caliper at a time.
Splitting the halves
Using the appropriate torx head and breaker bar, split the caliper in a vice.
Cleaning the calipers
The best way to clean the external parts of the calipers was to use break cleaner and wire wheel brushes or the a like. This will give the outside a nice metallic finish. Bead blasting gives a similar (but better) finish; you just need to find someone who knows what there doing!

shiny
Cleaning the pistons and cylinders requires patience and elbow grease. You can use steel wool or the green scotch guard pads to remove any stains or super light marks. If you have light scratches or surface rust you can gently use 1200 grit sand paper – anything greater will be difficult to restore.
I use my Dremel and a copper brush piece (designed for cleaning soft metals like gold) to clean the sealing ring groove at the top.

clean and not so clean
Painting
While the caliper is now in half and cleaned you can paint it with some high temp paint. Make sure you mask up the appropriate areas. Follow the instructions on the can.

painting
Installing the new kits
This is pretty straight forward, you just need to make sure you apply the caliper grease. The inner sealing rings just push in and feed the rest of it into the groove with your finger/thumb.

inserting the inner seal
The piston boot/rubber needs to be put on before you insert the piston into the bore. Simple apply a liberal amount of grease inside the boot and slide it over the top of the piston, keep pulling it down past the lip of the piston, and then wriggle the boot back up INTO the lip, not past the lip. This method makes easy work of getting the boot into the right spot – refer to the picture.

caliper grease

putting the boot over the piston - (i'll edit this soon so its clearer)
Using a small but even amount of grease on the piston it will enable it to easily slide back into the bore – make sure it goes in straight, to push it right in use a bit of wood.
Now with the piston at the bottom of the bore you can apply the snap rings to keep the boots in place as the new boots don’t have the metal ring running through them like the old ones.

Snap rings
Reassembly
This is pretty straight forward, put the new o-rings in and close the caliper haves together and put the bolts in by hand.
To tighten them there is an order and torque value of , refer to the picture.
Install your pads and fitting kit and your sorted.

Fininto


Recommended Comments
Create an account or sign in to comment
You need to be a member in order to leave a comment
Create an account
Sign up for a new account in our community. It's easy!
Register a new accountSign in
Already have an account? Sign in here.
Sign In Now