Jump to content

heinemann

Solex
  • Posts

    129
  • Joined

  • Last visited

  • Feedback

    0%

Blog Entries posted by heinemann

  1. heinemann
    After finally starting the car, there was a horrible screeching sound coming from the back off the engine. Really no way to diagnose the problem without removing the engine and transmission again. I ended up pretty much disassembling the entire car: exhaust, driveshaft, fuel lines, hoses, engine, transmission, radiator, engine wiring harness.
    I discovered that the shaft collar for the throw-out / release bearing was contacting the splined part of the spring pack on the clutch friction disc.
     
    I contacted gripforce clutches and they confirmed that the friction disc needs to be installed with the spring pack facing the flywheel into the recessed portion of the flywheel, which is not typical. The clutch kit only comes with generic instructions showing the spring pack of the friction disc facing away from the flywheel. After making sure that the release bearing slid freely on the collar, everything clutch related went back on the engine and torqued to spec.
     
    Getting the engine back in. My first approach was to install it form the bottom, but that was huge pain. So, I rigged the engine differently to the hoist and installed the engine from the top, and then installed the transmission from the bottom. The 10 foot steel cable was used as a safety just in case the bolt holding the engine to the chain gave way. Then, I reinstalled the driveshaft and then the exhaust... again!

    I ordered an O2 plug which will be installed when it arrives this week.


    Installing the engine this way is so much easier. Right now, I am using a cheapy parts store ignition switch to start the car, which I will swap out once I get the new part. Now, I have to clean up the wiring... again. But hey it runs! There is link below to a pretty crude video of the engine running. Dust blowing everywhere as I rev the engine. I am leaving the flares, front spoiler, and hood off or now. They will be the last things to go on the car, which should be very soon.


    BMW 2002 S54 Swap 480p.mov
  2. heinemann
    I wanted to provide some more details about the suspension setup on this car. I knew I wanted to convert to five lugs, admittedly for aesthetics reasons rather than performance, although 5 lugs hubs do provide 20% more clamping force than 4 lug set ups. I also needed larger rims for the 12 inch Wilwood rotors. This required my to get tii strut housings, which were sent to Ground Control so they could work there magic. I chose to go with Konis, which require 51mm (what I recall) tubes rather than the smaller 47mm tube need for stock, KYB, Bilsteins, etc. I wanted adjustability so I committed to the cost. The front big brake set up and e28 hubs, I got from Ireland, more for convenience, rather than sourcing the individual parts myself, but you pay for convenience.


    The original Ground Control set up uses Suspension Spring Specialist springs for the rear. I had originally ordered them before the trailing arm conversion. I was determined to have the rear hub flanges remade with 5x120 spacing and, after contacting machine shops around the country, just gave up and went with trailing arms from a e36 318ti. It uses the same rear end as an E30, but with five lugs.
    I had a machinist tell me the metal of the drive hub flange was brittle and would not hold up to the heat from welding the holes and then redrilling. I have seen others do it, so now I'm not so sure.
    The e36 318ti parking brake drum is very wide. There is a writeup from the guys over at Vorschlag who show you how to swap out the hub flange so that it sits more underneath the car. I didn't need that, but it's a good read.
    Additionally, the 318ti allows you to swap in a medium case diff and e30 325 stub axles for added strength.
    Here's the set up with camber caster adjusters at the top end. I originally ordered the Kmac camber caster kit, but the quality just didn't appeal to me so I returned them.

    Since I went to the 318ti trailing arms and coil overs, I felt some reenforcement of the trailing arm was in order. I used 1/2" .095 wall DOM Tubing and some square stock to beef up the arms. I may still add more reenforcement to the shock mounting location. Still trying to conceptualize how to make it double shear. They are heavy as it is and I don't want to add too much more weight.
    Gusset for the hub.

    Reenforcement to the shock mount.

    Trailing Arm Cross Brace reenforcement.

    On the Car.

    And, underneath.

    Note that the last two pictures of the coil overs are prior to reenforcing the trailing arms.


  3. heinemann
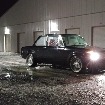
    Haven't posted in a while. Thought I'd provide a pic of the car as it sits now. Drove this junk up from Texas through New Mexico, Oklahoma, Missouri (Misery), Illinois, Indiana, Ohio, to PA. Handles beautifully, not too harsh considering the suspension spring rate. The Toyo HP's performed flawlessly when I hit a snow storm on the Penna Turnpike. You may notice I lost a wiper blade and arm, also on the turnpike. If anyone has a wiper arm with the airfoil please let me know. Waiting till spring to get the seats and door cards reupholstered, but otherwise I am super happy with the car. The thing is stupid fast.


  4. heinemann
    I decided to repair the 3 piece dash of my 1600 project.
    I used the following products:
    Bondo body filler putty knives (available at any parts store)
    Mixing plate for dash filler (I used a scrap piece of duct meta)
    Padded Dash Filler
    Kustom Shop Poly-Glaze Gazing Putty
    SEM Clear Texture coating (not recommended)
    Matte interior plastic parts paint.
    The first step is to remove as much of the bad plastic covering as possible. I also removed any foam the crumbled away or came off easily to get to a good base to apply the filler. The filler is sandable. You must use a Carbon filtered breathing mask. The fumes will knock you out.
    Use progressive stages of grit sandpaper, finer as you go, till you get a nice smooth surface.
    I finished the dash off with glazing putty and sanded that smooth as well.
    The second to last step was applying the texturizer. I would recommend using a better product. It worked for me, but is a really terrible product.
    The last step is to paint the dash with color and gloss to suite your taste.


  5. heinemann
    As some of you may have read already, I have been having some issues with the factory throttle set up. I decided to build my own linkage that would eliminate the slipping throttle arm. I had tried different fixes, including welding on a clamping collar to the throttle lever / arm, but it slipped anyway. So, I went out the junk yard and pulled a throttle bell crank out of an e36. The older ones are made of metal - aluminum actually. I knew it wouldn't fit directly, and since I don't have the equipment to weld aluminum, I decided to recreate it out of metal, and 3/8 rod.
    This it the original metal cut.
    rot
    The arm after I bent it to match the OE e36 throttle bell crank, with the rod tacked in place.

     
    This is the e36 arm side by side with my creation.

    Another side by side shot. I matched the bends, because I had mocked up the mount with the e36 bell crank, so I knew the profile would work.

    Here is another side by side shot, with the rods cut to the right length. The top rod is where the spring goes and it pivots on two steel bushings, that are from a pulley I swapped into my Jeep. The bottom rod goes into the 2002 pedal and rides in the channel just like the original 2002 throttle lever.

    This is the new metal throttle bell crank with the end that will receive the cable end.

     
    And, the part installed, before I cleaned up the welds. The design is pretty straight forward, and the arm is fixed in place by the spring pressure that pushes it again the trans tunnel. Now, I have to paint all this junk, lube it up and check it off my list. This should provide plenty of torque to manipulate the bell crank that pulls the ITBs open.


  6. heinemann
    As promised I have some updates for the exhaust system. This was a mega pain to finish, mainly because the weather was lousy this weekend.
    Ever try to weld in 40mph wind gusts? Not fun.
    But first, some pics of refitting headlights and rear roundel.
    Front end.

    In a previous posts, I mentioned that the roundel for the rear panel did not fit with the grommets. So, I decided to cut some threads into the posts and install them with lock nuts.
    Rear end.

    On to the exhaust. The entire system, including hangers is 304 Stainless steel. The tubes 2.5" the length of the system, which terminates in two 304 SS Jone's (formerly Aero) Turbine XL straight through mufflers.
    Exhaust from underneath the car. I used 304 SS V band clamps to attached the system to the headers. I might install another set somewhere in the system so it is more manageable to install and for servicing other systems. That crappy throttle lever is still giving me problems.

    The result before fusion welding the joints, which will happen sometime this week/end.

    And another angle. The hangers are bolted to the body. This makes it incredibly easy to install the hangers and then bolt the system in place as a unit, instead of fighting to slip the rubber hangers over fixed mounts.      

    Onto the E30 rear subframe swap. This subframe is also found in e36 compacts and Z3s, which have 5x120 wheel hubs. I had always planned on swapping in an e30 subframe, but I had invested in the e36 rear end and carrier. It's not a bad setup, just a bit heavy. I had time to fuss with it, because it rained all weekend. What really set me on this task was the need to have to have the subframe and axles installed before I could finish fabricating the exhaust. I am now going to sell the e36 diff and find an e30 diff with a good ratio. I was really set on the 3.91 ratio, and I know that the gear set could be swapped into an e30 medium case diff, but probably not cost effective at this time. Still have to cough up for the interior.  I think 4.10 might be too low. Anyway, still mulling it over. The S54 does rev to 8500 RPM so...
     
    After building a jig from the old 2002 subframe by using some large 1/2 bolts welded to square tubing to hold everything rigid, I measured the center pickup points to the diff center line. BMW diffs have the drive flange center line cast into the housing. At least, each one I've ever seen has had the center line cast into the housing.
    Here's what I cam up with.

    The subframe has to sit forward to the pickup points so that the center of the rear hub will fit in the center of the rear wheel well. This was confirmed by measuring with a plump bob, and cross measuring from the subframe pickup points to the differential mounting points on the subframe. Now, I will need to fab up a mount for securing the differential to the body. I plan on making a second diff mount.
    Gusseted the mounts.
    Gussets for the front and hey it works.

    Installed and it works. This is so much easier to install that the other subframe I had built.

    Before I finished the exhaust.

    Installed with the rear trailing arm, which also has new hard line brake tubing thanks to the rainy weather.

    The wheel sitting nicely in the wheel well.

    This weekend, if the weather behaves, I will clean it up and go pull an e30 diff from the bone yard and fab the mount. Hopefully, I can find something. Pretty slim picking when it comes to e30's in the local wrecking yards.
    That all for now. More to come...


  7. heinemann
    Thought I'd post a quick update. I finished up the wiring, built a relay bank, which is mounted in the trunk where the battery will go, and, finally, finished up the exhaust.
    Wiring mess.

    Thankfully, one night when it actually rained here, I went through the entire wiring harness, labelled everything, and removed some questionable additions and kill switches added by the previous owner.
    This mess has to get through two small holes on the driver's side firewall.

    Relay bank I built with Hella waterproof relays. The two right side relays are Derale relays that I am using for the fuel pump and fan. Both are ground triggered by the ECU / ECM. The Derale relays incorporate a blocking diode specifically for ground triggers by the ECM. The diode prevents amperage spikes traveling back to the ECM that can occur during motor dwell. I eventually added inline fuses to all ECM relays.
    From Left to right
    FAN,
    Fuel Pump,
    Hi-Beam,
    Low-Beam,
    12v constant trigger by Position 3 on the ignition switch,
    ignition switch 12v input for coils,
    ignition switched 12v input for cams, vanos and air valve,
    and ignition switched 12v input for injectors. 

    Mounted in the trunk. My plan was to use a distribution block from a e39 BMW, but mini fuses are surprisingly difficult to find, especially in low amperage.
    So, I created  positive bus bar and went with the original circuit breaker bank, and added a negative ground block just behind the strut bar. 20 amp for the ECM wiring and 30 amp for the fan and fuel pump. I did add inline fuses with lower amperage for the ECM relays.

    Engine wiring mess.

    Random shots of me figuring out stuff.

    I have cleaned up most of the wiring with friction tape and will soon add some wiring loom tubing to give it a nice look.
    Engine bay and ECM in place. I wanted to mount the the computer inside the cabin, but the loom was just too short. Stupid brake fluid reservoir keeps breaking off.
    You'll notice I mounted and expansion tank where the washer reservoir goes. It's from a Volvo. I was going to us a Mercedes tank, but the Volvo's was more compact and only has one inlet and outlet. The washer reservoir tucked up and under the cowl is from an e36. I just wired it into the original loom.

    another shot.

    And a shot of the ECM in its home. Picture's a little blown out. I'll clean up all that wiring this weekend.

     
    On to the rear end.
    Order a 4.10 LSD medium case for an e30. It may be too low a ratio, but I can always swap the 3.73 from my e30 if this doesn't play well on the highway.

    Cleaned up and rebuilt the differential. New seals and all.
    On to the subframe and the sway bar mounts.
    Originally, I had tack welded the mounts to have the sway bar go over the top of the trailing arms, but the bar interfered with the driveshaft.
    Mounts I fabricated.

    Close up of mounts. With camber adjusters welded in place. Yes, I am wearing socks with mandals, cause it's comfy.

    Full frontal.

    Wide.

    The rear suspension is hung. There is a bracket to swap out the rear solid discs for e36 vented, but I'll worry about that later. I rebuilt the calipers before installing

    Another angle.

    The subframe, differential, trailing arms, sway bar, and half shafts mounted. I rebuilt all the brake lines on the trailing arms as well. You will notice that this picture of the trailing arms has the shock mounted in double shear. It is also gusseted to add strength.

    Shot from rear of driver's side suspension arm and shock. The shocks are Koni adjustable dampers with Eibach springs. If the sway bar ends up hanging too low once the car is on the ground, I will affix it to the chassis, like an e30. The trailing arms are sitting much lower than they'll be sitting at ride height.

    Another shot.

     
    Finally, the exhaust fully tig welded being protected by my guard dog, Preston. All mandrel bent 304 stainless. Flat section is the subframe underpass. 1.5"x6" and has more volume than the twin 2.5 tube. I built it full flow with no restrictions. Going in the car on Saturday if the weather isn't disgustingly windy.

    Tomorrow, I am going to the pull-a-part to get the firewall mounted throttle bell crank and gas pedal out of an e30 (it had better still be there) and get ride of the stupid throttle arm, which keeps slipping. I made one with a clamping collar, like other members have done, but it still slips. Going to fix this problem once and for all.
    Headliner and windows will go in next week, and I plan to fire the engine.
    That's all for now.


  8. heinemann
    Here are some updates on the reassembly. This first pic is of another angle before getting started. I also removed all the flares while working on the car.

    Driver's side. Paint is pretty nice, of course like anything, if you look for flaws you are going to find them. They are minor and I have planned for some touch ups, after assembly.

    Installed the trunk and trunk seal. If anyone has ideas on installing the rear panel roundel / emblem please let me know.
    The studs on the back of the emblem fit so snugly in the holes that there is no room for the emblem grommet and I don't feel like enlarging the holes on the fresh paint.
    I also installed the gas tank, and fuel lines, using a silicone seal between the tank and body.

    At this stage you can see that I riveted in the quarter window channels and installed the quarter windows. Installed 3 point seat belts in the front, but decided against the 3 points in the rear because of mounting issues.
    The seat belts I am using are American made Key Safety Systems 3 point belts that are Humvee / Army surplus - brand new and cheaply sourced on Ebay. Very high quality as well and standard equipment for many car manufacturers.
    At the bottom right of the pic you can see the 7/16 - 20 bung I welded into the rocker.
    I have scoured junkyards looking for BMW hardware and, interestingly, I found that all the seat belts are attached with SAE bolts and hardware rather than metric - weird. 
    I also fit the e24 rear seats by following the tutorial in this forum. I test fit the rear interior panel and there is a slight gap between them and the seats, which will have to be filled.
    I will cut out the rear parcel shelf, since the one I made will no longer fit with the seats in stalled. I have installed Eastwood's Xmat sound deadening material in the trunk and inside the rear quarter sections and on the roof.

     
    On to the engine and transmission install.
    I decided to go with an older style clutch and flywheel, as the dual mass flywheel is prone to failing, and expensive to replace when it fails. The one I had on the s54 engine sounded like it had sand in so off it came and on went the aluminum flywheel and high performance clutch. But first, a new pilot bearing.

    Flywheel installed.

    Side shot.

    next I installed the clutch, naturally. You may notice the oil pan I am using is from and e34 m50 front sump. It has an integrated windage tray. I would end up fabricating an aluminum bracket to hold the dipstick securely to the oil filter housing.
     
    The s54 oil pan and pump off.

    A poor shot of the m50 oil pump and with s54 oil pump drive gear.

    Clutch fully mated to the flywheel and torqued to spec.

    And another angle.

     
    Engine and transmission together.

    Next day and my crazy idea to put the engine in from the bottom. I was really trying to avoid damaging the freshly painted firewall. This tuned out to much more difficult than anticipated. I have normally put the engine in from the top and then mated the transmission from the bottom, but with the door on, fresh paint, and clutch installed, I was hesitant to try it and screw up / undo all the body work. A side note, the s54 is canted 30 degrees to the passenger side, as apposed to the m20 and I think also the m10 which are 20 degrees. The s54 is a physically much taller and longer engine due to the head and vanos unit. My commitment to not lose the front radiator bulkhead entirely, is what forced me to rebuild the firewall and transmission tunnel. My aim was to get the engine as far back and low as possible.
    So, I clearance and reinforced the subframe.

    Beefy steel for the reinforcing plates.

    And, the bottom plate.

    Gloss black does not photograph too well, but it's plenty strong and gets the engine in the spot I want.
     
    Shot of the engine drive system. I would have to remove all this junk to get the engine in from the bottom.


    Positioning the car before placing the front jack stands.

    After a few hours, and a lot of choice words the engine was home. I had to remove the accessory drive belt and alternator to fit it through the front frame rails, because of the engine slant.
    Griffin sirocco style radiator installed with fabricated aluminum top plate to secure it in place. You can also see the Willwood  brakes proportioning valve installed in the firewall just below the steering shaft.

    A few days later and after cleaning up the rear end, I installed the rear subframe and differential as a unit. The differential is a 3.91 LSD from a e36. Would i do it this way again? Maybe, maybe not.
    Fitting the e30 rear would probably be easier, and then all you need to worry about is position of the wheel in the wheel well fore and aft. But, this fits, the driveshaft is linear, and ujoints are in good alignment.

    side shot. you might notice I welded in some positive lock caster and camber adjusters to the trailing arm mounts. They are stupid expensive for what they are (about $100 per pair), and I wish someone would make these available at a better price. Maybe I'll take the threaded locking plate to my machinist and see if he can fab some up.

    And, the rear shot of the differential mounted in place.

    Tomorrow, I will finish up the exhaust system and then fusion weld all the connections. Here's what I have so far. The entire system is 2.5 inch 304 stainless.
    The ECM ( Specialist Components Typhoon) I am running is alpha-N, so no cats are needed and no MAF. I ordered a cross over off ebay that the seller said was 304. It had tons of obstructions and when I put a magnet to it, the magnet stuck. So got a refund on that. Critter at AR Fab made the crossover for a really fair price. The resonators are Aero exhaust and beautifully constructed. I am also using aero exist turbine mufflers. Anyway, hopefully, I'll get a bunch done tomorrow.


  9. heinemann
    Jumping ahead.
    I have seen door card kits on Ebay but everything is on a budget. Didn't seem that hard so I decided to make my out of some good quality wood.
    Attached the old card to the wood and traced the pattern. Any place where the old cardboard was broken, I used the other card to make sure the pattern was correct.

    Cut and drilled the pattern. Here is the result.

    On to paint and body work. Disassembled the hood.

    paint stripping

    more

    and more

    and more. What a mess?!

    Spayed the hood with prep and etch zinc phosphoric acid to treat any rust. This or the paint stripper would come back to haunt me later. Pretty sure it was the stripper. Right?

    I primed the hood trunk and fenders with Eastwood grey epoxy primer. Stuff is awesome and not too pricey. This was done to keep the parts from flash rusting, and not for final prep for paint. And yes, my neighbor's wall is about to collapse.


    I also stripped the door and the trunk lid and finally decided that this was just not time or cost effective. Paint strippers leave way to much residue, the likelihood of having remover residue in nooks and crannies was too high and could jeopardize future paint work.
    So, I found a guy who does dustless water blasting and talked him down to $400 for the whole car and doors. I was very concerned with warping panels, but he showed me some of his prior work and it was impressive.
     
    After - It revealed that the car was in very good condition, bu the front driver corner had had prior body work. I would body work this with a hammer and dolly, weld up the pull holes and fix it right.

    Before and after. You can see the way I eliminated some of the cowl and replaced the sheet metal above the heater core with a formed piece of square tubing - very rigid and stiffens up the chassis considerably.

    Next shots are of the primed car with filler and block work. Below is an interior shot. The bay and interior would be coated with 2K Ceramic chassis black. I undercoated the car with Magnet paints undercoat / rust encapsulator and top coated that with more chassis black. The frame rails, and any nooks and crannies with Eastwood's internal frame coating and rust encapsulator, which is awesome stuff, not too pricey. I used it on the subframe body mounts, frame rails, rockers, B pillars, and shock towers, and the bottom interior of each door.

    The painter's body man, who who he eventually fired undid a bunch of my body work, which burns me up, but... Below the car is on a dolly I built to move the car around. Brand new wheels and they are always going flat.


    and the rear. you can see the rear shock tower truss I built to stiffen everything up and hold the battery. The plate with holes that attaches it to the trunk floor and rear cross member, is also what the differential carrier attaches to.
     

    And the money shot!

     
    Remember I said the paint stripper would come back to bite me. The reason the hood is not on the car is because some residue would react to the paint, clear or something, and cause solvent pops / fish eyes in the hood. Anyway, I am getting that back today and everything should be kosher.
     
    Right now I have been working to get everything back on the car. I'll post more pics of the clutch install, engine install, install of the e24 rear seats, 3 point front seat belts, and the fitting of bright work.
    If anyone knows how to make the vent window close properly, please let me know? I have rebuilt the frame and re-riveted the frame and vent window hinge and even tried a different hing and window with no luck. The issue is that the top of the vent window closes on top of the weather seal instead of in the recessed part. And, the write up in this forum do not accurately tell how to adjust the vent window itself. Ok, more to come.


  10. heinemann
    Obviously, the s54 engine is much more powerful than the original M10 engine. I knew that I wanted to beef up the chassis stiffness as well as clearance the front wheel wells for the wheels I would be running.
    After looking at some pics of how others had clearance the front wheel wells, I dug in a made some cuts.

    I shaped a filler piece out of 16 gauge steel, used some rosette welds and seam welds to fix the patch to the chassis.

    Here is shot from the inside of the car. It does not affect my foot position at all. The area was covered in zinc primer and would eventually be seam sealed before paint.

    Another shot.

    The passenger side before the patch is welded in.

     
    In addition to seam welding the chassis, I would replace the sheet metal section that covers the heater inlet with a bent piece of square tubing, keeping the hood latch mechanism still functional. You might see in it in some of my other posts. I also welded in a triangulated truss between the rear shock towers.
    Next on to seam welding. I welded along the major chassis sections. This is the inner wheel well to the upper fender support.

    Fender to the fire wall on the passenger side.

    Inner fender and doghouse to the strut tower.

    Fire wall to the dog house / engine bay.

    Disaster ensues. So i kind of feel like an ass for posting this, but just another reason to always be safe and have a fire extinguisher on hand when welding. The car was completely empty save for the headliner.
    When I was seam welding the A pillar to the top of the engine bay, the heat caught the vinyl headliner on fire. The smoke was horrible, but it looks worse than it was.

    Another shot of the rear section of the headliner. Anyway, ripped that out an got back to work.

    Geared up and back to work on the Transmission support.

    My assistant, Katja.

    I used some poly bushings to and angle iron to make the transmission cross member. The harmonic balancer for the transmission is the rubber thing in the center.


    welded up and painted.


    Next project  the shifter for the 6 speed Getrag 226.
    Made a cup for the bushing support.


    Wide shot of the set up.

    The rear support sitting in the transmission tunnel.

    Drilled to holes to plug weld the bushing support to the transmission tunnel.

    To be welded in.

    I used to the old transmission boot collar, cut it in half and welded it to fit the new shifter boot.

    I formed the tunnel cover piece buy hand. I decided I wanted to use dzus fasteners to attach it to the tunnel. The transmission fish plate welds look like crap. I cleaned them up, but don't have a shot of that.

    Deciding the placement for the dzus fasteners.

    Fasteners roughed in.

    Installed before welding.

    At the end of the day, I would clean up the welds and and make it all look sharp. I have revisited a lot of these decisions, cleaned up a lot of work, and made some changes when needed.


  11. heinemann
    Here is a small update on the Style 5 rims that I am using on the car.  I found these at a local salvage yard for $300. They had the usual curb rash and the clear coat was peeling. Cosmetically, the barrels were pretty bad. I used various stages of grit to remove the curb rash and polish the barrels to a mirror finish. I finished the polish with a polishing compound and light cutting jeweler's rouge on a shaggy buffing wheel. This project was beyond tedious, and only recommended for true skin flints and insomniacs.

    I took the rims apart and set out to polish the barrels.

    The center sections were in good shape so I left those alone.


    I used aircraft stripper to remove the clear coat. It took a while and several coats but it eventually all came off.
    I used a plastic spakle / putty knife top gentle remove the tough stick on coating.

    I close up of the aircraft stripper doing it's thing.

    I polished the rims buy hand using a successive levels of grit paper - going from coarse to fine (250 for curb rash though 2000 for mirror polish.
    This was tedious top say the least. I finished the rims off with a buffing wheel on a drill and some jewler's rouge.

     
    BBS multi piece rims use special knurled bolts to hold them together and they are very expensive to replace. I called around to have them chromed, but it was going to be absurdly expensive so I decide to zinc plate them and polish.
     
    After buying a zinc ingot of ebay, I made a plating solution using acetic acid and sugar. The ingot has to soak at least 24 hrs to pull zinc into solution for plating.

    I used some rechargeable AA batteries for the voltage. Zinc plating requires a very low voltage to be passed through solution. I monitored the voltage drop with a meter to know when I need to replace the batteries.  Below is a shot of the bolts coming out of solution. They ended up dull in color and had zinc crystals attached to the metal.

    I placed each bolt into a drill, spun them and polished them with super fine steel wool and 2000 grit wet #m autobody sand paper. The picture is lousy, but the finished results are very nice.

    Cleared the bolts before reassembly.

    Then I reassembled the rims, attaching the centers to the barrels and torquing the bolts to spec. I could be more pleased with the results.


  12. heinemann
    This is my first update in a long while and I thought I would provide some backstory on what has been happening with the project. I new that the stock diff. would not hold up to the power of the S54, so I decided to use and e36 diff carrier and swap in a e36 diff 3.91 LSD. In retrospect, it would have been easier and probably more swap friendly just to modify the e30 subframe to fit into the car. If this turns out to be a turd or starts dog-tailing on me, I will just swap in the e30 rear end.

     
    Next I welded the e36 diff carrier to the stock 2002 rear subframe with plenty of gussets and reinforcing plates. You might notice that the trailing arms from and e30/e36 compact. I used those to get the 5 lug conversion and rear disc brakes to match the front.


    And, the end result... However, I would end up making even more adjustments. I welded on some tabs in similar locations to the original trailing arms to accept the Ireland sway bar.
     

    IMG_2735.CR2
    IMG_2736.CR2
    IMG_2737.CR2
  13. heinemann
    Even though a car looks good when you get a hold of it, gremlins often lurk underneath. Considering these cars were not galvanized, rust is unavoidable, even on a desert car. I was preparing to clearance the rear wheel wells for the flares, when I started poking around. Go looking for trouble and you'll find it. After the screw driver went into the rocker a couple of times, I knew I would have to get into them a repair the rust. I also ended up repairing a rust spot on under the driver's rear quarter that had formed under the sound deadening material, literally on the vertical body panel.
     
    Upon Further investigation.

    The first cuts and inspection.

    My body working tools are pretty crude - a grinder, welder, body hammers, etc. - but they work. I hand formed some new rocker panels and welded them in, after making sure the rust was not further into the rockers and rust encapsulating the rockers since I was in there already.

    Patching the rocker near the front door jamb.

    Metal finishing.

    and more metal finishing

    What else is lurking under there? The fenders revealed their secrets after removal and making the cuts for the flares.


    closer inspection or the rear area of the fenders.


    Making a template for the patch.


    The result shot with some zinc weld thru primer.

    On another note, a great replacement for the hard to find body mounting screws used to attach the fenders and brake reservoir, is to go to a salvage yard and pull the Torx bit body mount screws from the fenders of e36's, e46, and many modern BMW's.

    They are usually in good shape, can be scuffed and painted to match your car's body work, are cheap if not free. (The salvage yard I go to just gave them to me, and have the same depth and thread pitch as the originals body mount screws. I think they offer a cleaner look too.


  14. heinemann
    Knowing I need some good oil cooling for the S54, I decided to go with a oil cooler from a RX7 turbo. They are very popular amongst Porsche race clubs and vintage track racers, primarily because of their size, low cost, and cooling capacity. Used ones are relatively cheap as well. You will find aftermarket "RX7" oil coolers on ebay, but I avoided buying one even though it would be new.  Every cheap aluminum radiator I have bought off ebay has eventually leaked.

    Here's a close up of the AN fittings welded to the cooler. The top fitting next to little aluminum post is the inlet and the bottom next to the drain plug is the return. Modern BMW engines have an oil cooler thermostat in the oil filter housing, so that the engines come up to temp before oil cooling is needed. The oil cooler thermostat / bypass in the RX7 oil cooler, which is mechanical and bypasses the cold oil from the engine similar to the BMW oil diverter needs to be removed and the passage blocked off.  I undid the drain plug, tapped the hole and used an old bleeder valve to plug it. Now, oil will flow through the cooler regardless of temperature. The BMW oil diverter will function normally.
    Here's a closer shot.

    BMW oil lines going into the oil filter housing have slip fittings with O-rings. A few companies make a kit to adapt AN fittings to BMW oil filter housings used specifically to attach aftermarket oil coolers. I purchased on for close to $60, but now I see them on ebay for under $20.

    Attached to the cooler to the car using stainless rivnuts / nutserts and some aluminum brackets that I made. The brackets pictured below are actually some supports I made for the front air dam.

    Another pic of the brackets. and oil cooler as it sits with out the front air dam / spoiler attached to the car. I would eventually clearance the old bumper support for the oil cooler lines.

    Cooler lines from the filter housing.


    and, through the front valance. I would eventually clearance this more for serviceability.

    And how it sits under the front spoiler. I will probably add some wire mesh to protect the cooler from rocks and debris.

     
  15. heinemann
    Lats update of the night. When I ordered the front suspension setup from Ground Control, I was still planning to use to stock rear end, so they sent it with some blue coil race springs. With the 30 trailing arms that was not going to work, so I went with a rear coilover setup, Seats and springs set me back about an extra hundred bucks.
     Here are some pics of the trailing arm reinforcement.
    I used .25 wall DOM to reinforce the mounting location. You can also see the gusset I added to the front section of the hub where the splines of the axle go into the hub/bearing.
    This is a different angle of the gussets.

    And another closeup.

    And finally the bottom side of the tailing arm with bracing welded in across the trailing arm's mounting points like found on an M3.

     
  16. heinemann
    Here are some pics of the the radiator install. I went with Griffin Scirocco style radiator. It is only about 13 or 14 inches wide but super thick. I also knew I wanted to keep the front core support, so I used some box tubing with a decent side wall thickness to rebuild the core support with a forward tilt. The electric fan is a pusher style Spal. 
    Added some support tabs that the bottom radiator channel will sit on. I will add some small rubber bushings so the radiator is not riding metal to metal.

    The top section of the rad was supported with some brushed aluminum I had lying around. I used a wire wheel and then a flap wheel to give it a nice brushed aluminum look. Works great at locking the radiator in place.
     
    So, I knew that I was not going to be running drive-by-wire for the s54 and the typhoon ecu I ordered was set up for a throttle cable. I also knew I was not willing to pay $300 for a bell crank that is offered by some companies. So I made one out of an old BMW throttle body and bolted it in place of the throttle motor.

    Here is the throttle crank attached to the motor plate.

    You can see from the cut out that BMW throttle bodies supplied by Dellorto have coolant passages, which I very cool.

    Here it is attached to the engine. Admittedly, it was not my idea. Some e30 guys who swap in s50's use a similar setup.


  17. heinemann
    This post is outlines the steps it takes to baffle the 1600' fuel tank and install a higher volume fuel pump. In retrospect, I should have just gone in through the top of the tank done the baffle and swirl bowl / pot and welded it back up. And, yes the tank was thoroughly cleaned before I started working. I considered the fuel cell route and maybe will do that down the line. I am not ready yet to give up my trunk interlay or being able to the fill the car from the outside. There are way around that, but this cost me maybe 30 bucks, with the Por fuel tank sealer being the most expensive part. I hear mixed reviews about eastwood's line, and the Aussie guy's product is a bit expensive.
    Parts list
    One good condition bmw 2002 fuel tank.
    One e30 318 fuel suction unit.
    One submersible fuel pump of your choosing. I went with a 255LPH unit to feed the S54.
    Soldering gun
    Lead free electric solder found at any radioshack.
    Welder either mig with gas or tig.
    Greased lightning (local hardware store)
    Zinc Phosphate etching solution (local hardware store)
    POR 15 Fuel tank sealer
    I read that the e30 section unit would drop into the 2002 tank with no issues and that it is great for EFI swaps. I was running a conelec pump for the dual weber setup before. still have it if anyone wants to buy it.
    Taking some preliminary measurements so that I was certain it was going to fit. I also thought having it here might be helpful to those wanting to do the swap.


    You will have to solder off the old pump connections and solder on the new pump.
    Below are some pics of the tank fab, internal baffle and fuel bowl and checking fitment before welding up.
    Did a passive leak test and a pressure leak test and everything turned out fine except my finger.
    Tape up the filler hole with a good adhesive tape like gaff tape to ensure the liquid stays in the tank while sloshing around the liquid to reach all the nooks in the tank.
    Used the greased lightning for a few minutes to remove any residue.
    Used Zinc Phosphate at full strength for several minutes, swashing around thoroughly, then wash out with water and used compressed air or heat or a combination to dry the tank completely. I used compressed air and a soldering torch to accomplish this fairly quickly.
    Apply specified amount of Por 15 Fuel tank sealer and follow instructions.
    You should have a good amount of sealer left over, so find other uses for the stuff. It hardens like rock.
    Pretty much it, and hope this helps you.
  18. heinemann
    This was the beginning if the project. I knew the tii engine would never make its home again in the engine bay, but I'm sure would find a good home in a tii restoration project. My friend Dave helps and mom gets creative with her finger placement on the camera lens.

  19. heinemann
    So, I attempted to respond to Freshman02's query about doing the swap, and wrote a nice detailed message that got erased when I tried to send it. I figured I'd just post to the community instead.
    Figuring out the engine mounts is a bit of challenge. I know there was a guy making m20 swap mounts, which is what I based my design off of. Haven't heard anything about the M20 mounts in a while. Here's some pics.


    Some people have made mounts that connect to the unibody, but it is only sheet metal so it doesn't seem like that good of an idea to me. The S54 is a very long engine and the Getrag 226 is a wide transmission, so I thought moving it back into the cab would be a good idea. I wanted to get as much of the weight behind the front wheels. I moved the engine back 2". This meant rebuilding the firewall / bulkhead and transmission tunnel. I was determined to keep the heater, so I kept the mounting points for the heater core and blower assembly. The S54 sits canted at 30 degrees, as opposed to the m20 20 degree lean (I think that's right), so that gave me a little more clearance at the firewall.
    I needed to make a transmission mount, so I reused the captured nuts from the old transmission tunnel, as well as the shifter cup and welded those in. The swap also required me to get a new driveshaft. After mockup of the engine and trans, and the rear end setup. I measured from the guibo to the diff. flange. Real OEM list drive shaft lengths in millimeters for all BMW's, so I found a driveshaft with the right diff flange (some use CV's at the diff). I accounted for the slipyoke, allowing about an inch for movement. This also required welding in some mounting tabs for the new carrier bearing. I cut out and reused the ones from the removed transmission tunnel as well


    Moving the engine back also provided room for mounting a radiator. The vanos unit makes engine longer than an M20, even without the front distributor core.
    The S54 oil pan is designed to eliminate oil starvation, especially in long lefthand turns, so I need to address any oiling issues. The S54 is quasi rear sump and gets into the steering linkage, so I switched over to a e34 M50 front sump and oil pump set up. I plan on baffling the pan and (hopefully) adding an Accusump. I used the s54 oil sprocket and chain.


    This guy Andrew has a nice write up on the front sump swap here: http://www.r3vlimited.com/board/showthread.php?t=237727
    The S54 is also drive-by-wire, but the engine management I'm using is set up for drive-by-cable, So I built a bell crank out of an old BMW throttle body. I will shell out for somethings, but not $300 for a fancy bellcrank.

    I also wanted the engine to sit lower in the car (about an inch), so clearanced and reenforced the front subframe.


    The engine as it sits now. I am in the process of rebuilding the firewall, because it looked horrible. I think I finally figure out how to clean it up, while keeping the heater mostly drawing air through the hood cowl, rather than the engine bay.


    Presently, I am just cleaning up some welding and will post any progress.
  20. heinemann
    This car had been sitting unused for almost ten years and was neglected. The body was completely straight, but it's a high desert, southwest car so my hope was that rust repair would be minimal.


    Modified subframe.

    Tire fitment. After the five lug conversion, which used e28 front hubs and e36 318ti trailing arms. The car sat pretty well. The larger tires fit because I have a Ground Control coilover setup lurking under the car, which allowed me to tuck the tires under the body as much as possible. Smaller sidewall tires and small hubcentric spacers are required for clearance and fitment. I also switched over to lug studs rather than use the lug bolts.


    Car as it sat without OEM fender flares.

×
×
  • Create New...