
.jpg.493090b27f1b354524c292905e3f2703.jpg)
Early Rear Bumper Install on Late Model BMW 2002

Entry posted by theNomad
3,919 views
Posted from

Yes, it's been done before, but not by me, so why not toss up some info on it.
Removing the rear bumper leaves some large holes that will need addressing. The previous owner had Maaco paint it but they didn't bother to remove anything before spraying.
Here's a hint: If you decide to get a cheap paint job on your car, the least you can do is remove as many trim items as you possibly can! Possibly sand it a little as well!
I wet-sanded the rockers but the primer lines are still there, big let down.
|
|
|
Lazy MAACO painters didn't remove any trim. |

|
|
|
1000 grit wet-sanding hardly helped. |

|
|
|
Large hole for the US bumper shocks. |

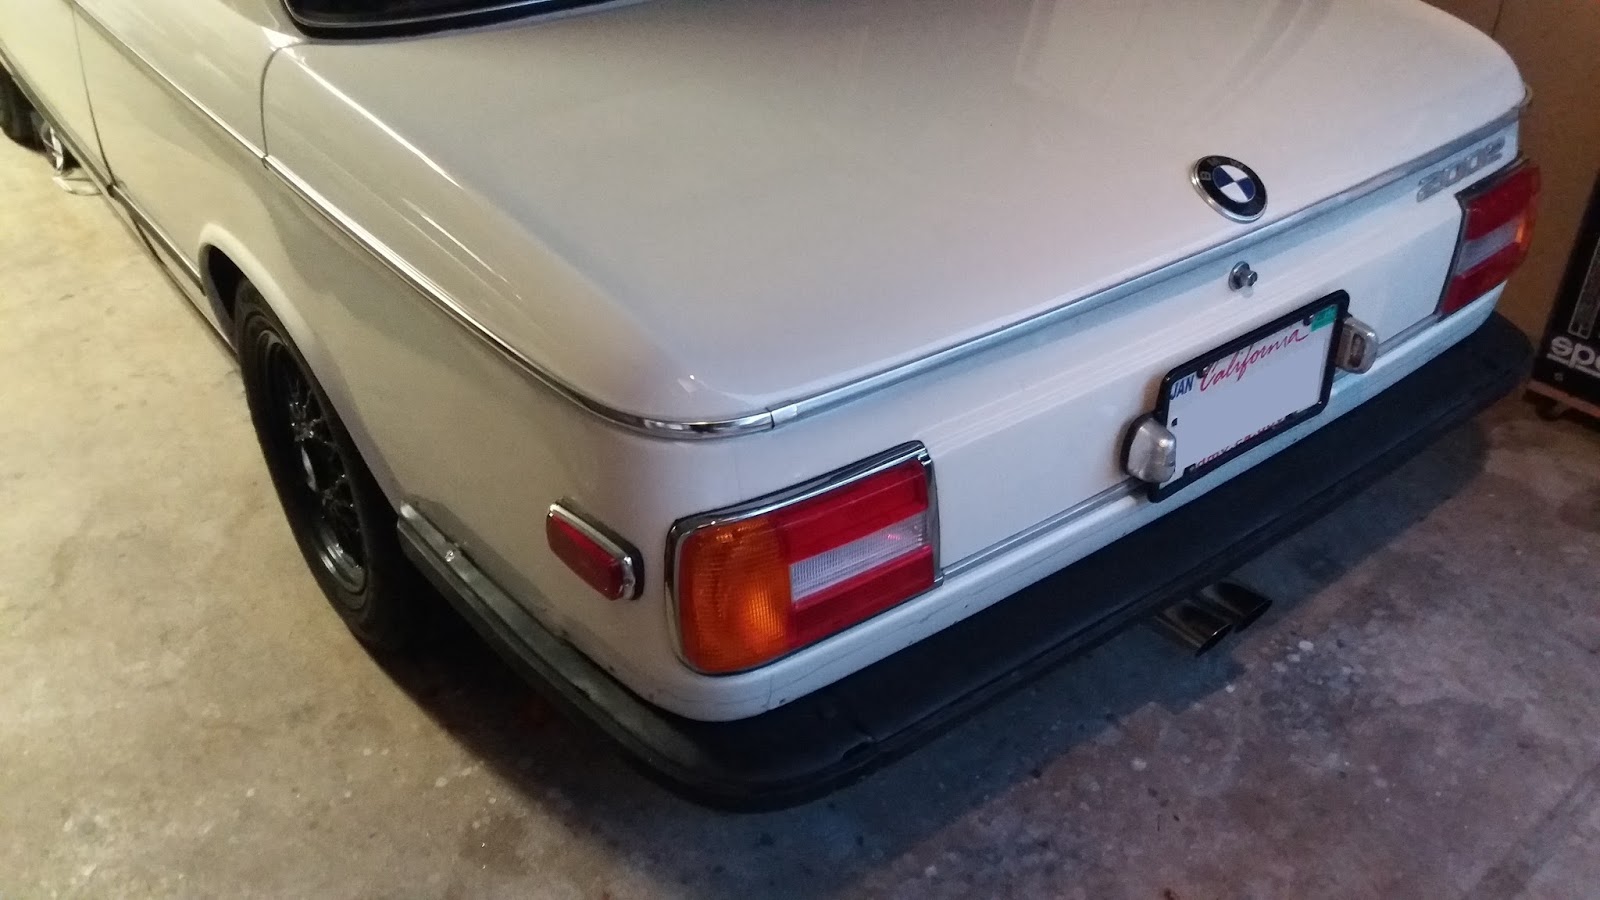
After massaging the rear '72 bumper (not really a euro, I know) into shape using body hammers I sanded, primed and painted the rear bumper pieces wrinkle black. It'll match the roof rack as well.


The second coat of paint dried like I wanted it to, in a fairly uniform wrinkle and I called it "good enough".
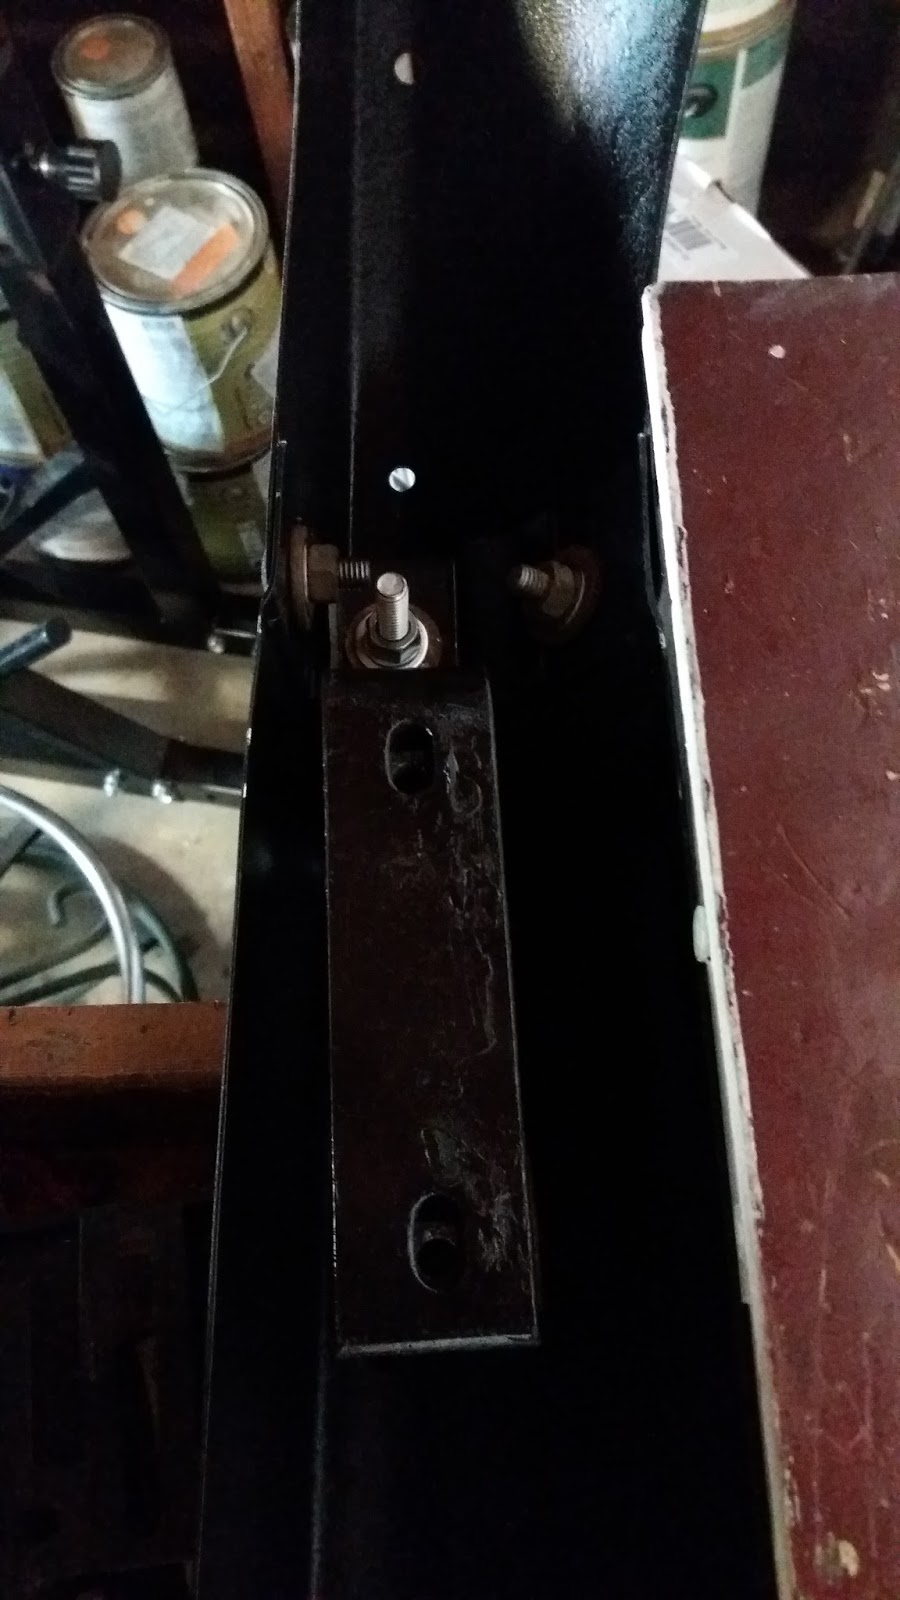
The rear holes for the early bumper are already in the bodywork but the inner holes to get a socket in are not there and must be added.
A punch dimpled the inner panel where the holes needed to be and also guided the drill bit.
|
|
|
Use a punch to mark the location you'll need to drill |

|
|
|
A Dremel or step bit can open up the holes for your socket. |

Bumper bolted back together easily and I painted the bolt heads to match. I'm not springing for bolt covers on this old thing. $10 worth of stainless hardware was all I needed to add.

The rubber rub strip went back on. The two tone black adds dimension and looks better than seeing empty bolt holes. (Pre-71 "Short leg" bumpers have no holes I believe)
Here's a little trick with a rubber inner tube I used to:
1. Hold the mounting bolts in place
2. Create a"gasket" between the bracket and body panel

The short brackets tuck the bumper under the body lip for a nice tight fit. Not much "bumper" protection but any wack in the rear would cave in a body panel anyhow.

Finally, two holes needed to be drilled in the outer quarter panel to mount the long bumper legs. I put rubber washers between it and the body.


Love the new look for $125 or so and a few days work!


2 Comments
Recommended Comments
Create an account or sign in to comment
You need to be a member in order to leave a comment
Create an account
Sign up for a new account in our community. It's easy!
Register a new accountSign in
Already have an account? Sign in here.
Sign In Now