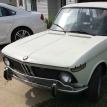
Nearing the end of the back end
Since the last update I’ve managed to complete the installation of the replacement trunk floor, the Jaymic spare tire well, a replacement tail panel, a new valence panel for that tail panel, delete the exhaust cutout in said valence panel, hang a trunk lid, replace the RR quarter panel bottom, and welded up the wheel opening on the RR corner.
The bulk of the repairs to this point have been pretty straight forward. The only thing that took some creativity was closing up the wheel opening. I’d casually puzzled over this for months now and finally just dove in on Fri night. The solution was remarkably simple. I used a piece of welding rod to form the arc of opening and welded the quarter panel to that. With the shape solidified I then cut slits in the inner wheel housing every half inch or so and folded those flaps out to meet the rod. Then it was a simple task of using a cut off wheel to remove the excess and weld it together. A little work with a flap wheel it’s a solid clean wheel opening ready to be hidden by a turbo flare.
I will form another length of welding rod to mimic this opening for the other side so that they match.
I’m looking forward to wrapping up the rear of this project in the coming weeks so that I can jump back into the front end. The nose will be coming off, major repairs to the nose that will go in its place, some firewall repairs, and some
major frame rail fab work by yours truly.
-
 1
1


3 Comments
Recommended Comments
Create an account or sign in to comment
You need to be a member in order to leave a comment
Create an account
Sign up for a new account in our community. It's easy!
Register a new accountSign in
Already have an account? Sign in here.
Sign In Now