Blogs
Our community blogs
-

- 215
entries - 580
comments - 108142
views
Recent Entries
 Latest Entry
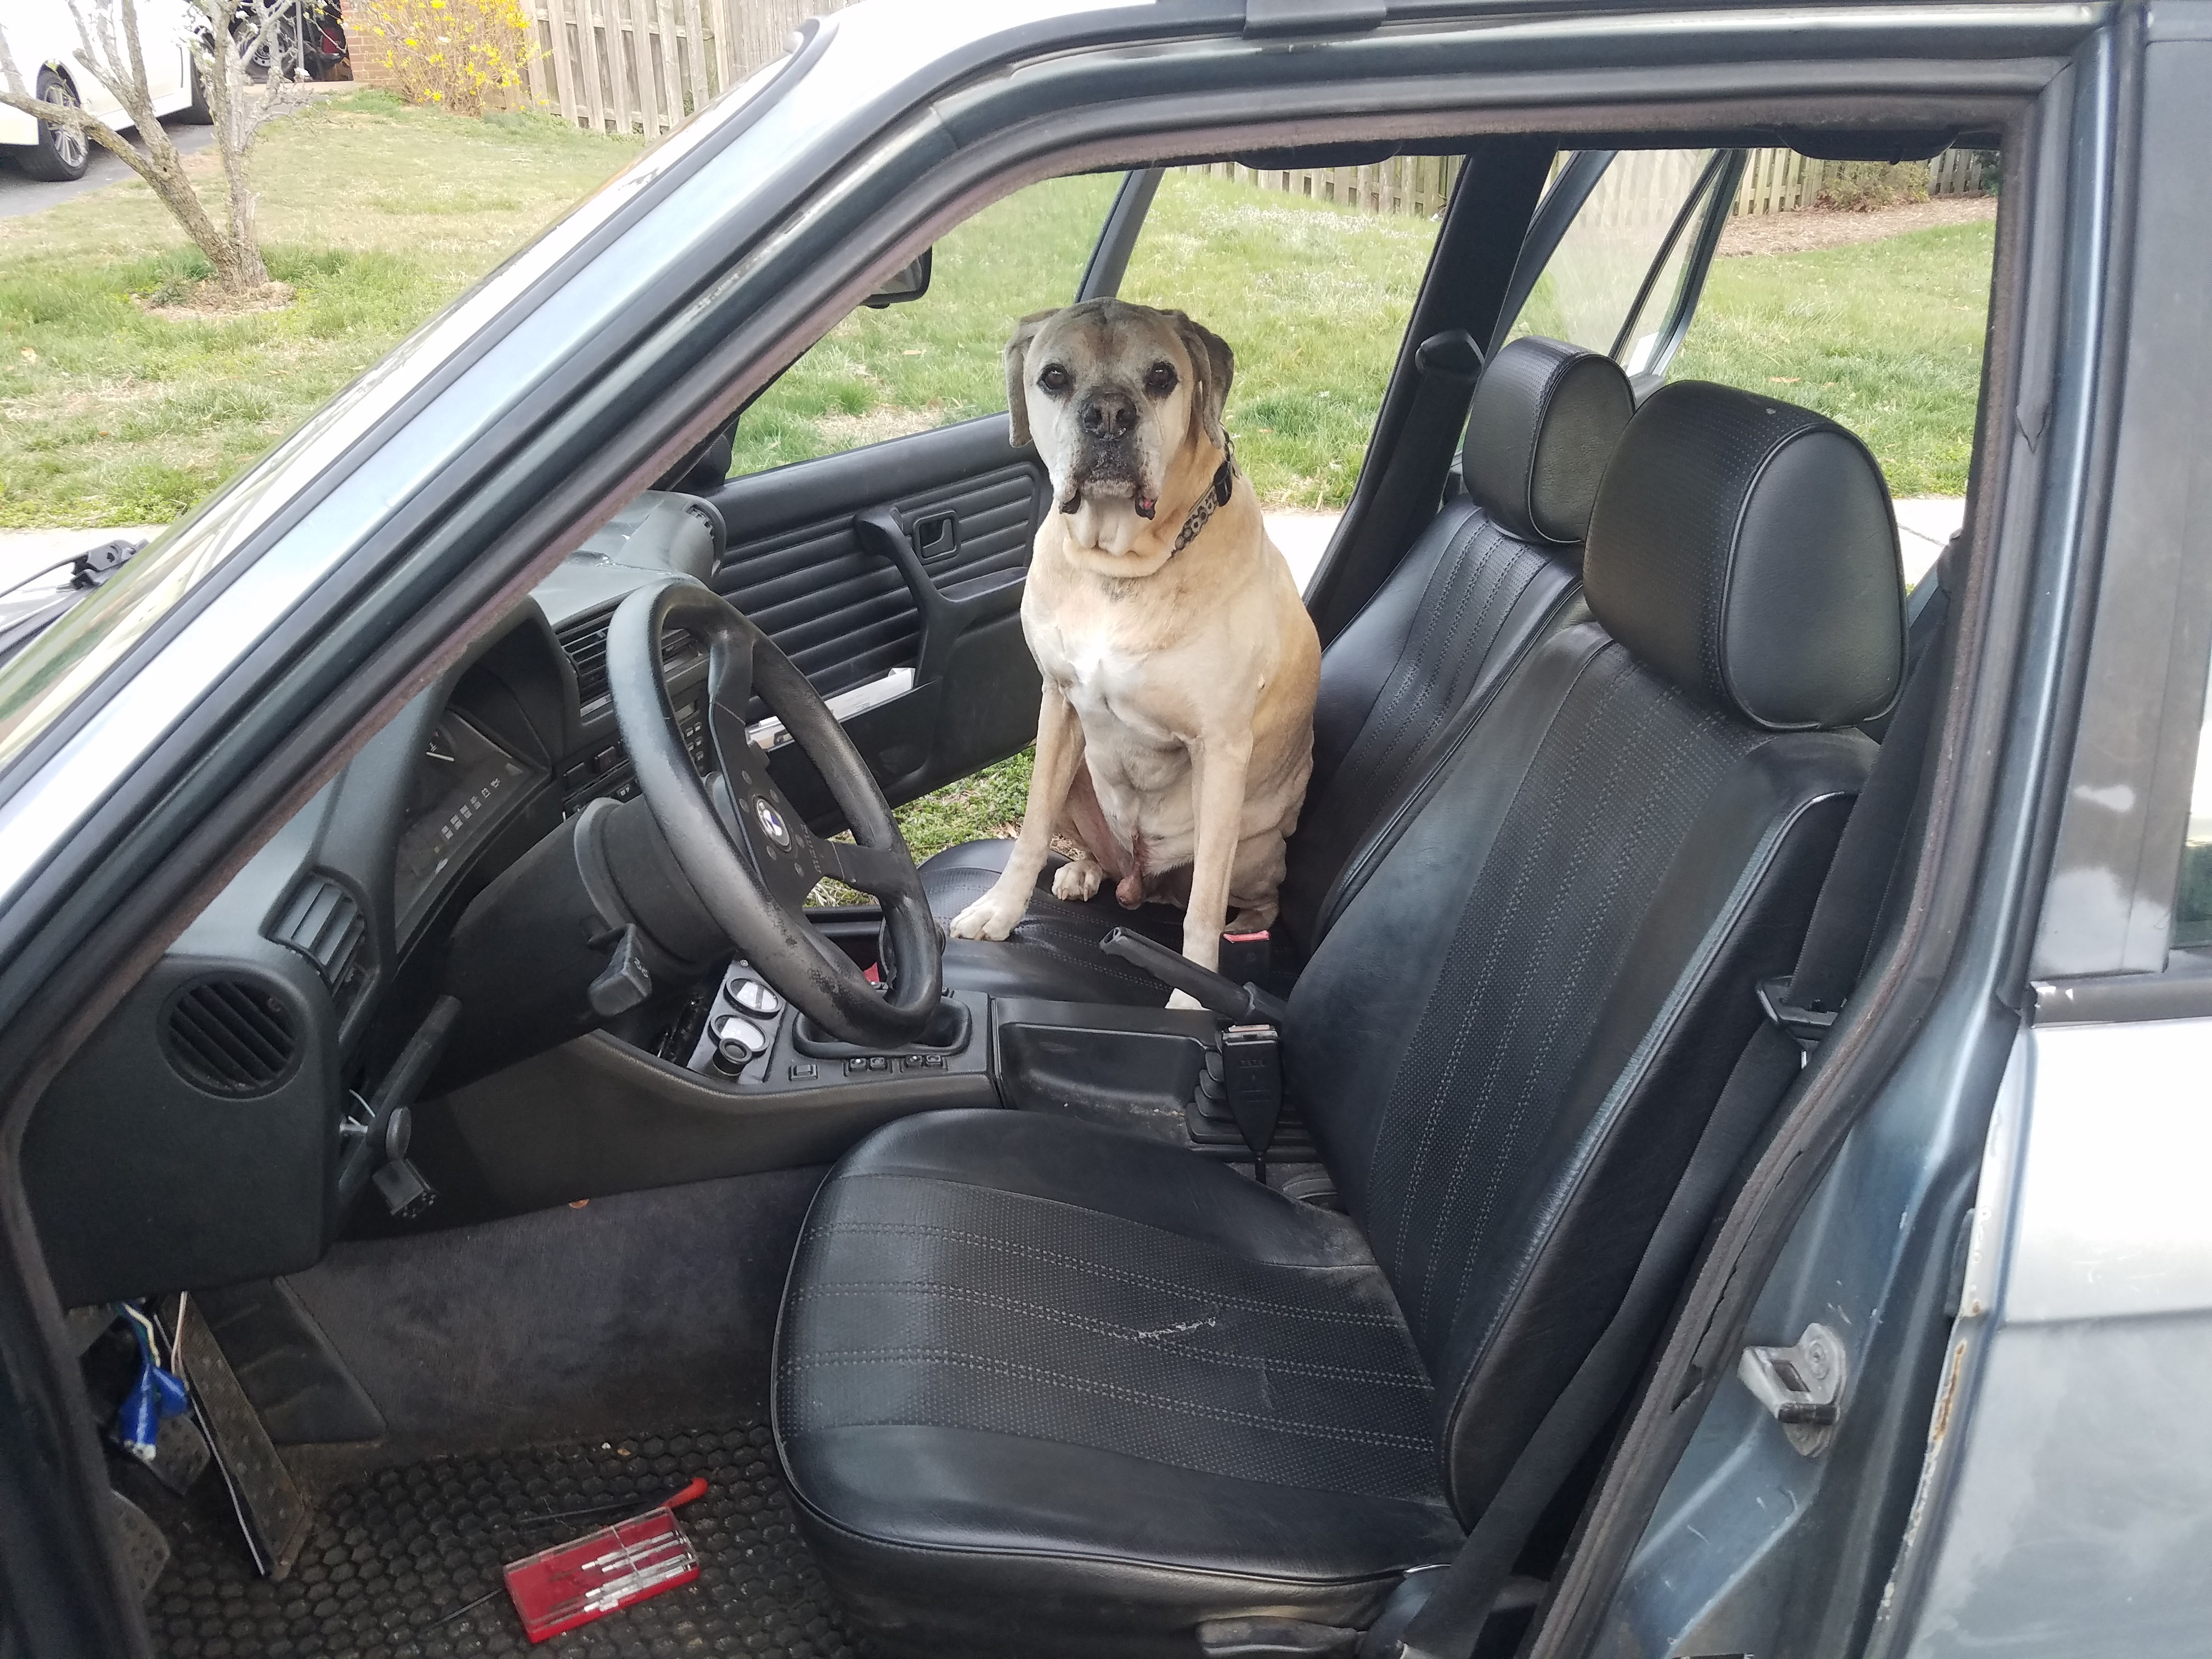
Meet (Bristol) Milo!
Happy 2002sday! Meet (Bristol) Milo! Rescued this little pup from the local SPCA.
No Recaros were harmed during this shoot ?? Be well, Be safe, and Be kind ? - 215
-

- 79
entries - 14
comments - 33520
views
Recent Entries
 Latest Entry
Do you like it? Then it is perfect.
Today someone in a BMW E28 group on Fa
cebook posted a pictures of some wheels he planned to install on his car and asked the inevitable question:"What do you all think?"
I looked at the post and knew, just knew, many purists were going to comment 'Dude, that is hideous', or 'I guess if you like to look like one of those guys' and the other myriad of comments that come from the question 'What do you think?'.
I wrote to him:
And I meant it. I recently purchased a 2000 M Roadster in silver. Very cool car, very fast and very cool - oh, I already said that, but it is that cool. It has very BMW looking aftermarket wheels and, what I knew would be controversial, BMW Original Equipment (OEM) rear wing. I was so excited about the car. My first BMW M car. I posted a picture of it on Facebook in some of my favorite groups from BMW groups to other car related pages. The response I got from many:
'Wow, very ricer looking.''What's with that wing, are you going to keep it?'
'Too bad about the wing.'
There were many other comments that purists in the Roadster community thought of the wing on my car. I went from excited to practically embarrassed to drive the car around. I immediately started shopping for a trunk lid without a wing to replace the certainly hideous appendage my car had grown. I shopped for a couple of weeks, some people had trunk lids to sell me, and overall I wasn't getting my Elephant Man car fixed for less than $300 to $400.
I then looked at the car and thought 'I like the wing.' Sure it is a bit gaudy but it just fits the car - I guess that's why BMW offered it as an option. I then thought 'Why am I going to spend money because others don't like it? I am the one driving the car.' In the end, I have decided to keep my grotesque looking M Roadster with the hideous rear wing and enjoy the car.The above scenario plays out all the time, In hairstyles, clothing, houses, stereos, TV's, what our kids do and don't do - pretty much in everything we do. In the car world we seem to be less charitable with our comments. Someone paints a car a strange color and many laugh at the owner. They lower the car
but 50% of the people don't like stanced cars. They raise the car (ortruck) and put big tires on it and 50% of the people don't like raised cars. They modify it outside, inside and under the hood and people ask why the car wasn't kept original. Some keep their cars perfectly original and many respond about how boring the car looks and why haven't they modified it?
Essentially, you aren't going to make everyone happy. In fact, probably most won't like what you do to your car because it isn't what they would do. I am 52 years old soon and maybe with age I have learned to not care what others think or maybe I have learned if I like something then why not do it?
The moral to this story is:
If you decide to modify (or not modify for those keeping a car original) and you post a picture online asking the opinions of others realize that many are not going to like your decision. That's their prerogative. But don't base what you decide to do on what others think. As I told my new friend today:
'Do you like them? Then they are perfect.'
That's the thing about cars. Really, no two cars are alike and not everyone is going to like your car. But isn't that half the reason cars are so cool?- Read more...
-
- 0 comments
- 79
-
- 17
entries - 22
comments - 23839
views
Recent Entries
 Latest Entry
It's alive!!
Long time no updates.
I eventually had the car shipped to Austin where Terry Sayther's got to work on it. Got it all up and running and I'm slowly, very slowly working on getting the rest finished up.
Finally got some hubcentric wheels put on last week (Corsa Velocita) and AC compressor and condenser in. Photos coming soon. Next up Restomod AC.
- 17
-
 Latest Entry
Cool upgrades - Electric Fan and Silicone Hoses
1 Peter 3:15but sanctify Christ as Lord in your hearts, always being ready to make a defense to everyone who asks you to give an account for the hope that is in you, yet with gentleness and reverence;
I had these items hanging around collecting dust for the past few years. I set aside some time to get them finally installed. Electric Fan and Silicone radiator hoses from Ireland Engineering. The fan is wired in with a relay attached to switched power from the horn relay. I wrapped the wires in Temflex tape to match the wiring harness.A few hoses needed to have 1/4" or so trimmed off of them to fit perfectly but the hose kit included nice hose clamps so everything went in very nice overall. I spent a little time flushing out the cooling system and the heater core, which is just good maintenance. I will do an additional flush of the cooling system after running it a few cycles and then it should be pretty solid.
In order to install the electric fan, other than the relay wiring, The stainless steel front panel from a dishwasher I replaced was used to make a bracket that bolts onto the radiator mounting bolts and the fan.
Overall it took me longer to install everything than I thought it would but it's also been 104 degrees and I've been stealing an hour here and there to get it done. I finally took a good part of a Saturday to finish up the wiring and harness wrapping.- Read more...
-
- 0 comments
-
- 9
entries - 11
comments - 26352
views
Recent Entries
 Latest Entry
Epilogue
As it has been well-demonstrated, I'm an idiot. The little tick-tick-tick sound was due to my forgetting to remove the band around the guibo.
Unfortunately, the low dull rumbling appears to be due to my not having smacked the transmission tunnel with the hammer in exactly the right spot. The slave cylinder is just touching the body. I'm not going to drop the box just so I can smack it; I'm hoping that I can either get a pry bar in there and lever the sheet metal over a little bit (of course I'll feel bloody stupid if I snap the slave cylinder) or reach the general area with a couple of 1/2" ratchet extensions and smack the end.
We had our first New England snowfall this morning, so it's unlikely I'll get much more driving in before the tii and its new 5-speed are put to bed for the winter.
In the "what sort of a budget did your budget 5-speed have" department, these were my actual costs:
--Getrag 245 transmission: $125 (Craigslist)
--Shortened driveshaft of unknown provenance: $75 (Craigslist)
--U-shaped bracket: $50 (ClassicDaily)
--Home-shortened shifter platform and linkage of unknown provenance: $30 (eBay)
--Braided clutch hose: $30
--Used 2002A speedometer cable: $20 (eBay)
--323i throwout bearing: $40 (eBay)
--320i clutch arm, retaining spring, and pivot pin: $15
--228mm Satchs clutch kit: $213
--Clutch master cylinder: $65
--Clutch slave cylinder: $26
--Transmission selector shaft seal: $8
--320i rubber transmission mount: $0 (had a used one lying around)
As per last installment, the big take-away from the first test drive is that there's nothing obviously wrong with the bargain-basement trani and driveshaft. That's a big relief.
But even with the dirt-cheap gearbox, driveshaft, and shortened shifter, the list totals nearly $700. So much for a "budget installation," huh? The elective prophylactic purchases were the clutch (the one that was in it really was fine) and the clutch master cylinder. Subtract those and it's about $420, which starts to sound reasonable.
But I'm comfortable with that amount of mission creep. I sleep a little better at night knowing that the components inside the bell housing (clutch, t/o bearing, lever, pin) are all new, and thus the odds of needing to drop the box are slim. Plus, when the original four-speed was in, I was having difficulty shifting out of neutral and into gear once it was warmed up. I had replaced the slave and bled it thoroughly, but it made no difference, so I was looking at possibly needing to do the master cylinder even if I didn't install teh 5-speed. I suppose, if I wanted to know for certain what the cause was, I would've replaced the trani and slave first, then the clutch, then the master (yeah, right...) but the important thing is that the problem is now completely gone.
The home-shortened shifter of unknown provenance works fine, but there's no mistaking it for a professionally-built, tight, short shifter. Which is to say, it feels about like every 2002 shifter I've ever had. I can live with that. And if I want to pony up the $110 for something better at a later date, that's easy. The transmission doesn't have to come out for that.
It would've been very easy to have the mission creep include the exhaust. The one on there is old but serviceable. The muffler wouldn't separate from the resonator, so I had to leave the assembly in there during removal and installation. But every time I smacked my forehead on it, I wanted to find a rust hole so I could have an excuse to Sawzall the damned thing out.
I guess my parting words of wisdom are this: Just be reasonable. It's fine to try and hold costs down, but as you confront the problems you run into along the way, think about the tradeoff between saving money and how you'll feel if you have to do it again because you got it wrong.
--Rob
- Read more...
-
- 0 comments
- 9
-
In the past few months, I removed a lot of things, got under the ca whole lot and learned quite a few things about how things were done in old days.
It is not a show car by any means, but I love it.
Here are some of the things I did, I am not going to go into details as this website has much more detailed accounts of almost everything that can be done to this car.
Just a few things that I wish I knew before I started the project:
- The rear windows are a bitch to put back, it makes it a breeze if you have another pair of hands. In my case, I had to use a bunch of shims, extra long sheet metal screws, I will discuss the reason in a minute.
- Patch work of sheetmetal might not be perfect, but it, I feel is definitely a worthwhile investment and makes the car better. If you can not afford to replace the floor pan, just do as much as you can, the car will still love you and thank you.
- The window sill weather strips are really old school design, even by 1975 standards, but you can definitely do a DIY hack using self adhesive backed 1/2" felt strip, $ 2.74 per door, and I think it makes the window operation smoother.
- The 3M chrome adhesive trim is a better alternative to the original belt-line trim as it takes care of the water logging issue behind the original trim.
- The lower trim ican be replaced with a stick on trim from a 2007 Altima and matches the width pretty nicely. Its not perfect match but I wanted to lower the number of moving parts, especially the non critical ones.
- I did a DIY carpet job, 20 dollar outdoor black carpet and two rolls of universal carpet. Again the idea was to make the car better as I can not afford to make it perfect.
- Most important aspect, I kept the car in a driven condition or near derivable condition, so the project never got out of hand...
I am trying to figure out a way to post images here...
- The rear windows are a bitch to put back, it makes it a breeze if you have another pair of hands. In my case, I had to use a bunch of shims, extra long sheet metal screws, I will discuss the reason in a minute.
-
- 24
entries - 42
comments - 28050
views
Recent Entries
 Latest Entry
Pulling away
Enjoy the sound and see the acceleration of the rebuilt Alpina motor
- 24
-
- 4
entries - 3
comments - 6034
views
Recent Entries
 Latest Entry
front end custom
This is the basis of the new front end with custom crossmember dropped low to allow engine to sit low enough (dry sumppped only) with 265 getrag box to not need tunnel modification.A cross brace will be added to link the adjustable caster rod ends with the inboard pick up point of the front control arms.
- 4
-
- 31
entries - 53
comments - 27263
views
Recent Entries
 Latest Entry
Foggy
Let's light up some moisture.
So, I got some Marchal fog lights from : Schickentanz, thanks again.
When mounting them, I wanted to avoid drilling holes, anywhere. I've seen that a lot of people will mount them to the hood hinge brackets, but that means the lights are close to the center (near the kidney grill). I wanted the lights to be pushed out (near headlights), I also wanted the brackets to be semi-hidden.
So, I decided to use the bumper-mount bolt holes to support the bracket… I doubt I’m the first to do this, but I hadn’t previously read about it.
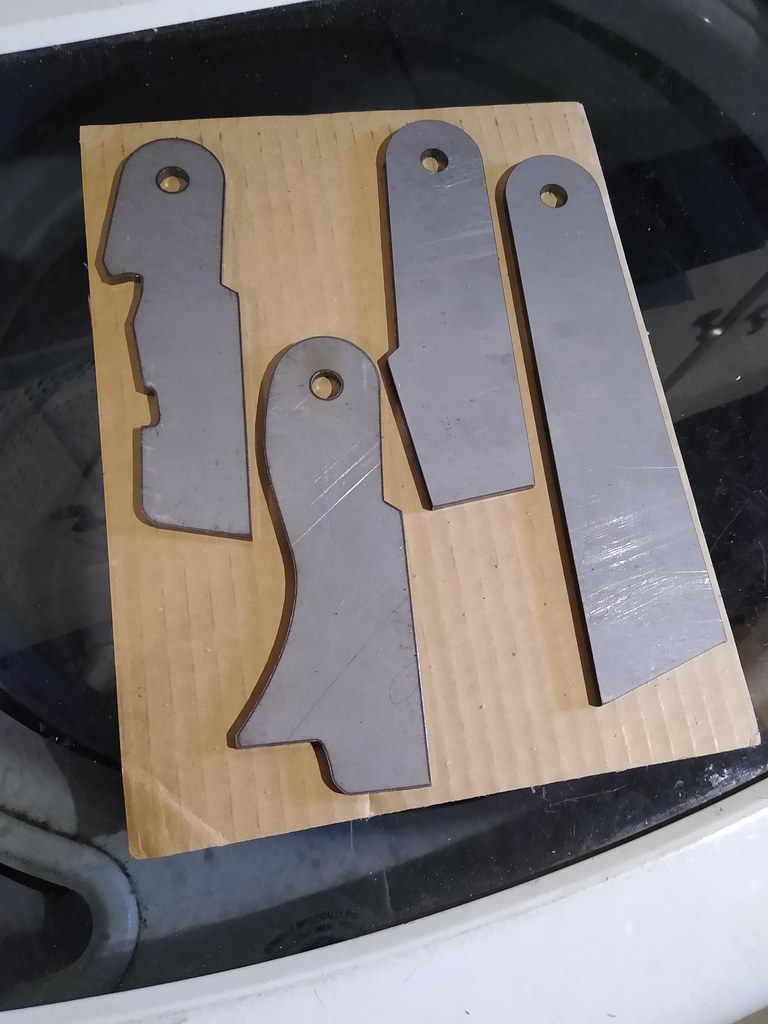
I started by making a (mock up) bracket with a left over 3/8” MDF sheet. I would cut out the pieces with a jigsaw and glue them using wood glue. I found this step to be super helpful with the overall design, it’s much easier to cut and glue MDF, then cut and weld Metal. Unfortunately, I didn’t take any photos of it and I threw it out already.
In addition to the above, I added a trapezoid shaped piece at a 90’ from the vertical part of the bracket, this piece also has a triangle shaped support, welded below it to reinforce the 90’ from flexing.
The trapezoid piece will stick-out of the grill, through the 2nd opening from the bottom of the grill.
I had to make the bracket in 2 pieces, if not I would need to cut the grill. So, I drilled the trapezoid piece, to install a bolt near the end (the portion which sticks out of the grill).
For the 2nd portion of the bracket, where the actual light will be mounted/bolted. I wanted the bracket to be angled towards the car, to keep the lights as close to the body as possible.
I used 4 pieces.- I drilled 3 holes to adjust the mounting height of the lights, but then I ended up joining the 2 lowest holes so that I could slide the light up and down for more adjustability.
I painted the 2 pieces black and added a grommet to pass the wire. I test mounted them again (below).
Here’s the final product, installed with the grill on.
POWER. The first time I flipped the switch, the fuse blew and I'd be lying, if i didn't say I tried it a 2nd time with a new fuse. So, I ended up having to take apart my center console. It turns out I mislabelled 2 wires, the ground and the load (wire which feeds the lights). So flicking the switch would join the negative to the positive :s. Wasn't cool. I thought I was all finished and then I had to find an issue. luckily it wasn't a huge thing and I was able to sort it out within 30-45mins... without damaging my delicate custom console.
Lights on!
Out for a drive to mom and dad's
I'm really happy with the way the brackets turned out, I'm even thinking about fabricating some to sell.I think, I prefer my 02 with the fog lights. What do you guys think about?
Thanks for reading,
Anthony
Next project: Custom fibreglass duckbill. - 31
-
- 4
entries - 3
comments - 2915
views
Recent Entries
 Latest Entry
It Fired, not Fried!
So, enough time had passed. The new garage didn't have anything urgent to do, house siding was done, no circle track racing to help with, and nothing else had broken, so it was time to fire up this lump that I've been hanging cords on for the last year.
Ran some fuel lines for return from the pressure regulator, and one for pickup.
Tried using my old tii fuel pump. Stuffed the hoses in a jerry can, cycled the power a couple times until the pump changed noise (loaded up), went to get my fire extinguisher , turned around and there was a puddle of fuel on the ground. Not much, maybe a foot across, but damn, I wanted to fire this up. Upon closer inspection, it was coming from behind the wiring plugs. Not today.
A quick trip to rock auto (ask me later how much it hurts going to local parts stores for generic parts) and a 3 bar 044 type pump was on its way. Time to wait.
Once it arrive, hooked it up, and no fuel made it to the floor. Checked some settings I did quite a few months before, entered the license key into TunerStudio (I bought the copy so I could use the auto tunes), and finally hit the starter button. Lots of cranking, and could tell it was trying to fire but never really did.
On a whim, since I wasn't sure I had tuned it right, I put my thumb over the Idle Control Valve inlet. It was sucking lots of air while cranking. A few more pops from the exhaust.
These were the original injectors from the 318 (15 lbs I found out later) and hadn't been used in who knows how long.
A few more pops, and it took off. I had to play with covering the ICV to keep it running. I ended up swapping it out for a different style (I may still revert), which required some more playing to get it to close (which it really doesn't ever seem to seal completely). I was, at that time, still running the original B&G 2.9 firmware, so the options for testing the ICV were a bit primitive, but it ran, and I ran through warmup enrichment auto tune a couple of times, which showed a small leak in the rad, which I expected from some seeping that showed it self earlier.
I had kind of decided that I am going to use a set of Motorcycle throttle bodies, and the MSExtra code has provisions for ITBs, so I decided to upgrade the firmware now. TunerStudio connected to MSExtra has better testing for ICVs. Most of the the other benefits require rewring/mods to the MS unit, but I don't think I'll need them for this little M10 (sequential fuel injectors, coil on plug, etc).
I re-set up everything (which worked better than expected). Tuner Studio had done a major upgrade(2.x to 3.0), and 'moved everything', and the interface changed when you switch from the B&G code to the MSExtra. A couple of runs through the Warm up Enrichment, some VE tuning, and it's not too bad now. I had the VE tables way to low, so the auto tune couldn't do its thing (Air/Fuel very lean), initially, so I bumped them up and it got it close enough it could do its magic.
I'll try to get a video of it running soon.
I've got a set of 2000 GSXR 750 itbs ordered from Ebay, so I'll have to build a manifold. Since the GSXR has 80mm cylinder spacing, and the M10 has 100mm, some creativity will have to occur. I'm not sure if I'm going to split them (they are 2 sets of 2 itbs), which would require fabricating a fuel rail, or just leave them and offset # 1 & 4 30mm with 2 &3 10mm.... Half the runners longer than the other is like a dual plane manifold right?
Lots of options.
It may be time to look for a slightly larger cam, so I can work with the flexibility that the megasquirt provides.
Did I mention I may skip putting this in my tii while I rebuild that, and just build a Locost using this motor, so have something more fun to drive than a TDI while I redo the tii? Who knows what will happen....
If you've made it this far, congrats, this is a rambling mess
Thanks for listening.
p.s. the look of the setup didn't change much, so no new pictures are required
- Read more...
-
- 0 comments
- 4
-
- 24
entries - 52
comments - 14488
views
Recent Entries
 Latest Entry
More room in the Shop
A car is a lot more compact when it is all put together. Parts take up a lot of space. This is the expensive part. I’m trying my best to limit that but sometimes you don’t have a choice. Other times, you do and still decide financial burden. I mean, reuse all the old (perfectly fine) crappy components on a freshly painted car? I can’t bring myself to do it. However, I can reel myself time to time in the name of expediency and frugality(a real word?).
I have been quite busy since the last update. The big effort being a whole new brake system front to rear, fuel plumbing, re-plating hardware, pedal box assembly, and finding parts seven(!) years after I took them off the car. I can and have been doing a few things in parallel and make some modest progress but it’s hard to complete one task completely. The problem is, most of these tasks are serial. I can’t bend the new lines without the master cylinder in. I cant put the master cylinder in until I get my powder coated parts back, can’t assembly those until I re-plate the hardware and on and on. But what I can do is work on something else! So this game of round robin continues until I save enough to get the parts I need to do the thing that lets me do the other things.
Brakes: I bought stainless lines from the Thestopshop.com. Their prices were reasonable and they shipped them quickly. I also bought stainless fuel line from them as well. The brake fittings I got from amazon, https://www.amazon.com/gp/product/B097VZNGNS/ref=ppx_yo_dt_b_search_asin_title?ie=UTF8&th=1
I got this line bender
Amazon.com
WWW.AMAZON.COMand this flaring tool
Amazon.com
WWW.AMAZON.COMAmazon.com
WWW.AMAZON.COMThen I 3D printed some mold parts.
All in all they turned out quite well. I can make more so if you need a set, $25 shipped but it will take a few days to get them all molded.
I bought new flex brake hose from ebay that claimed to be NOS brake hose, it was cheap and looks the part.
With the brake lines bent up and all in place I turned to the fuel lines. I decided to run the line under the driver side which is where I think the return for the Tii originally went. It turned up at the pedal box and used flex hose to the filter king mounted above it. I bought a cheap fuel pump from RockAuto and mounted it in front of the fuel tank under the car. To do this I bent up a little bracket and welded on a nut that the pump “P” bracket can screw to. It came out ok.
Please ignore the cobb webs.
I had a E21 clutch master cylinder from a while back that I thought was a direct replacement for the 2002. Turns out it’s not. With a 2002 clutch master cylinder costing about $180 I figured I’ll try to make the cheap $40 E21 one work.
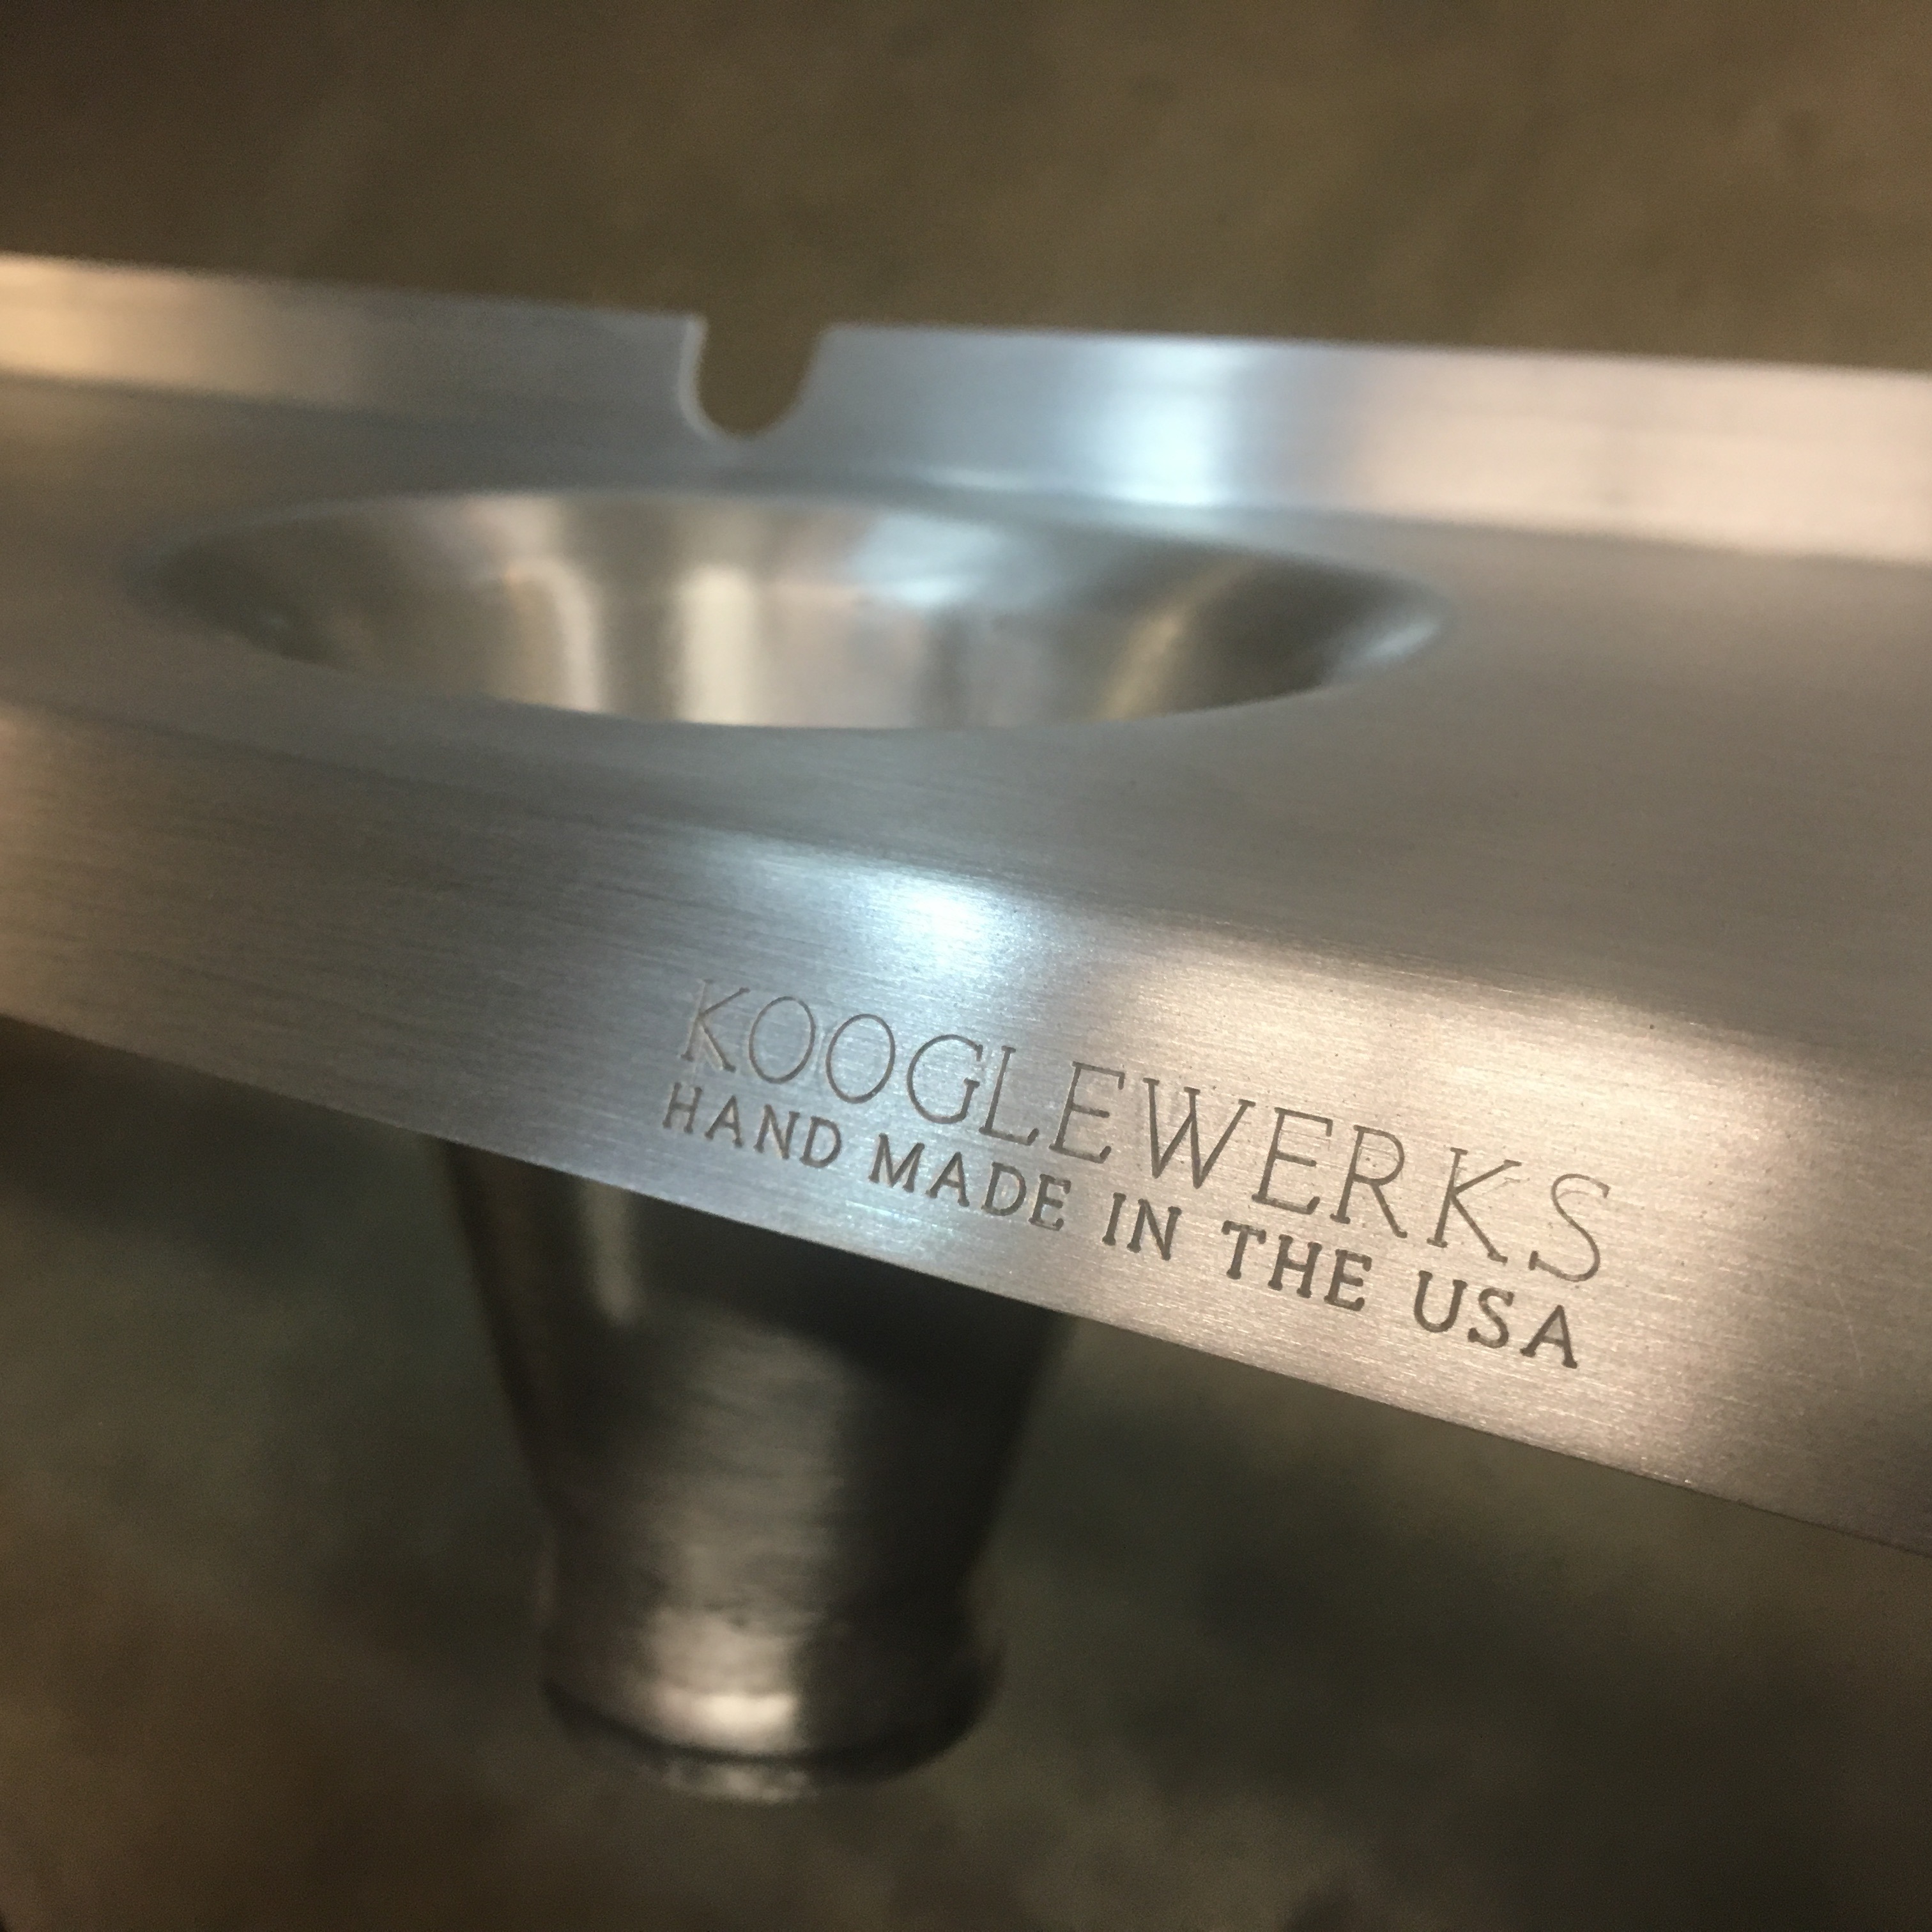
I turned down a cylinder out of 6061 on the lathe and had some 3/8” 6061 flanges cut from SendCutSend. This took two iterations as initially I used a 1/8" flange and planned to use a nut behind it but didn't have enough room. So I had to bump up flange thickness and thread it. I made an offset fixture for the lathe to turn down the center of the flange while leaving bosses on the ends. I think it came out pretty well.
I tapped the flanges for M8 x 1.25 Heli-Coils then welded it all up. The weldment fit up quite nicely and while technically didn’t save me much money, I do have material to make 5 more assemblies. So, let me know if you want one!
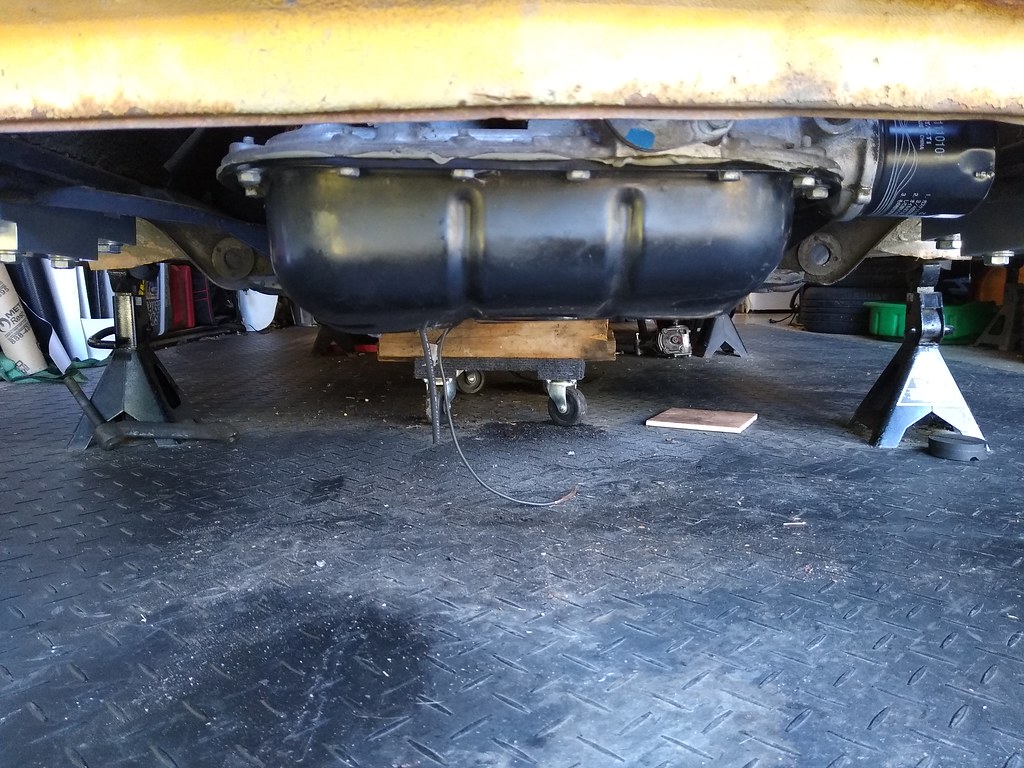
So, brakes done, clutch done, fuel done. Next big hurdle is get the engine in. With the help of a few friends we got the engine off the stand, mounted to the subframe, fit up the trans, and slid the whole assembly under the nose of the car.
We incrementally lowered the car until it was time to raise the subframe. It took about 2 hours to get the engine set.
Engine in! Now wiring. This is a big task.
First, I molded firewall grommets using the ID from this thread for the wiring harnesses. On the passenger side, I made some plugs for the air conditioning holes.
I started unwrapping all of the electrical tape and replacing it with Tessa Tape. I got a pack of it from amazon and it is much nicer to work with. I also bought new electrical contacts and a crimp tool. It took me a little while to track down these parts so here’s the list of what I found works well for replacing contacts.
These are the parts from Digi-key:
1 A100614CT-ND
42098-2CONN QC TAB 14-18AWG 0.25 CRIMP $0.17 ea. 2 A1420-ND
60620-1CONN PIN 14-20AWG CRIMP TIN $.0.25 ea. 3 A1421-ND
60619-1CONN SOCKET 14-20AWG CRIMP TIN $0.23 ea. 4 A27925CT-ND
60701-1CONN QC TAB 10-14AWG 0.25 CRIMP $0.27 .ea 5 A36375-ND
42238-2CONN QC RCPT 14-18AWG 0.25 $0.22 ea. 5 180384-2-ND
180384-2CONN QC RCPT 10-12AWG 0.25 $0.33 ea. I also got these heat shrink connectors from amazon for the connections that are not in a housing.
Qibaok 320 PCS Heat Shrink Spade Connectors
Amazon.com
WWW.AMAZON.COMTo properly crimp all of these onto the wires I got this crimper set. It works quite well especially for the price point.
HKS Ratcheting Crimping Tool Set 9 PCS
Amazon.com
WWW.AMAZON.COMI bought extra wire to splice in where needed and run new wires. I also got battery cable. I got it all from tinnemarinewire.com. Their prices were much more reasonable than the majority of other vendors I found. And they shipped very quickly.
I blasted parts at home then had a generous coworker who got them looking nice all powder coated. I also prototyped the gauge pod. I will probably do one more (or two) iteration to better marry the dash bump for the the gauge cluster.
- 24
-
- 5
entries - 17
comments - 5996
views
Recent Entries
 Latest Entry
Project Two Dot Oh. SWEET16 gets a heart transplant.
Okay, so I'm back!
I bought an engine and transmission from @williamggruff last year with the intent of swapping it before Vintage 2016, but that did not happen. I'm going to take a stab at it before Vintage this year. I'm tired of working hard to keep up with the pack. I'll store my current stock 1600 for future resale (Like that's ever going to happen!)
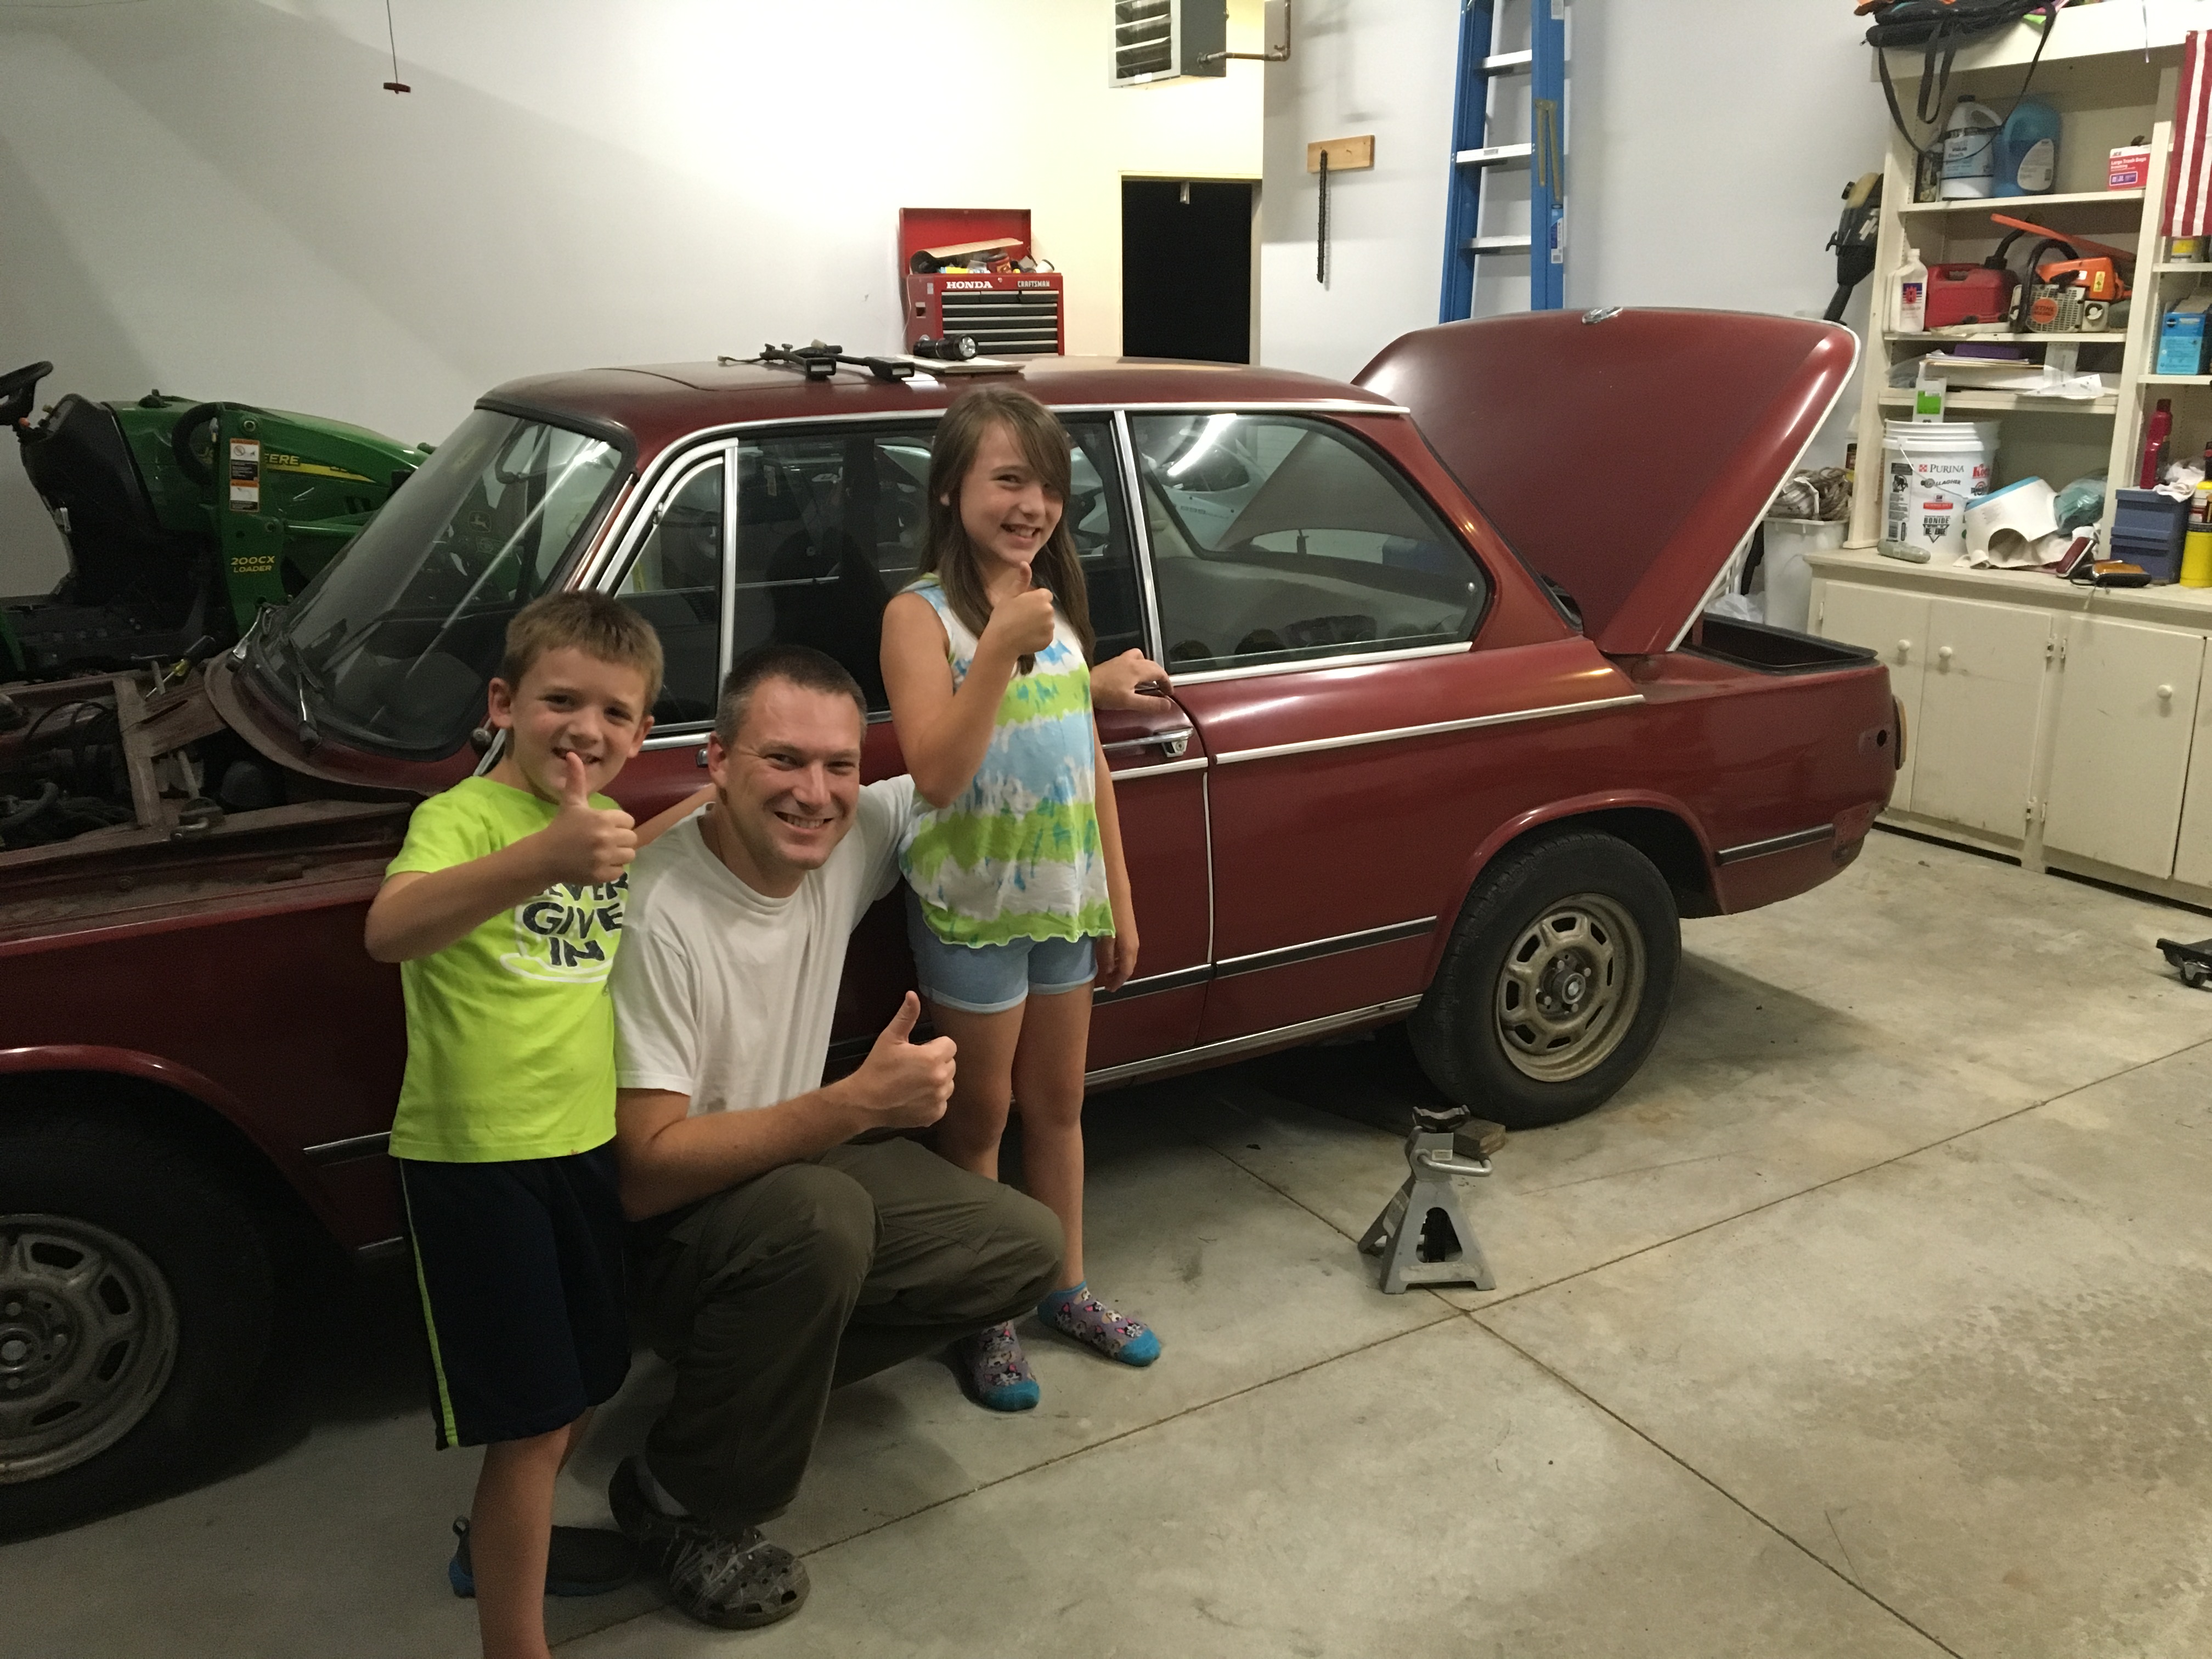
I started this tear down with my daughters with the intent of them helping me through it. They did, for the most part, help me with part of the engine tear down. I've "ditched" them for now in the interest of time! They were only 5 and 7(at the time), so I have plenty more engine builds in their future.
Vid Link: https://goo.gl/photos/zNaBnQtCfiYfUseSA
Here's where it sits now:
Not much to taking them down. I just used zip locks and and a sharpie to keep things organized.
I started here:
Don't mind the hammer. I didn't use it....
Okay, I'm lying! But, I didn't break anything. SERIOUSLY.
I will say this clutch has me scared. Any thoughts? Wondering if I can continue using it:
Here is a better view:
She's pretty nasty.... Although I do like them nasty. No...Wait... That's different! Anyway, more shots:
Front end tear down:
Oil Pump Removal. I used one of those Craftsman MAX ACCESS Socket sets. https://www.craftsman.com/products/craftsman-19pc-universal-max-axess-socket-and-ratchet-set-3-8-8221-drive?taxon_id=1845 They do a good job of getting on the nut. I didn't want to use the open end of my box wrench and my standard sockets interfered with the oil tube.
My 2.0 has SWAG!!!!! Okay, I'll stop with the corny puns...
^Timing chain guides.
I was kind of disappointment that I didn't get to use my cheaply made 1/8" stamp set I snagged off of Amazon. The did a good job of marking everything for me.
Do they come from the factory like this or is it a rebuild?
Lastly, here are the pistons. Lots of carbon build up.
This was an FI engine from a 320I (In think 1982), but I will be going with a Weber 2 bbl I got from @ldsbeaker when it's done.
If anybody has any questions or need more pictures, let me know!
Box of stuff left over...
- 5
-
- 9
entries - 56
comments - 7010
views
Recent Entries
 Latest Entry
Life lately
Back in the garage
Making up rough mounts
Everything works and clears, all bolts can be pulled out. I can definitely make this better down the road, but I'm super happy for now.
The engine sits very low and should help keep the handling flat.
It's also as far back to the firewall as I can logically go, and leaves some nice distance in front of the engine for the radiator and fan setup without changing the nose at all. (Besides pulling the snorkel.) This is also an AE86 swap radiator, that works beautifully in the BMW chassis. Since the engine is so low, there's plenty of room for the ITB's with 100mm trumpets and the Pipercross filter. The junction block is from an e36.
If you need a good open barrel crimper I can HIGHLY recommend the Hero.
Shifter lines up perfectly with the JSP AE86 relocation kit and makes the shifter feel like a rifle bolt. The tunnel plate was extremely hard to weld in for me, and even after some help it's not perfect yet.
Honestly, no car has EVER fit this well on me. Every single thing I need to touch is right where I want it.
Settled with all the weight on the suspension finally.
This worried me quite a bit...
But, as luck would have it, JSP developed this absolute work of art and I just couldn't resist.
It's been such a long hard trip to this point. - 9
-
 Latest Entry
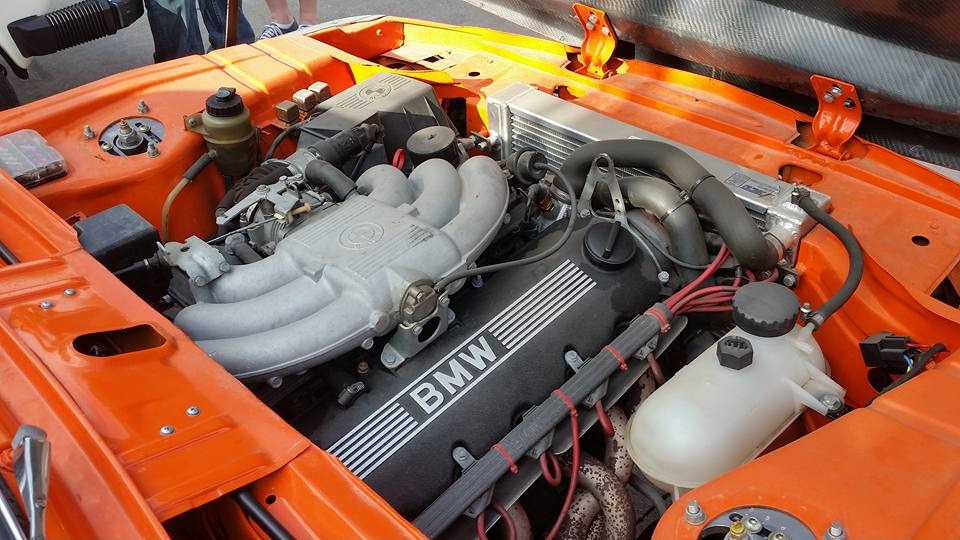
2002 turned track/DE car with m20 swap
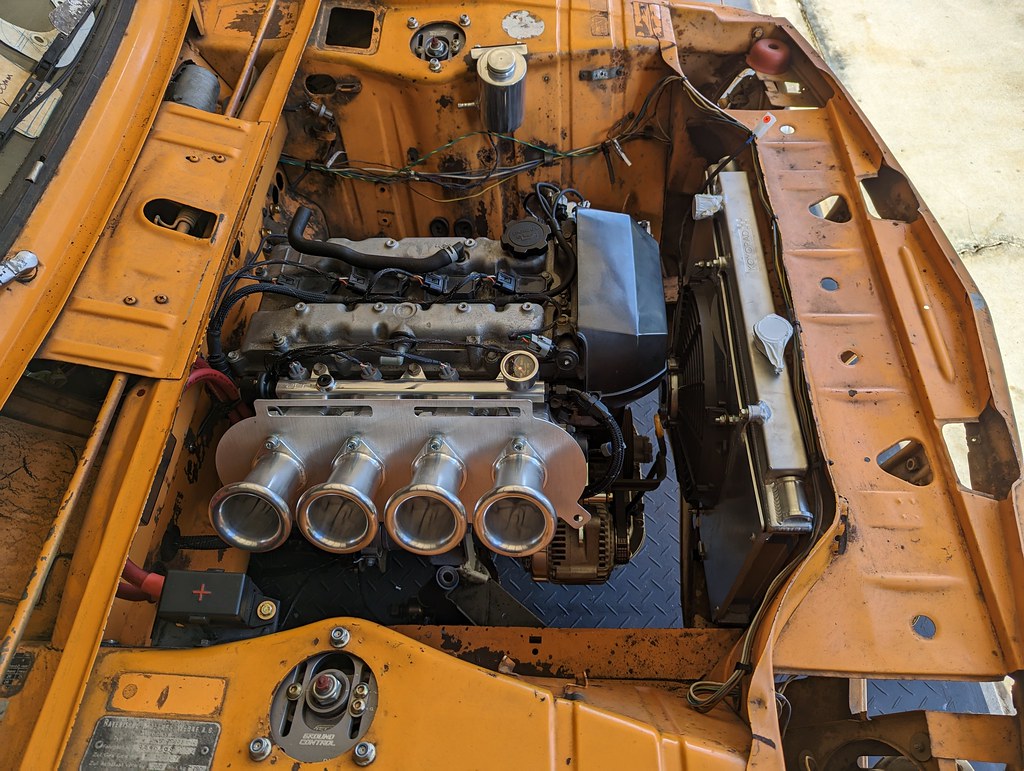
I have owned over 20 2002's in my life and have owned this 69 for over 10 years. I purchased it from my dad in 2004. I drove it as my daily and then started doing driver schools in it with a fresh, cam'ed Tii motor making 150 hp.
So..one year ago I sold that Tii motor and decided to go for an m20 swap.
Why sell a nice Tii motor? I was bitten by the track bug and was becoming more and more frustrated with the low power of my little M10. The m10 was a great motor but to get more HP I would need to do some serious work and I just was not that into do another M10 build.
Why m20? A friend had an s52 swap done on his e30 and gave me his m20 with 100k on the clock. Sounds like a good start right? His swap was done at Motorsoprt Services in Deland FL. The owner, Rick has been a long time friend and said he could help me with most of the work on my swap.
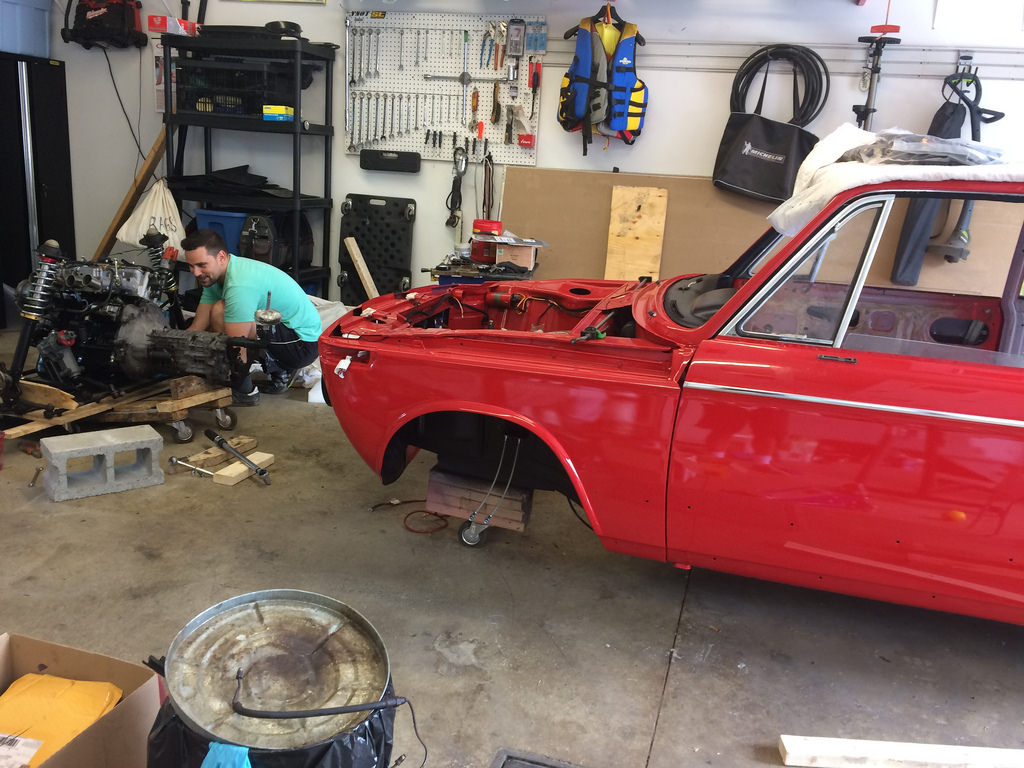
This situation is getting better for me right? Well...as took the car apart I found rust, shocker, right?
After lots of rust repair the car got to Motorsports Services for fabrication to the body and engine fitment .
Seeing the M20 apart, Rick discovered it had a cracked head. I sourced a head with 20k on it and did a full rebuild and new cam.
So far, here is my list of things done. (So far)
-Nose cut and strengthend
-Rebuilt head
-engine bay painted
-everything under the was blasted and painted
-Turner chip
-motor mounts from only02.com
-284 cam
-cold air intake
-VW mk2 Jetta radiator and 10 inch fan
-e30 coolant bottle
-larger oil cooler
-Enlarged tunnel with E36 transmission and custom shifter and trans mount
-Single mass flywheel
-Sachs race clutch
-stock e30 driveshaft
-e21 LSD
-blasted and painted pedal Box and all new hardware from IE
-custom dash cluster with VDO gauges
This 2002 already had Tii struts and brakes along with a tii booster. It also has Billy's and Coilovers, big sway bar up front and adjustable in rear, stress bars front and rear,battery in the back, race seats, harnesses and a roll bar, Zender flares and Epsilon wheels before the swap.
. Sorry, the pics are out of order. I will update pics when we get further along with the process.
-
-
- 8
entries - 15
comments - 8550
views
Recent Entries
 Latest Entry
EFIing an M10
So this issue of EFIing an old M10 motor comes up repeatedly from time to time and so I thought I could bring my thoughts about this together. I don’t know if there’s already a blog entry or write-up, so… sorry if repeating. Please feel free to add all your info, opinions and experience to make this a helpful content for later readers!
Talking about the reasons for EFI doesn’t make sense here I think. Let the pros-and-cons discussion take place somewhere else.
Fuel supply
(This does not affect tiis with an intact system)
Pump:
What kind of injection ever shall be installed, in any case you will need fuel supply. A 12 Volt electric fuel pump that provides a pressure of 2-3 bar (31-43.5psi) has to go into the car. I guess a lot of pumps will do this since various systems work with pressures in this range. You should find a good 2nd hand pump somewhere, so buying new isn’t the only option. Check for correct voltage, pressure, junction diameters and where to get connectors. Tii pumps have a delivery rate of 120ltr/hr and 1,5-2 bar pressure as the German manual says. These ones have an intake filter.
There are in-tank-pumps also. Use the search function for info about this, I haven’t seen the perfect solution yet. Be aware of the different heights the 2002 tanks have when looking for an in-tank. I prefer an out-of-tank pump because of better access and less fuel mess if to address.
Here are sending units. Left: roundies 46ltr.. 200mm. Middle: squaries 50ltr., 225mm. Right: tourings 51ltr/turbos 70ltr., 290mm.
The other ones are all mounted on the underside of the car as far as I have seen. You may install a tii or other fuel pump at the same spot where tiis have them from factory. Don’t choose an in-trunk-mounting. Some versions of foreign brands will require custom installation by fabricating brackets or clamps. Care for elastic elements to the body for noise reduction. Don’t forget an expansion barrel not too far away from the pump to smooth out flow and pressure impulses. Check if your pump has an integrated filter in the intake, otherwise install an in-line-filter before.
Feed line:
The next step is the feed line. Tiis and -seemingly- all US-squaries have a metal tube leading from the left rear axle mount to the front end of the left frame rail below the battery. 73+ euro automatics have this, too. For tiis this is the feed line from the tank to the filter next to the radiator, for the carbed cars it’s the return line from the carburetor to the tank. The plastic line in the cabin is return for the tiis and feed for the carbureted. Check this one for usability anyway, it will carry some remaining pressure later. In case of doubt: renew. Do not install another plastic line parallel! Fuel pressure lines belong under the car.
Cars that don’t have the metal tube from factory can be equipped with this (tii-) version but do not trust 50-year old material. Buy this new, the risk of losing gas through a leaky tube isn’t worth saving some $. Plan a fine filter at the engine end of the feed line. I relocated mine underneath the battery because there’s not so much heat from the radiator.
Pickup:
The fuel pump sucks gas out of the fuel tank. Tiis have a separate pickup unit including return next to the sending unit for the gauge cluster. In these cases, the sending unit doesn’t have a pickup but just the electric junctions of the sender.
You may now find and install a tii fuel tank with pickup together with sieve and sender. This is a pretty easy and quick solution but wait for it until your tank is empty. If you want to stick to your just freshly refurbished tank you can modify it for the tii pickup:
You may go this route as an option:
Means: Create a custom pickup (don’t forget a sieve) and using the sending unit as return. Remember the different lenghts of the sending units. Let the diameters of pump intake/filter and custom pickup match. Order new gas-resistant rubber hoses of required sizes, clamps etc.
Some squarie tanks should have a welded-in junction some similar to the one shown above, painted black. This one is not longer than its visible part and does not catch the bottom, so: useless.
To get from the inside of the trunk to the underside of the car you will have to drill holes (in a non-tii). Here’s how it is done in a rear differential support from factory:
The smaller tube is for the wires. Sorry for not sandblasting.
So here’s your route: tank pickup, holes, fuel pump and feed line. Free order of appearance. These can be done without setting the car out of order for a longer time, it will remain driveable. If there are open junctions after installation: plug blind safe as long as not needed.
Now be prepared to install a wideband oxygen sensor. Narrow bands are useless. A location for it may be in the downpipe after the junction of the two lines. After welding in the bung (it’s 18x1,5 at least for Bosch sensors), plug blind. Think about where to run the wires.
Keep in mind that the oxygen sensor will need a controller. So buy a sensor with integrated controller (expensive), an ECU with integrated controller or an extra seperate device. These sometimes have a 3-step output (cold/middle/hot) for exhaust gas temperature for an LED, maybe in the center console.
Well, this is the easier part and you will need it anyway. Now: choosing the EFI. It’s no good to look for a plug-and-play solution what simply doesn’t exist.
A. Yes, there are these 318i L-jets. To swap the entire intake seems easy indeed but:
- the 318i gets air from below and not from the side or above. It’s an updraft. There’s no space for the air flow meter and an airbox except you relocate the battery out of the engine bay. Some people don’t like this, metoo. Many custom holders, brackets etc. will be needed.
- fabricating a throttle linkage will not be done quickly. You’ll have to combine levers and cable roll.
- The RPM signal comes from #1 on the coil/dizzy. I’m not really sure if this signal coming from a dizzy with points is suitable or not. Worst scenario here: replace the camshaft including anti-clockwise dizzy by those ones of the 318i.
- last not least: the E30 intake buddha is a question of taste, of course. But in my opinion the optics of the tii runners have never been topped.
B. This Bosch LH 2.2 for Volvos.
There are some people who have done this swap successfully by using the 318i intake also. This means same part, same issues plus several modifications to the harness and more.
I went with an intake combi of 320i and tii but the required mods are still more. (didn’t get it to run)
C. Aftermarket ECU and EFI systems
These systems have their own universe. They offer the opportunity to take some kind of all-grabbing influence on your engine’s performance. Some are fuel-only, some cover ignition also. By this it should be possible to get a 76 to pass smog. If switching to another camshaft or a 4-valve head the ECU can be adjusted to these mods. Well, there is the learning curve, and it’s long: But however... Maybe you have to pay for a tuning shop.
The prices vary a lot. Think carefully about your engine hardware and if the software will be familiar with it. On the other hand, you don’t need an ECU with full sequential for a 12-cylinder.
Relay board:
You will quite probably need this. A relay board is a device for many aftermarket ECUs. It carries a main relay, a pump relay (even tiis don’t have these) and several fuses. There are omni-fit boards in the market that use high-power transistors instead of relays. I don’t have experience with these but on the pictures they look pretty tiny. Check.
Do NOT run the coil via the main relay! You will not be able to switch off the engine. I chose two small 4-fuse boxes with the same torpedo-style fuses as are in the car for symmetry. Look for space in your engine bay and think about where to locate this board.
Now you can run a 1.5mm2 (do not undersize) wire to the pump colored green/white, that’s original. You could go from the relay board through the cabin under the rear seat through one of the blind plugs for the lower seat belt bolts- if there are no belts. Look for a solid ground spot and run a brown 1,5mm2 wire for the pump to it. The ground wire for the rear defrost should be near. At this stage the car will still be driveable.
Decide: cover the ignition or not? I recommend yes. There is the chance to gain so much better torque at lower RPM that you won’t miss it if experienced once. You may start tuning fuel-only and add the ignition later but don’t buy an ECU not covering the ignition feature.
For this, you will have to have a trigger wheel. I’ve learned that a 36-1 is quite easy to handle since each gap has 5°. Which custom wheel and which sensor (hall or VR) you choose is up to you. Note: your ECU must handle your choice. Here are measurements of the tii crank pulley hub (for easier app'ing a trigger wheel) :
Note that there is a mark on the pressed-on ring that does NOT show TDC!
Inserting a very important fact here. The pairings of TDC marks of carbed engines and tiis do not match! If you have a carbed engine with a tii pulley hub in TDC the marks on pulley and chain cover will not flush. The difference is about 11 degrees. You'll have to add new marks on your own.
Don't you think all parts are the same in dimensions. I created all my injection action on a spare engine block on the table what was much more comfortable than diving in the engine bay all the time. I also installed a spare flywheel and bell housing to find exact TDC on the tii pulley I wanted to install later in ther car. The marks didn't fit. I don't know if it is about the crankshaft, the chain cover, the bell housing or the flywheel but I decided to align this on the engine in the car and not on a spare.
Now let’s come to the injection style: throttle body injection (TBI) or port injection. The base of the phrase is: where exactly are the injectors located? I’ve been told that both styles could be run with an alpha/n-only ECU but ask yourself if you really want to do that. Most ECUs offer certain additional inputs and it would be a waste not to use them for better performance.
When choosing a TBI unit you should check: number of injectors, flow rate, impedance (resistance) and throttle size. What about: air temp sensor (IAT), fuel pressure regulator, throttle position sensor (TPS) and an idle air control valve (IACV or IAV)? Is it pulse width modulation (PWM) operated or is it a stepper motor? Note that the to-be-chosen ECU must be able to handle all components! My UMC for example can’t deal with a stepper. Where to put a MAP (manifold absolute pressure) junction? Some ECUs have a built-in sensor and are connected by a plastic tube, some have electric input and need a separate sensor adapted to the intake somehow, but do check before.
Compare the questionable TBI units for hardware and think about where to install missing sensors (IAT in the airbox, coolant liquid temp =CLT in a 318i/320i divider, where to put the IAV). Don’t choose a unit without TPS, it’s a mess to adapt these later. Look if a universal engine wire set is available, these seem to be pricey. Otherwise you’ll have to buy all single wires of your color choice or de-knot a 2nd hand harness- what I did. Look for all required connectors and plug housings. Will your stock airbox fit onto the top? These and more questions have to be answered before choosing an ECU.
Some may want to have port injection. I see three routes: 318i buddha intake, 4-throttle intake with injector holes from an aftermarket supplier or 320i injector bridge with custom intake.
The 318i buddha intake has already been addressed.
If going with 4-throttles check if a TPS is included. Other sensors won’t be included, so prove where to get and and how to locate them. What kind of airbox may match? How to connect an idle valve or can a throttle motor be adapted? Does the ECU accept such motors?
The euro 320i with K-jet was offered from 1975 to 1977. In the US seemingly longer. Its intake injector bridges can be set with more modern electric injectors. Well, adding the intake there won’t be much space below:
The black square feed line is hardly visible. It has to be modified and it is really very tight there. The mounting of a TPS to the TB is hard.
You may have a custom intake:
Decide if you want to fire batch, semi- or full sequential. Yeah: do google.
Concerning the ignition: you may stick to the standard dizzy, some may upgrade to coil-on-plugs (COP). There are also twin modules with the ECU running in waste spark mode but then the dizzy has to be replaced by a blind plug. Where and how to install COPs? However: no way without trigger wheel. Check resistance of plugs, wires and coils. Either the modules need integrated drivers or the ECU needs them.
Choosing the ECU is easier at this point. It has to provide all your required inputs and outputs. Raise a list. I chose a pretty small one since it might find a place in the engine bay to avoid drilling a hole for the harness:
The model car has a scale of 1:43.
Be now aware of the mapping. Some have talent to think inside this stuff. My advice is: read, read and read. When finished: continue reading. Talk to as many people as you can find who know about this and like to share their experiences with you. Or: pay the man. These are pricey men.
This is just a short overview. Now feel free to add your thoughts, ideas and corrections. I’ve done the beginning. You’re welcome!!
- 8
-
- 20
entries - 43
comments - 22324
views
Recent Entries
 Latest Entry
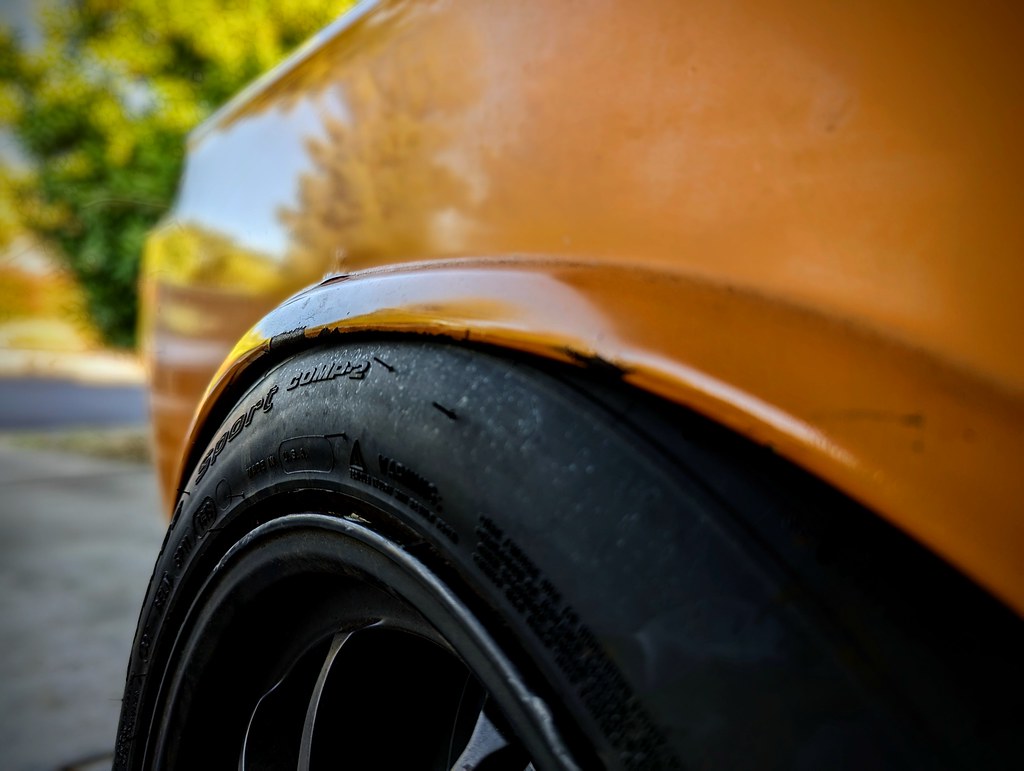
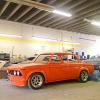
BMW M2 with S54 engine - As it sits
Haven't posted in a while. Thought I'd provide a pic of the car as it sits now. Drove this junk up from Texas through New Mexico, Oklahoma, Missouri (Misery), Illinois, Indiana, Ohio, to PA. Handles beautifully, not too harsh considering the suspension spring rate. The Toyo HP's performed flawlessly when I hit a snow storm on the Penna Turnpike. You may notice I lost a wiper blade and arm, also on the turnpike. If anyone has a wiper arm with the airfoil please let me know. Waiting till spring to get the seats and door cards reupholstered, but otherwise I am super happy with the car. The thing is stupid fast.
- 20
-
 Latest Entry
First Impressions
First trip out to the car. It's a big project but I'm really excited to take my time and do things right! (Pics inside)
- Read more...
-
- 0 comments
-
- 4
entries - 9
comments - 3714
views
Recent Entries
 Latest Entry
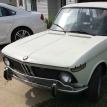
Body work by SCR
Matt and the guys did a incredible job on the body work of my 02. He has an eye for details and he has the metal bending shaping, cutting and fabricating tools to accomplish the job. Many hours were spent hanging the doors and aligning the hood and rear deck lid. After many hours of work the result is flawless body gaps. The defining body accents, the ridge on the roof and on the sides, we’re the result of hours of sanding and correcting.
Only the deck lid was replaced with a NOS part. All the rest of the sheet metal is original.
- 4
-
- 29
entries - 59
comments - 24686
views
Recent Entries
 Latest Entry
What's the Point?? (what had happened was...)
After getting the exhaust squared away I took to figuring out why the headlights didn't work. Had to again sponge until it became apparent the turn signal column lever was bad.
Drove the car thru summer and into the fall while adding cosmetic items and learning what the Guibo is. Wish I had the photos but you know the story. Thumping in the trans tunnel when shifting (only subtly at first) lead to multiple crawls under the car until through researching I decided to order one and replace it.
Since I liked the look of the euro turn signals and found a pair I replaced them and also found some bottle cap wheels and a Momo steering wheel.
Winter came and the suspension became something I thought I could get sorted so I began gathering the parts to refurbish. Punching out old tired bushings was not easily accomplished with the subframe on the car. I learned the hard way it needed to come off so...
One thing led to another while getting the front end together. Looking up at the oil pan and oil covered steering box had me pouring thru threads using my friend the search function and being subtly hypnotized by all the build threads and Articles on modifications and upgrades.They all led to an evolution that started with front bushing replacement. While looking up at the subframe I notice the oily steering box so...
and the pedal box grunge...
and the oily oil pan...
etc...
well, you can see where this is going. Needless to say project scope creep took hold and fast forward to the most recent change when I decided to go the full Monty tear down for body repairs and paint.
I really liked the paint (original) but due to the PO weak attempts at matching the color at front quarters and a rear end in need of straightening chose to repaint. Here are some of the planned mods after the body work and paint include: big brakes both ends, shortie bumpers, Hella 550's, dual Dellorto 40's, Stahl header, stainless exhaust, Motorsport 300 degree cam with IE head bits, high compression 10.5:1 pistons, 5 speed G245, LSD, urethane bushings, HD struts and shocks, Alpina wheels, new carpet set (ESTY order coming later), 1 piece dash, new rubber window gaskets, new headliner (thanks Steve), deleted side markers and lower trim, under seat trunk mounted battery, low profile under seat subwoofer, kick panel and hidden package deck speakers (from an faq thread) and other stereo bits.
And on it goes...
- 29
-
- 19
entries - 79
comments - 8348
views
Recent Entries
 Latest Entry
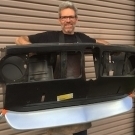
initial review: "MVP" aftermarket nose panel
made a little video a while back after unboxing the MVP early model nose panel.
- Read more...
-
- 0 comments
- 19
-
- 0
entries - 0
comments - 755
views
No blog entries yet
- 0
-
- 0
entries - 0
comments - 4298
views
No blog entries yet
- 0
-
- 20
entries - 7
comments - 4604
views
Recent Entries
 Latest Entry
Minor update
I’ve managed to fit a a new outer wheel tub, a new outer rocker panel, and a harvested trunk divider. I also have the quarter panel from the ‘69 for this car once it’s time. Rebuilt and powered coat trailing arms and long neck subframe were installed under the car to make it a roller again.
I also removed the engine/trans so I could get a better idea of how bent the front of the car is. It didnt look good from what I can recall.
I won’t likely touch this one ‘til the ‘73 is a runner driver again. That might take a while. Oh well. It’ll be there when the time is right.
Some day...
- Read more...
-
- 0 comments
- 20
-
- 29
entries - 52
comments - 5621
views
Recent Entries
 Latest Entry
Droppppppppped.
M10 is out!! Thank you all for the list of data I’ve read to make this easy. ?
- 29
-
- 15
entries - 69
comments - 4995
views
Recent Entries
 Latest Entry
Paint
Dropped the car off at the bodyshop to get the paint finished. They'll be blending the paint on the doors and roof. Can't wait to have it fixed.
- Read more...
-
- 0 comments
- 15


.jpg.493090b27f1b354524c292905e3f2703.jpg)


.jpg)
.jpg)
.jpg)


 . So, I ended up having to take apart my center console. It turns out I mislabelled 2 wires, the ground and the load (wire which feeds the lights). So flicking the switch would join the negative to the positive :s. Wasn't cool. I thought I was all finished and then I had to find an issue. luckily it wasn't a huge thing and I was able to sort it out within 30-45mins... without damaging my delicate custom console.